How to keep a healthy budget by styling a room with key pieces overtime., plus a checklist!
If you missed it last month, I kicked off the series for styling a room overtime. (Check out Living Room Tips Here). With summer approaching, it can be so tempting to go out and get the latest and greatest items (and for a few items you totally should - you deserve it), but it may help your overall budget to do just a little planning. Don't worry we have a guide below to help.
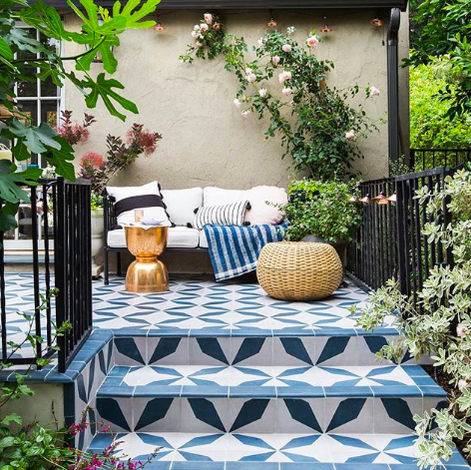
What I have found from my years of project management is that you generally have 3 key items that come together to make the perfect project. Resources (including mula), time, and quality. The three are generally at odds with each other and thanks to so many home renovations we see on social media and tv, we generally are looking for all three to be quick, amazing, and affordable. In this series, I help guide you to making only a few trade-offs when it comes to time so that you can maximize your budget for the most high quality, items of your dreams. So without further ado here are some helpful tips for styling your outdoor space or patio with time. Best Time of Year to Buy:
FURNITURE
SPACE HEATERS
PILLOWS, POTS AND ACCENTS
GARDENING SUPPLIES
GRILL & BBQ SUPPLIES
Get the best Outdoor Decor Style with Time Checklist to help plan all the pieces for your Living Room and best time of year to buy to make the most of your budget.
Hope the guide helps you guys, and don't forget, all good things take time!
xoxo,
Jessica
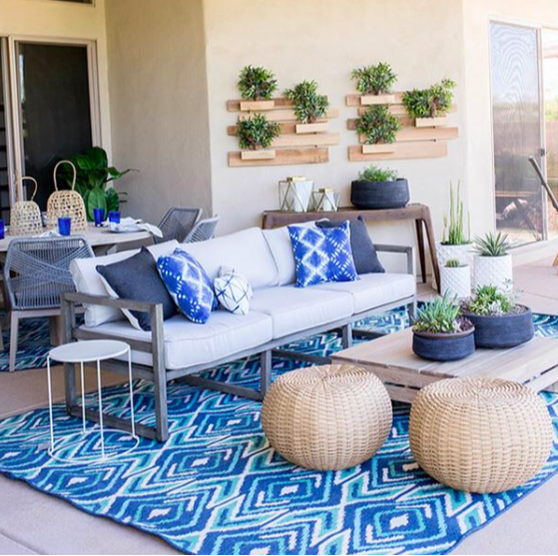
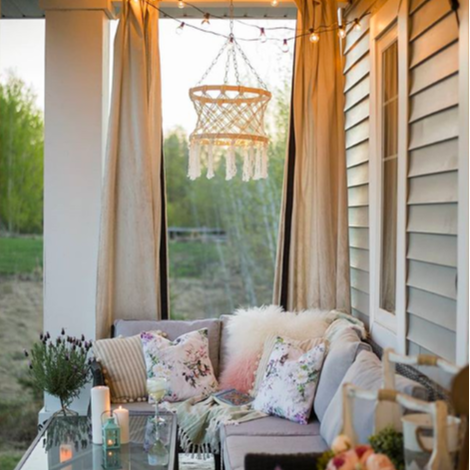
Our Favorites: Outdoor Decor Inspo
0 Comments
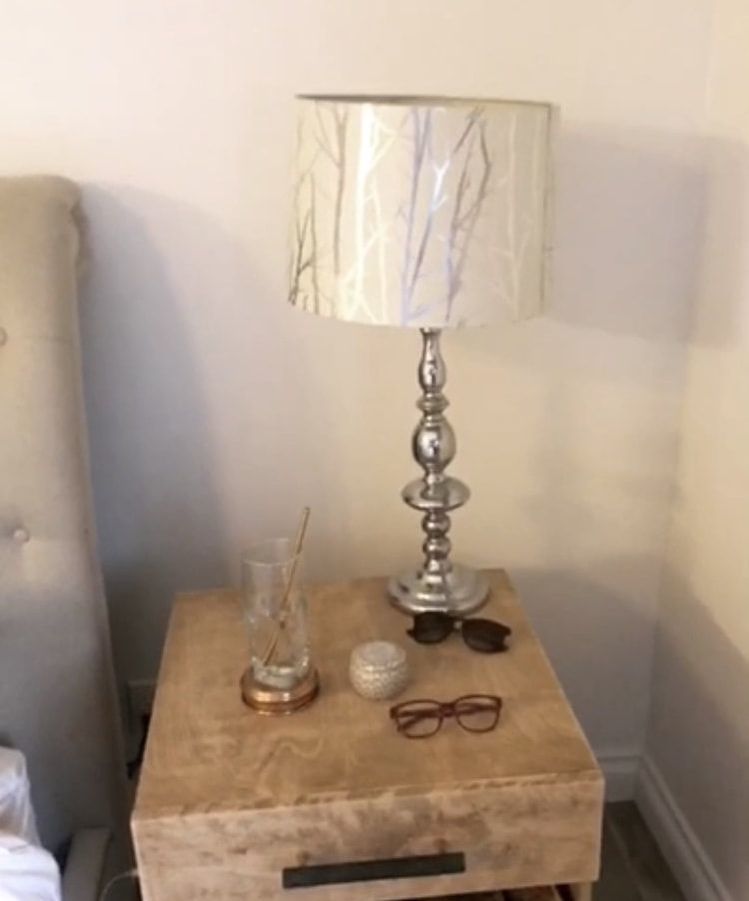
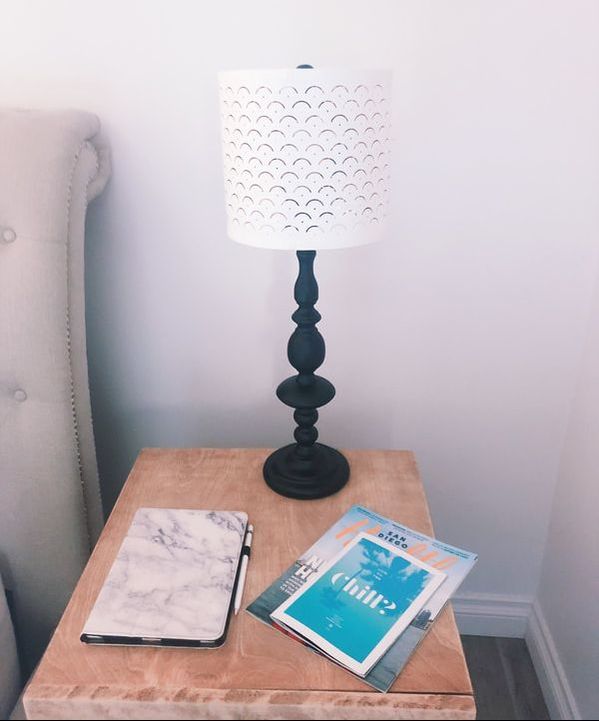
6/12/2018 0 Comments DIY Table Lamp UpgradeThis post contains affiliate links. See affiliate disclaimer here.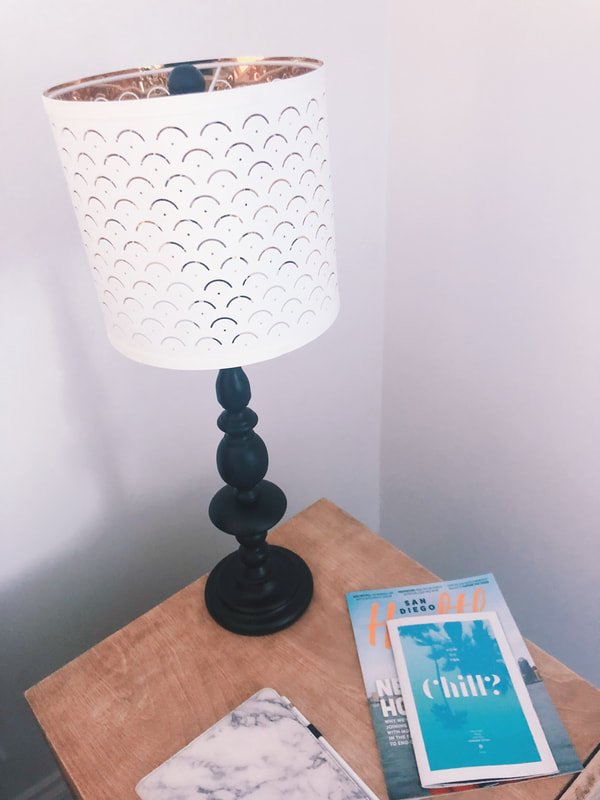 
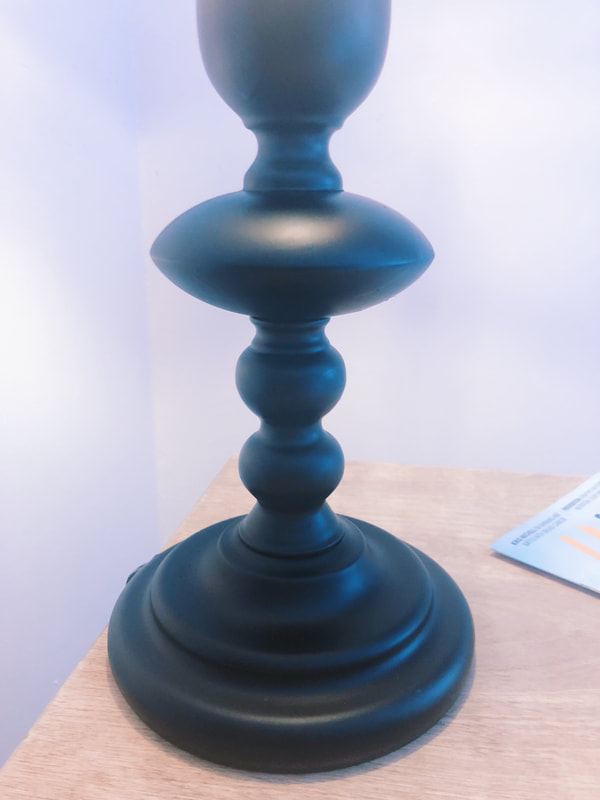 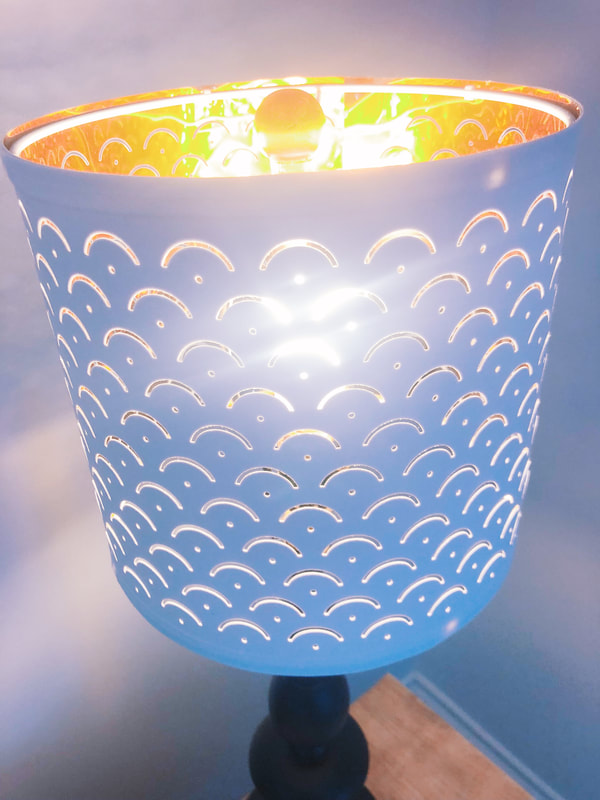  For those of you who have been following along my master bedroom upgrade, you know that I've been looking for creative ways to refresh the space (see the DIY night stands here). Just like with the night stands, I had been looking for a while to find some lamps that combined the industrial and airy modern look to go with the rest of the room. Sadly, once again I was coming up either empty or looking to spend $350 per lamp. The pair that I fell in love with was on sale over Easter weekend and I was ready to go on a big purchase when my dad talked some sense into me and said, "you DIY tons of things anyways, why not just DIY to upgrade the lamps you already have". I started brainstorming immediately that if I found the perfect shade, I could repaint the stand and add a contraption so that the switch was much easier to use. That's what led to this project and I have to say it was super quick and easy to do and cost less than $50. See the step by step below and check out the video tutorial here. Supplies
Stand
Shade and Electrical
If you have any lamps needing a refresh, send a picture to [email protected] and I'll help source the perfect upgrades. Have a great Tuesday! xoxo,Jessica
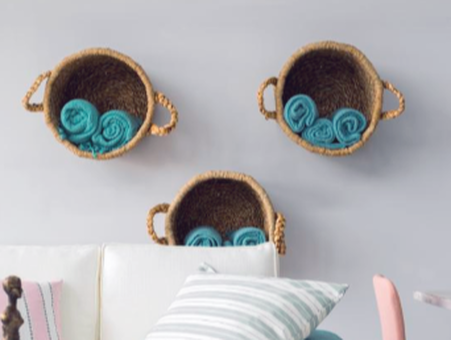
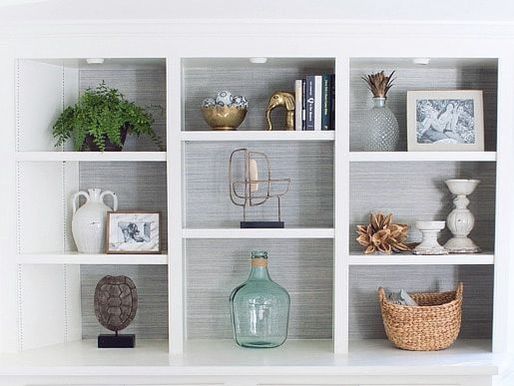
5/22/2018 0 Comments Top 5 Ways to Use BasketsWhen and where to use baskets in your home decorIf you have been following me on instagram, it is probably pretty apparent that I LOVE baskets. Woven grass baskets especially. Part of it, is because it reminds me of South Africa. I remember when I was younger, going to the South African markets and smelling woven grass for placements, coasters, nick nacks and any other creative use you can think of. Now when I put a fresh basket in my house, I get that smell and the memories of home. Another reason I love them, is because they are so darn cute and functional! I love that they can make a messy pile of blankets look effortlessly organized. Or, provide a soft organic touch to an otherwise hard materials space. Here are a few of my favorite uses for baskets and some of the best baskets I've found out there. 1. Entry Table Catch-all 2. Shelf Storage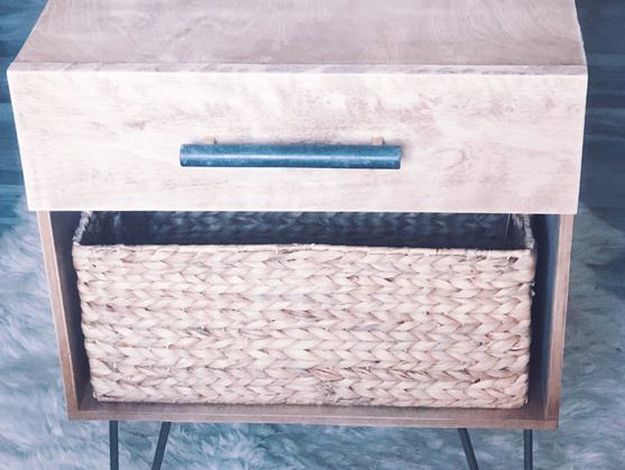 Beyond The Clock - DIY Nightstand Baskets - Home Goods 3. Towel or Throw Rack4. Planter Holder 5. Laundry Basket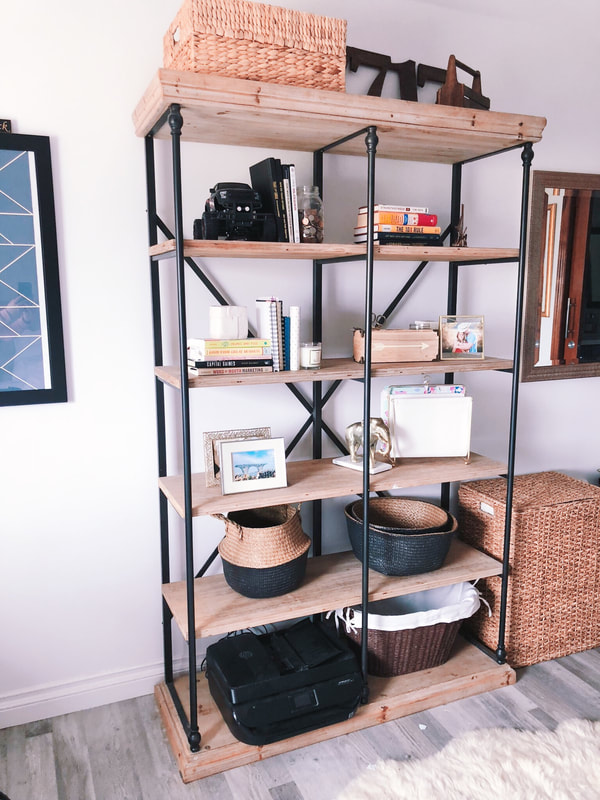 Beyond The Clock - Bookshelf Styling Black and Natural Seagrass Baskets - Amazon Laundry Basket - Macys Laundry Hamper - Target Hope you got some good inspiration and can't wait to see how you use baskets in your home! xoxo,Jessica
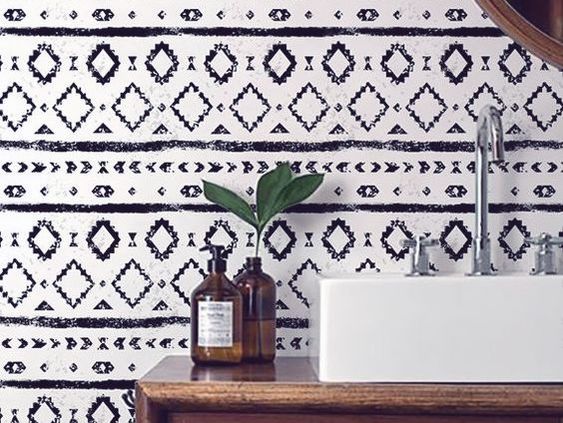
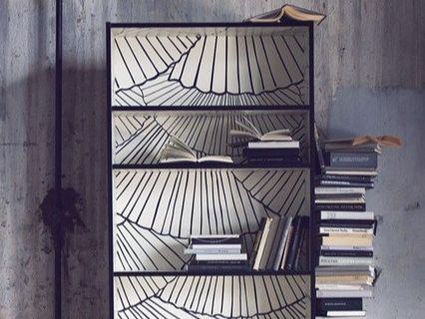
5/17/2018 0 Comments Wallpaper Hacks For a RentalBest ways to use wallpaper in an apartmentIt's no secret that wallpaper is one of the trends everyone is loving right now. It's funny how trends come back around. The good news, is that there are so many options for wallpaper now, it doesn't have to look like the stuff you were ripping off from the 50's. Still, if you live in an apartment or rental, you may not think of wallpaper as an option to dress up your space. I recently added some framed wallpaper to our bedroom and it was such an easy and relatively inexpensive way to add a different type of wall art. Brad really wanted a white board for next to his desk, but it didn't really work with the overall look I was going for in the room. So instead, we got some wallpaper that tied in with the bedding, a great frame from Michael's and now he uses the glass as the whiteboard. It looks great and is perfect for his brainstorming. So today, I thought I'd share with you some of my favorite ways to use wallpaper without the commitment. 1. Removable Wallpaper
2. Framed Wallpaper3. Tabletop Wallpaper4. Bookshelf Back WallpaperHope you are feeling inspired for a little wallpaper project. As always, I'd love to hear how you use wallpaper and what inspiration comes to life in your home! Feel free to share in the comments below or tag me on instagram! xoxo,Jessica
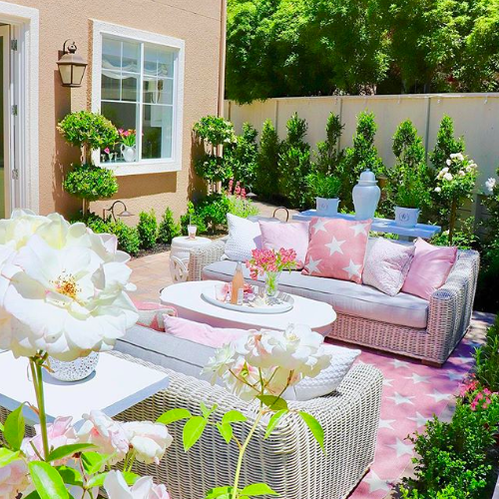
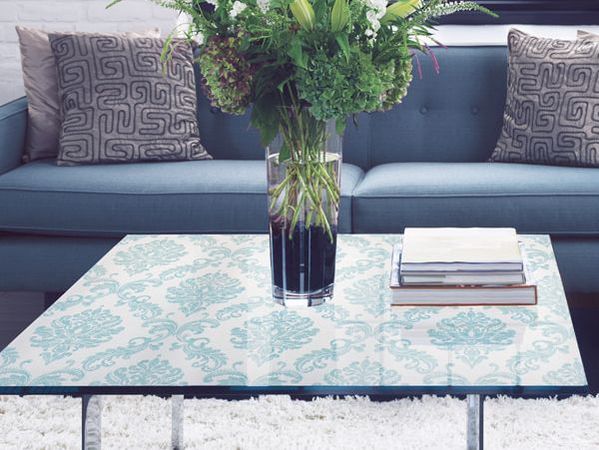
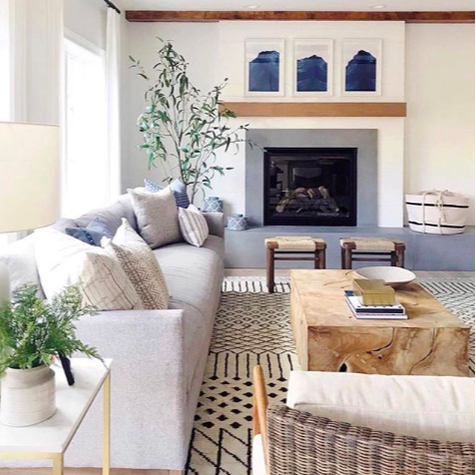
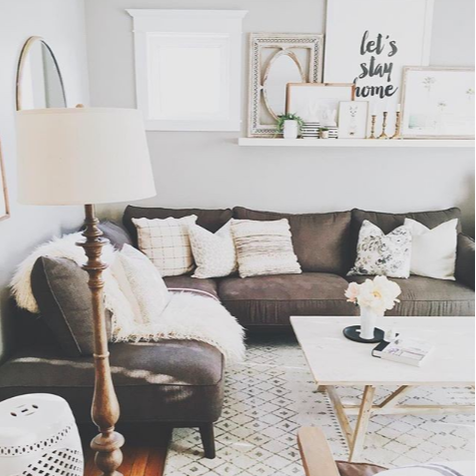
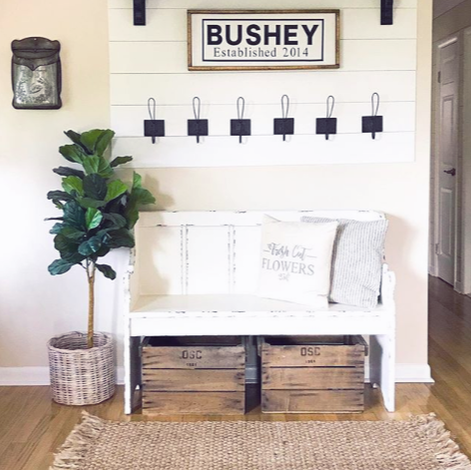
5/8/2018 1 Comment Style with Time: Living RoomHow to keep a healthy budget by styling a room with key pieces overtime.
Whether you are moving into a new place or getting that 'blah" feeling from an outdated room in your home, redecorating can quickly start to feel a bit overwhelming. You may have pages of pinterest boards saved with a mixture of styles and details you love and when you go to find them, you quickly stop and say wait how much is this going to cost?
From years of watching home reno shows like Fixer Upper or Flip or Flop!, we are quite comfortable with the fact that a gorgeous transformation takes just a few hours. In reality, the best way to really make your room come to life and depict your dreams, is to style it over time. This helps on both a cash flow perspective as well as making the those transformation feels last longer. With each little addition you make, you can experience the euphoria of making your house feel like the home you envision. So how do you style with time? This month, we are digging into the living room and how you can style a living room over time. If you are building from scratch, you can always start out with a few really cheap items from estate sales or Ikea just to get started, and then follow the guide below to quickly upgrade in the most efficient way getting the greatest impact for the lowest cost. Best Time of Year to Buy:
FURNITURE
TELEVISIONS
HOME DECOR ACCENTS
PLANTS
FLOORING & CARPETING
Get the best Living Room Style with Time Guide to help plan all the pieces for your Living Room and best time of year to buy to make the most of your budget.
Hope the guide helps you guys, and remember, all good things take time. (And if you ever need to bounce ideas off of someone, feel free to reach out here!)
xoxo,
Jessica
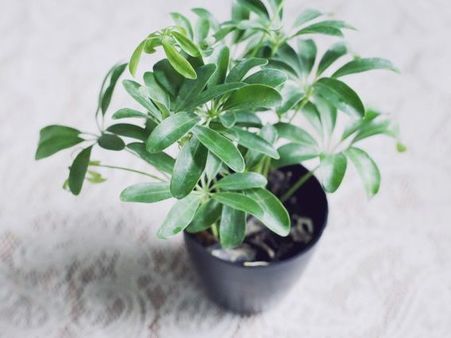
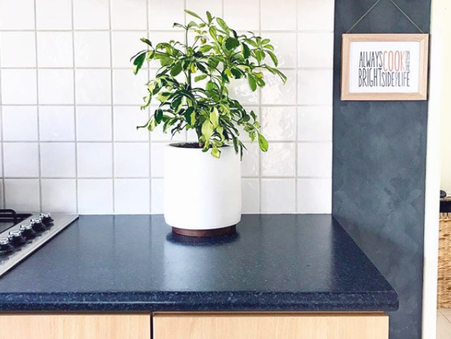
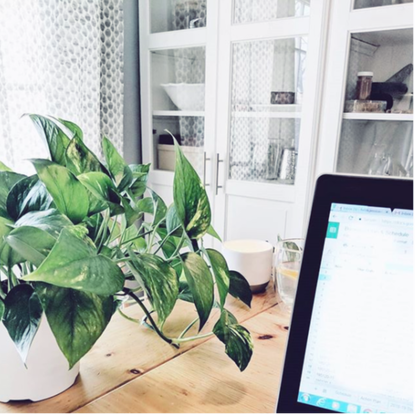
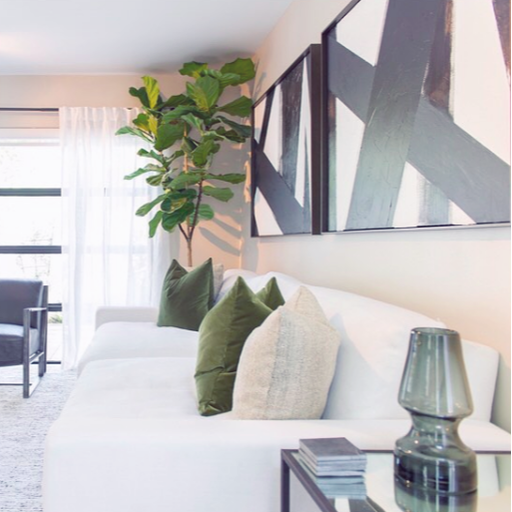
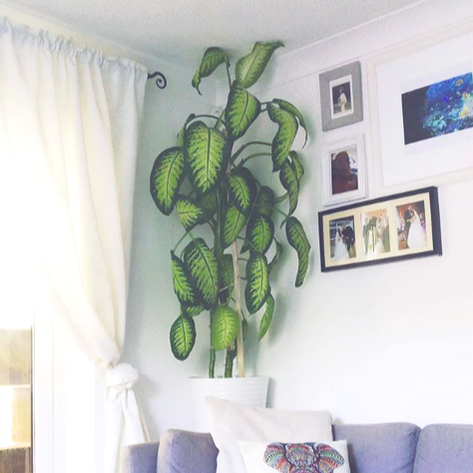
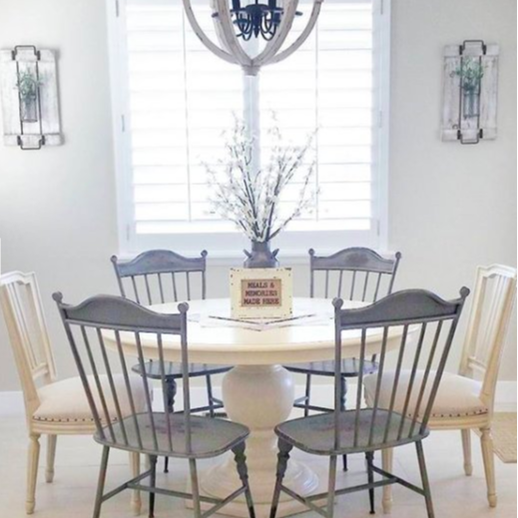
Our Favorites: Living Room InspoAdding greenery to a space can completely change the feel of the room. It gives it an organic feature and livens the space completely. However, if you are anything like me, keeping a plant alive outside where mother nature does half the work is hard enough, indoor plants barely stand a chance with me novice green thumb. So to help all of us out, I found the top 5 plants that survive well indoors, are easy to maintain yet pack a punch with their presence and enhance any space. 1. Dwarf Umbrella TreeI may be drawn to this one given that I'm from Seattle and the name is a cute nostalgic nod to my upbringing. Also known as Hawaiian schefflera, this fast-growing guy is easy to contain in size by clipping the top leaves, which also makes it a great contender for a lively indoor bonsai.
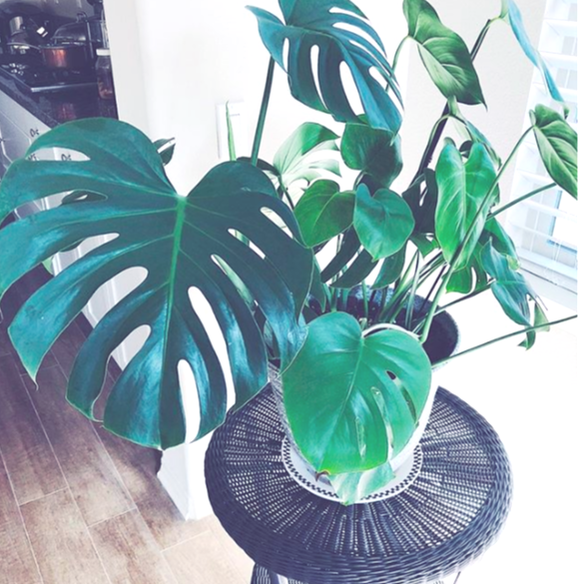
2. PhilodendronMy favorite part about these guys is the multi-colored, heart-shaped leaves. This is another fast-growing houseplant that would look great draping gently over the top of a bookshelf or try the split-leaf variety for some tropical flair.
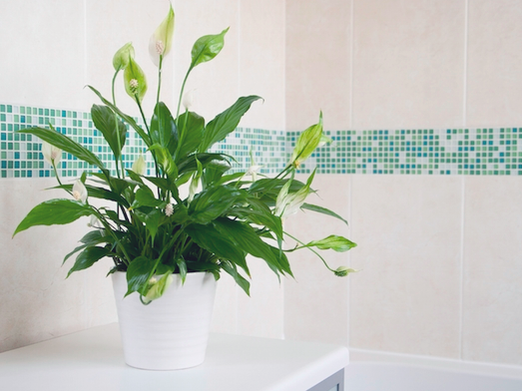
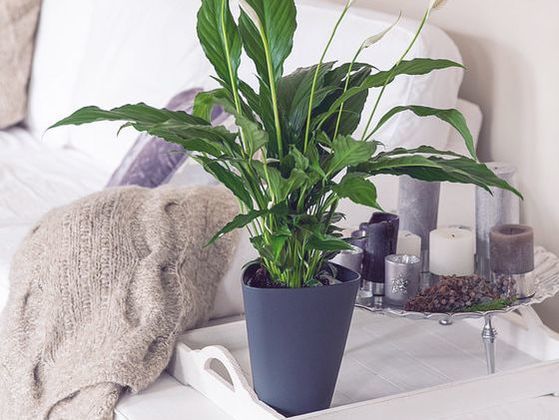
3. Peace LilyThese full but delicate plants would make the perfect compliment to an office or bathroom. They are one of the most low maintenance plants out there and are great for filling space with the added interest of the flower peaking out.
4. Fiddle-Leaf FigThe Fiddle-leaf fig is full, leafy and tall. It's great in the corner of a room to add height and dimension along with that organic touch. Think of it for a living room, bedroom or entryway.
5. Dumb CanesThe bright variegated leaves of Dumb Canes bring a certain happiness to a room. They prefer low-light areas so are perfect for growing indoors. I love these for a nursery or kitchen.
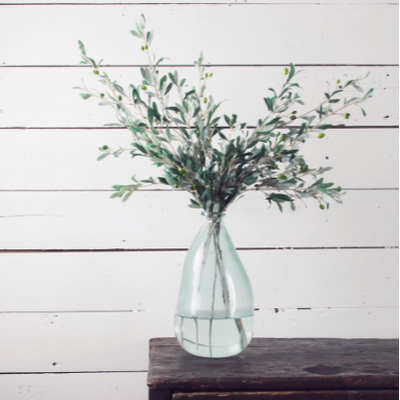
Bonus: Branches
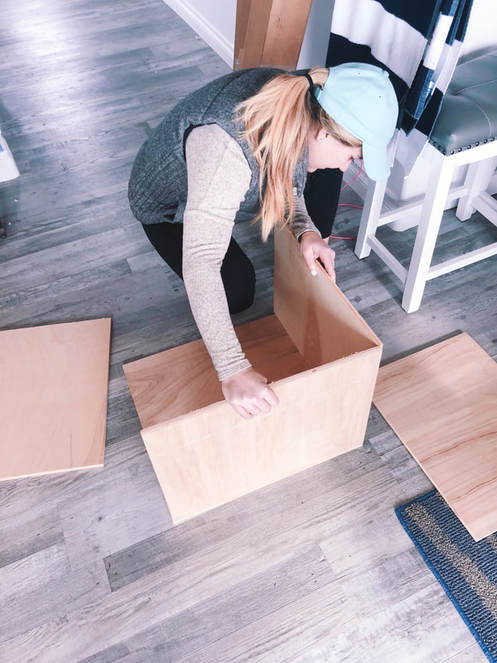
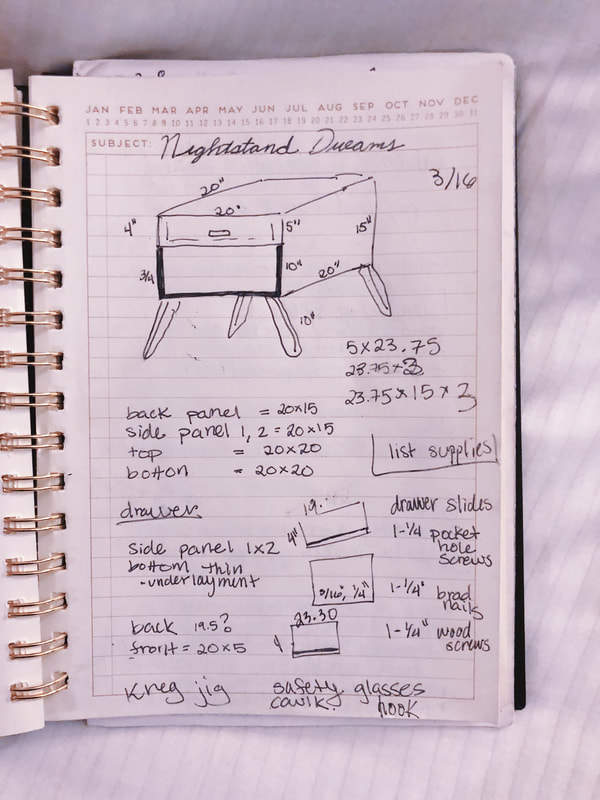
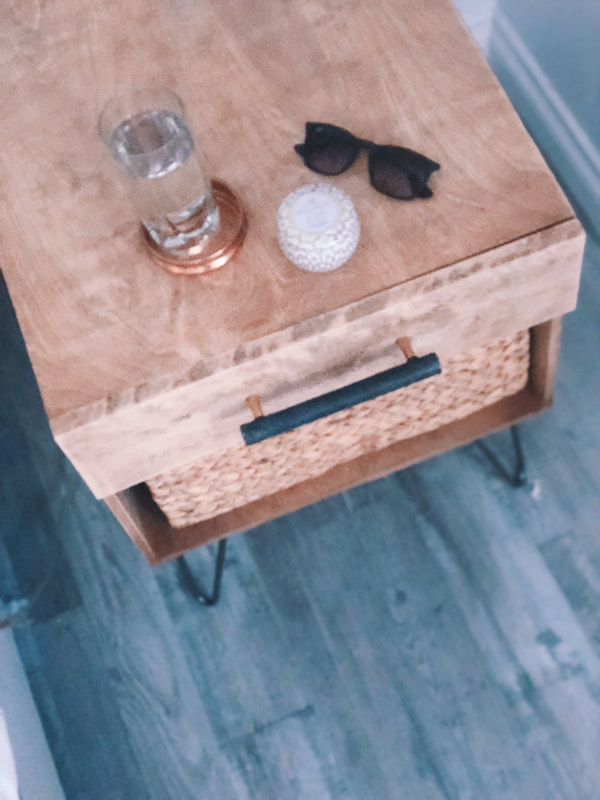
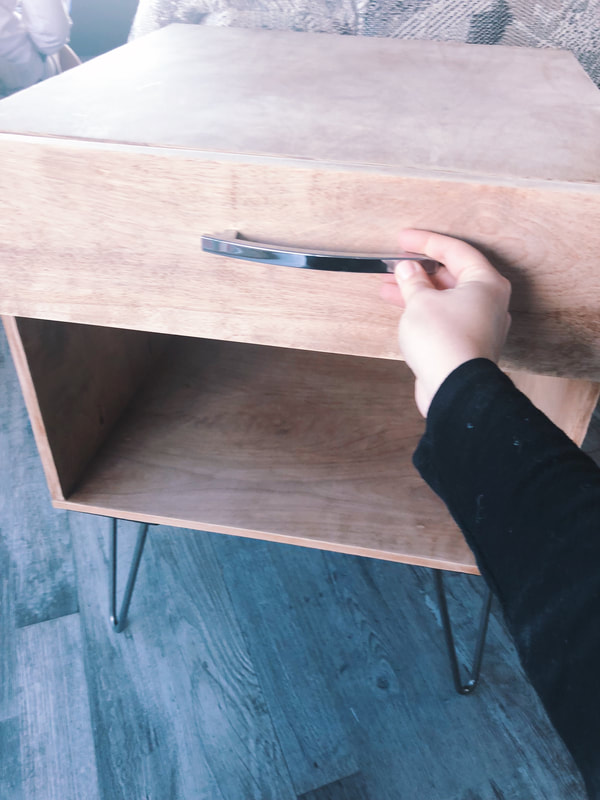
4/26/2018 4 Comments Mid-Century Modern DIY Nightstand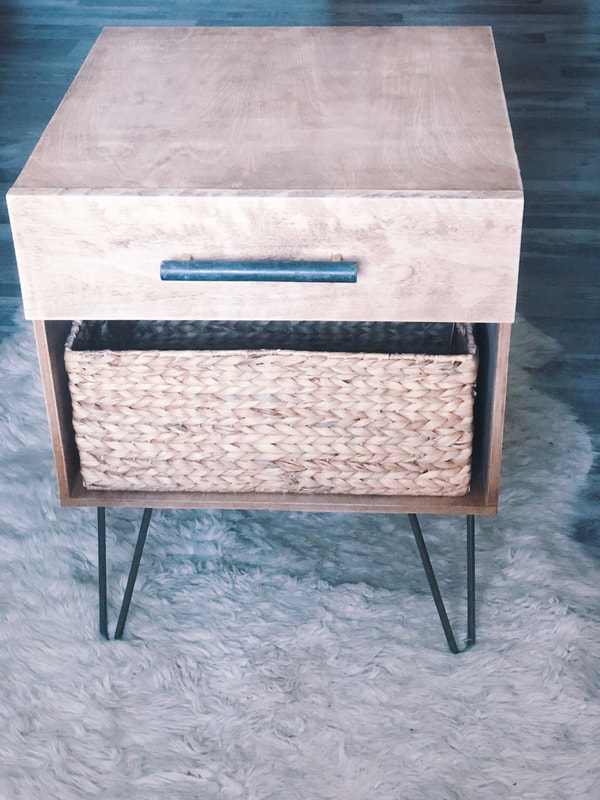
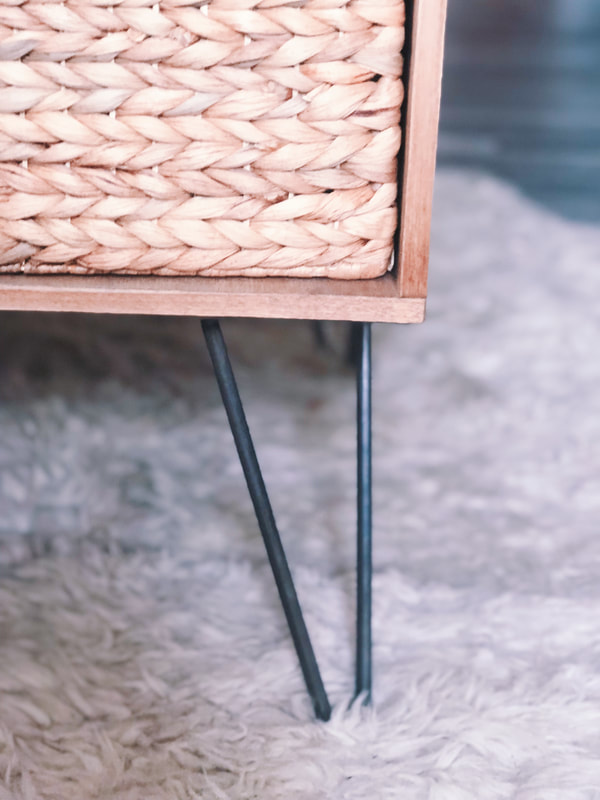
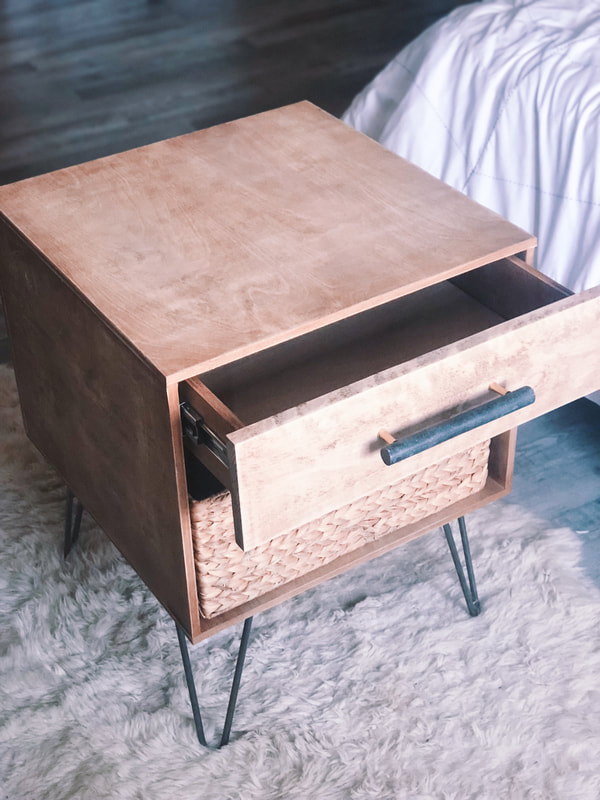
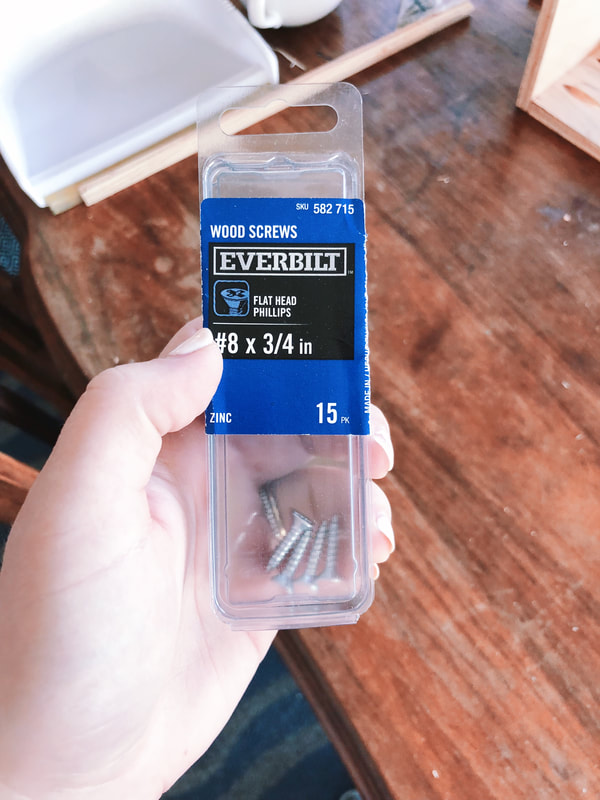
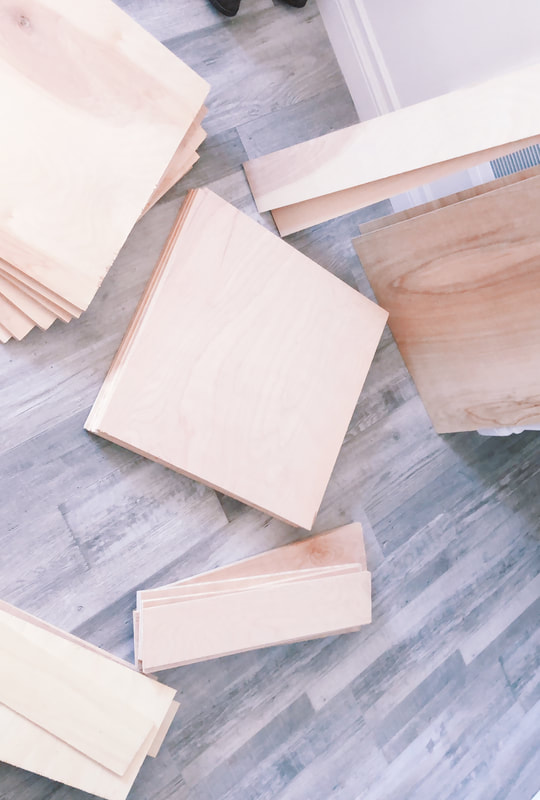
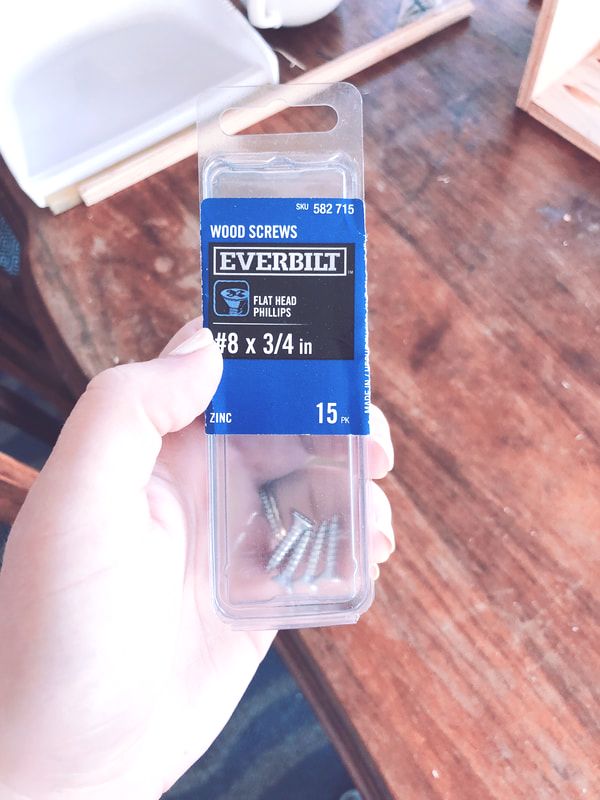
 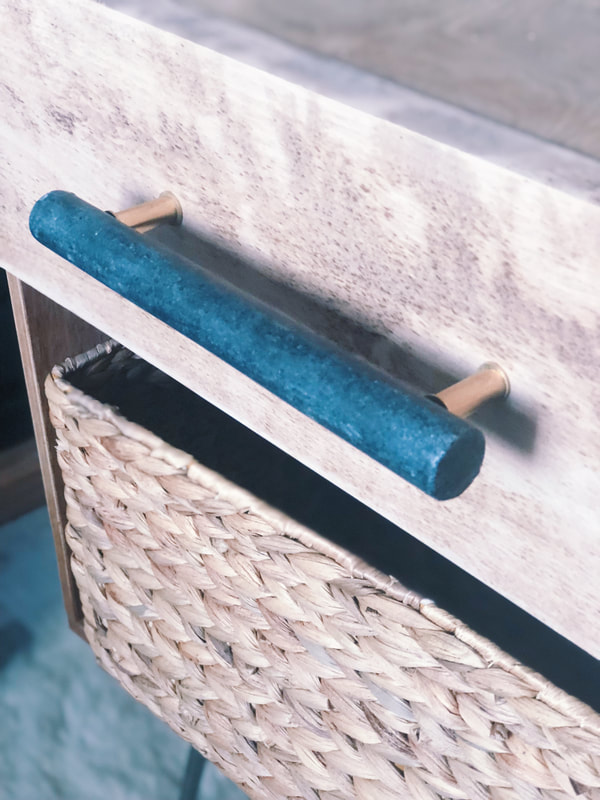  DIY Bedside TablesIf you have been following along on my instagram stories, you know that I've been working on some nightstands for our bedroom. I'm excited to share with you the complete how to guide for creating one of your own with the good, the bad and they why the heck I did this in the first place. I've been looking for nightstands for about 6 months. I know that sounds crazy, like why can't I make a freaking decision, but the battle between what I wanted and what I could afford were REAL. At one point, I had found what I thought were the perfect ones on wayfair.com but they were on backorder with no date of when they would be back in stock and I was wanting to transform our $6 straight out of college nightstands STAT! So one day, I started sketching in my notebook what I thought I would want. It took a few sketches and the design evolved but I eventually ended up with a design, the optimal dimensions for our new bed frame (plus all the stuff I like to keep on my nightstand) and voila! I then decided to google supplies on Home Depot and Amazon and I priced out a rough order of magnitude of what it would cost to build (including purchasing tools that I didn't have at home) and I was super excited to find out that I could build 2 nightstands just the way I wanted them for the price of 1 that I'd picked out on wayfair. Score! And so, the DIYing began. Supplies
Tools
Hardware

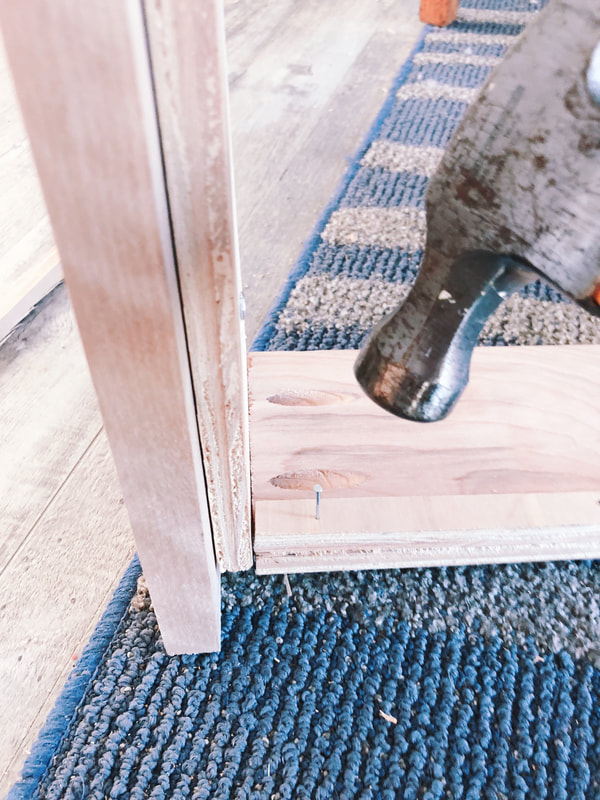
Start the BuildThe Main Compartment
  The Drawer
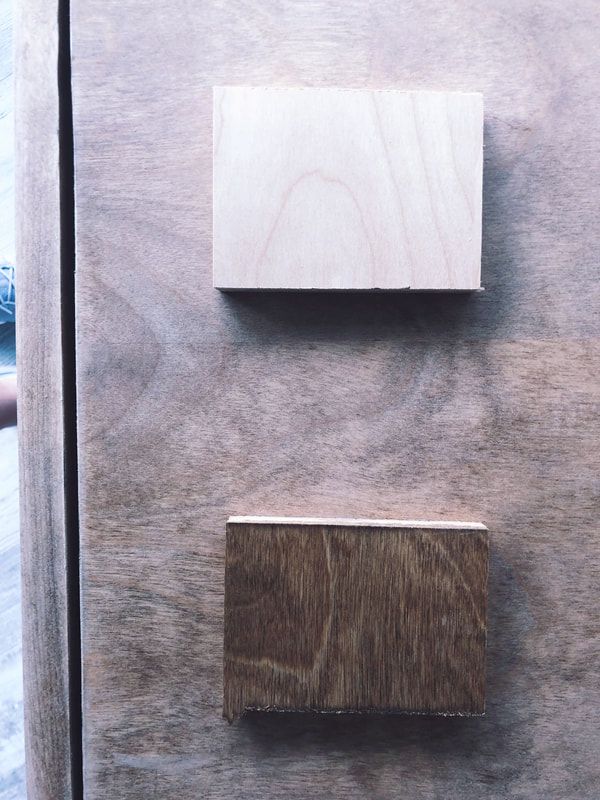
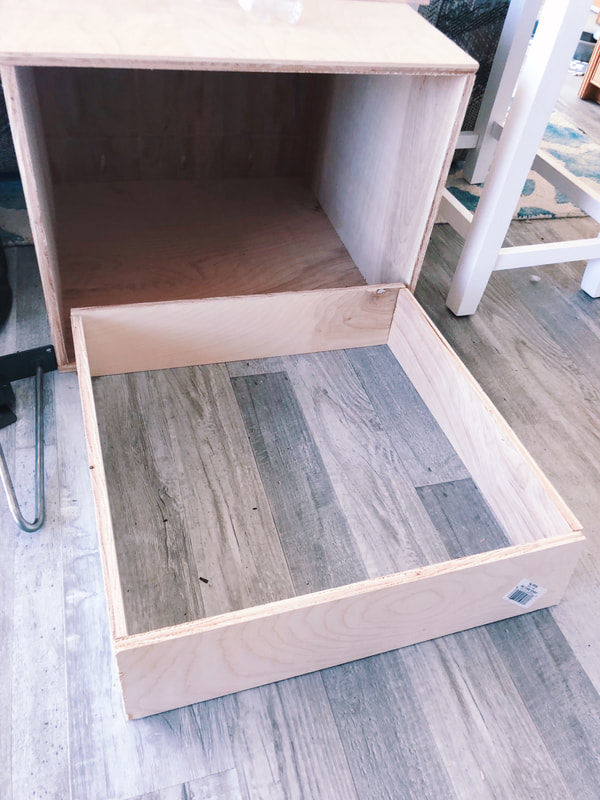 The Finish
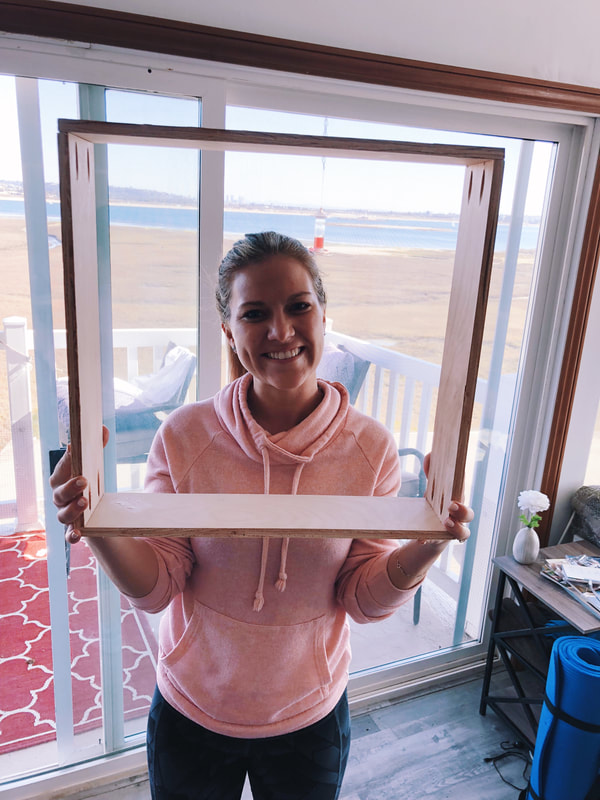
This project wasn't easy since it was my first time doing anything like this. I learned A LOT along the way but I am so excited with how it turned out. My rustic mid-century modern look is perfect next to the new bed frame. Stay tuned for the complete bedroom remodel, I'm excited to share it with you soon. Just a few more finishing touches left. Thanks so much for being a part of this fun journey. xoxo, |


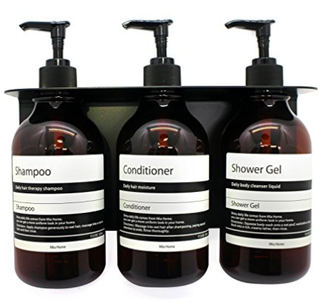
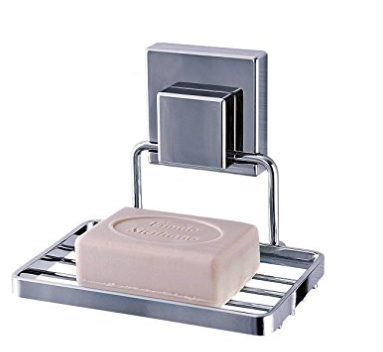
 Kerastase (I love using this 2-3 times a week to revitalize my hair and keep the dead ends away) 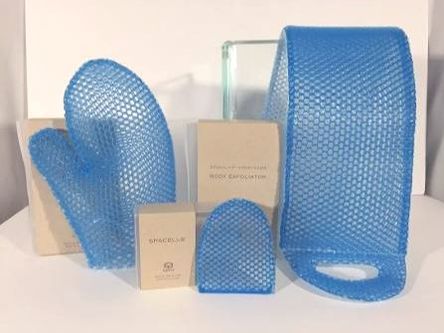 Supracor Body Scrubbers (These are great for acne, there are two sides for finer and more coarse exfoliation) | 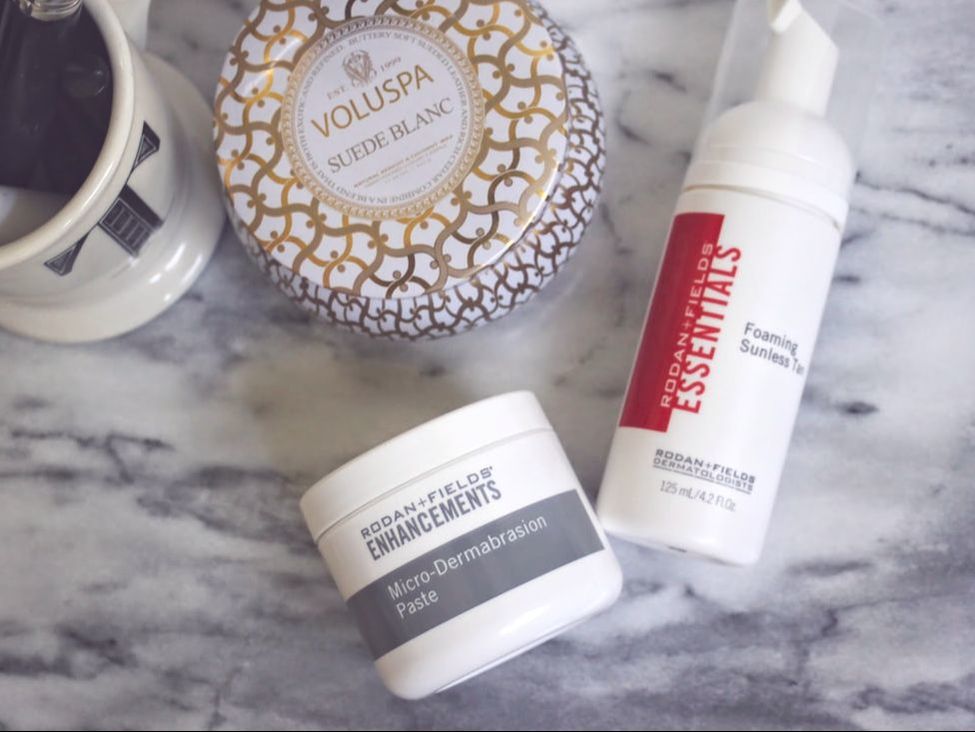 Rodan + Fields (The master exfoliator, makes your skin feel like butter after a single use)  Gillette Venus Razors (I have these in my Amazon subscription cart so that I always have fresh razors on the way) |
4. Favorite Products
I not only keep my favorite products in the shower, but also a back-up of any of them under the sink so that I never run out. Above are some I can't live without..
I not only keep my favorite products in the shower, but also a back-up of any of them under the sink so that I never run out. Above are some I can't live without..
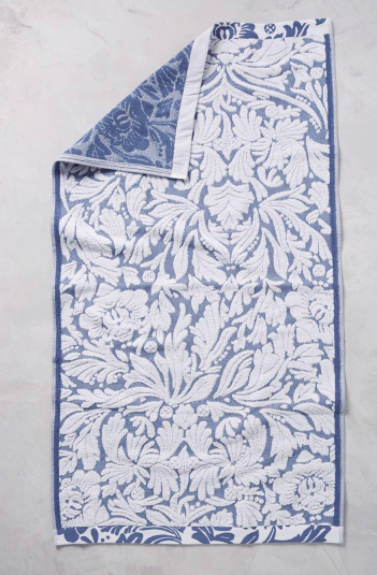 | 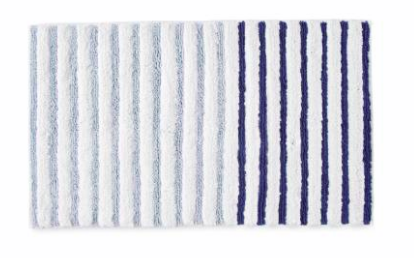 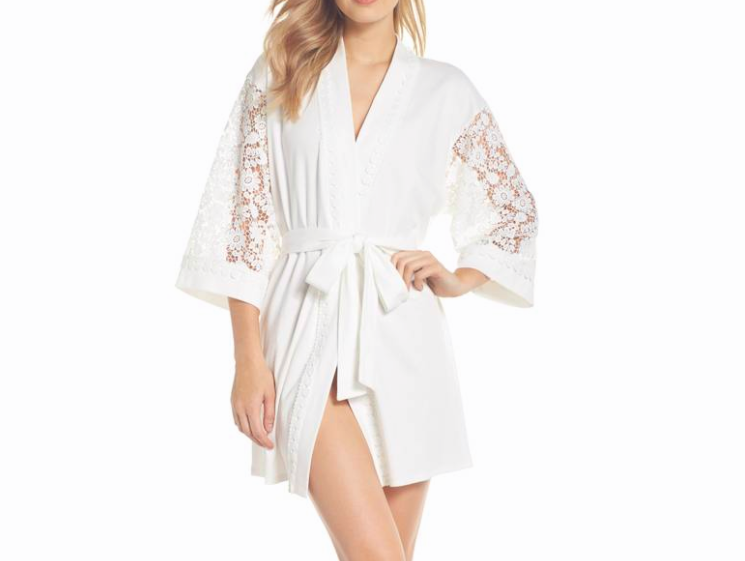 |
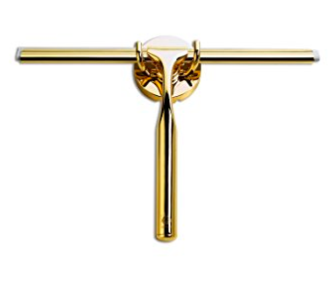
Nordstrom
These are all on my wish list love the details in the towel and robe and the bath rug looks so clean and modern.
These are all on my wish list love the details in the towel and robe and the bath rug looks so clean and modern.
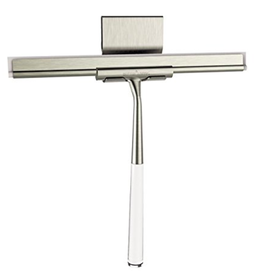
5. Post Shower Necessities
Stepping out of the shower and being covered in plush from your head to your toes is a must. The perfect towel seals in the experience. It's like putting a bow on a present... and you'll need to know the perfect bow for your robe as you relish the final moments of your shower spa escape at home.
Stepping out of the shower and being covered in plush from your head to your toes is a must. The perfect towel seals in the experience. It's like putting a bow on a present... and you'll need to know the perfect bow for your robe as you relish the final moments of your shower spa escape at home.
Hope you got some good ideas to make your own personal spa getaway at home. It's hard to always make time for ourselves, but making the everyday tasks just a little bit better can bring a whole lot more brightness to your day. It's a domino effect, with each thing that brings you a smile, more are sure to follow.
xoxo,
Jessica
4/16/2018 0 Comments
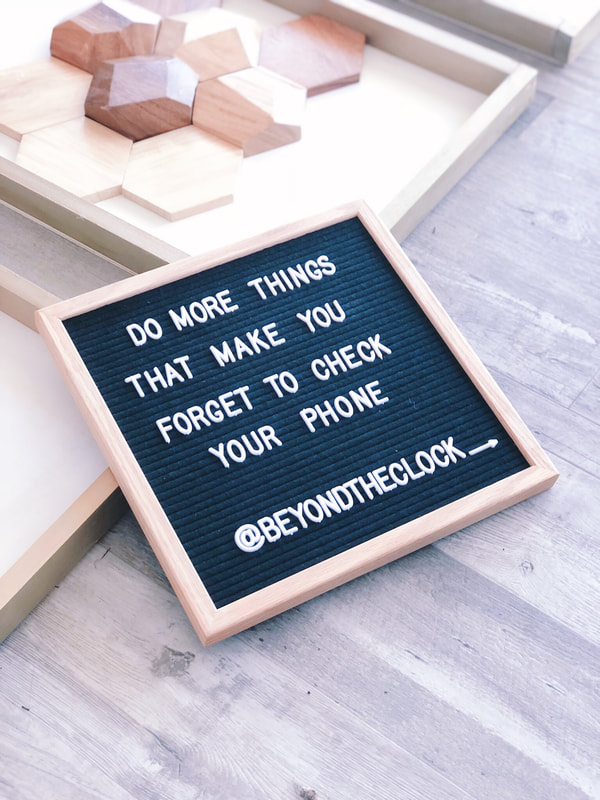
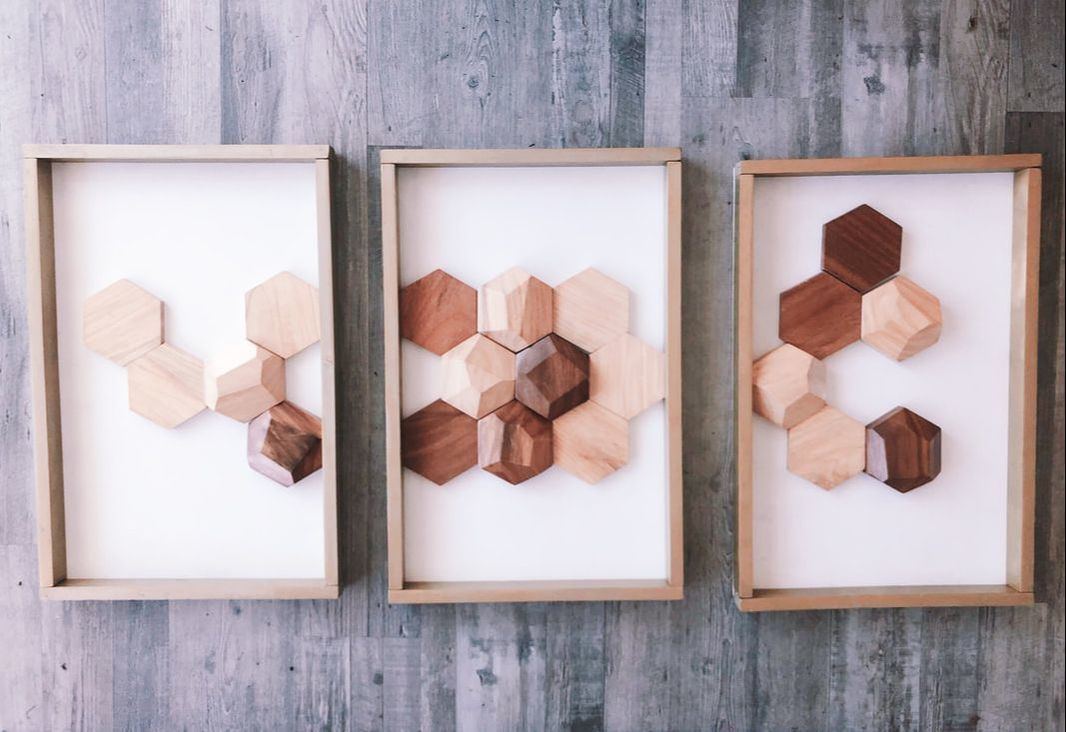
DIY Shadow Box and Trip Tych
How to make wall art that stands out in any room.
 |  |
 |  |
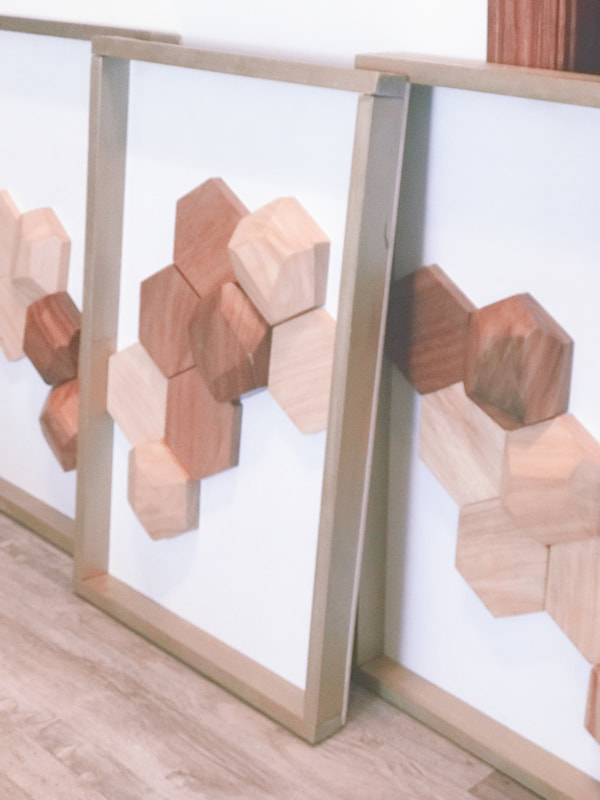
I've been looking for the perfect piece of art to go above my headboard. Something that is unique, gives flow to the room and has a sense of timelessness. After coming across these hexagon tiles for another project, I knew that I wanted to incorporate them with the subtle geometric patterned theme I had started in my bedroom.
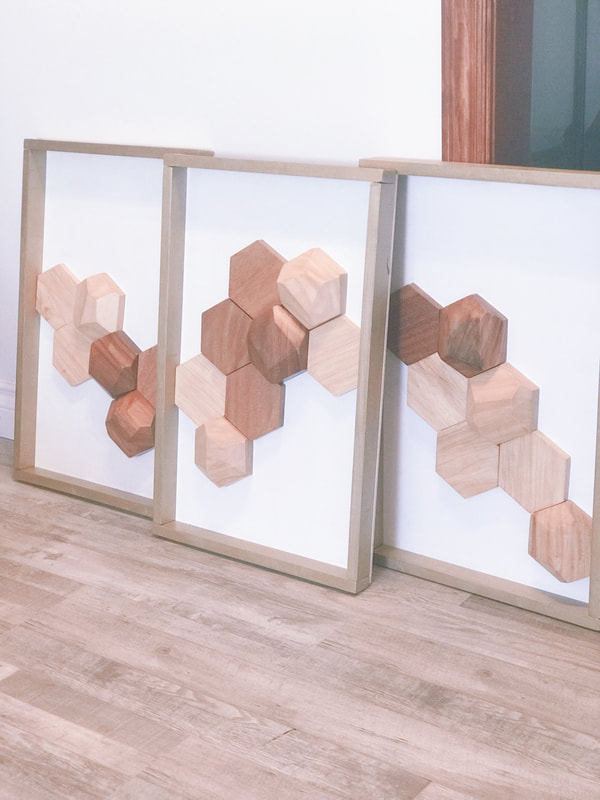
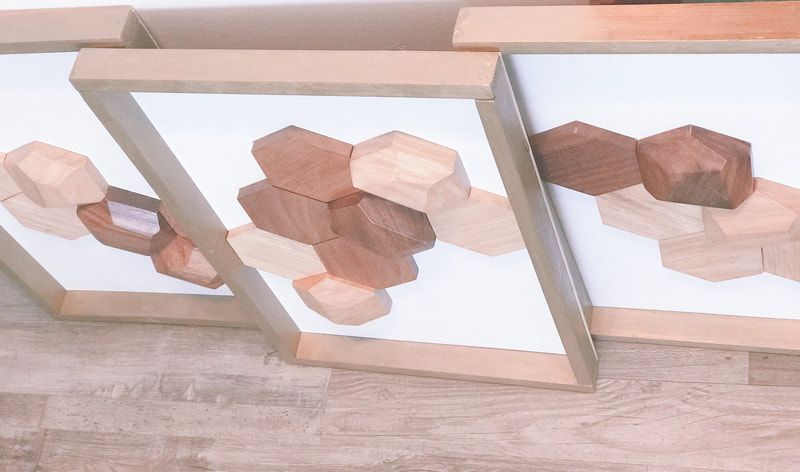
My idea to create a trip tych with shadow boxes was quickly deterred when a trip to Michael's had me squirming for $60-$100 a frame for the size range I was looking at. I quickly realized that I could build a glassless shadow box that would not only make it a lighter art piece for the wall, but also much lighter on my wallet :-). Plus, I got to customize the frames with my own paint choices. So whether you are going to paint a mural or add some unique 3D objects, give this framing technique a try.
My idea to create a trip tych with shadow boxes was quickly deterred when a trip to Michael's had me squirming for $60-$100 a frame for the size range I was looking at. I quickly realized that I could build a glassless shadow box that would not only make it a lighter art piece for the wall, but also much lighter on my wallet :-). Plus, I got to customize the frames with my own paint choices. So whether you are going to paint a mural or add some unique 3D objects, give this framing technique a try.
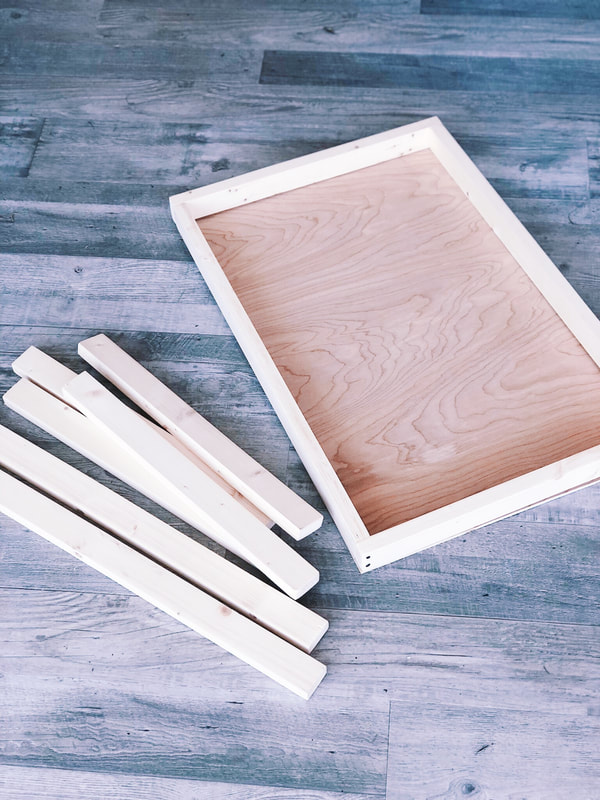
Supplies:
Steps:
1. Draw Your Plan
Thinking through your plan before heading to the hardware store saves you many trips back and forth. I suggest thinking through the dimensions and make sure you take into account overlapping measurements and joining points.
2. Let Home Depot Do the Hard Part
You can absolutely always measure and saw your pieces yourself, however, if you already have the measurements, I've found that Home Depot is always super helpful and will cut the various pieces I need.
3. Sand the pieces
To help with a smooth finish on the paint, give each piece a light sanding so that it is smooth to the touch. I just did a couple seconds per side at 80 grit paper/
4. Hammer the frame
For this one, it is MUCH easier if you can get a partner to help hold the boards in place as you hammer. This will create a cleaner join as well as keep things in line. If you want to switch this up and do a more traditional 45 degree joiner, you can saw the pieces at 45 degrees instead and skip this part, going straight to the next step.
5. Paint
You can use spray paint or hand paint, just pick your favorite colors and let it roll. I did 3 coats to get the finish I was looking for.
6. Attach the backboard
I used underlayment for this step, but you could just as easily use a cork or canvas backing depending on your project. Just line up your frame pieces with the backboard and then hammer around the edges. I used just 2-3 nails per edge and it had .a really sturdy hold.
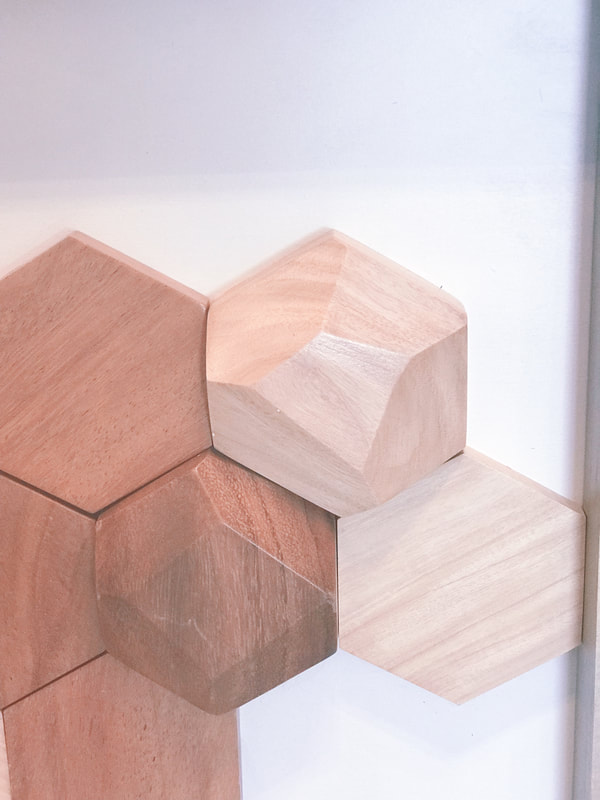
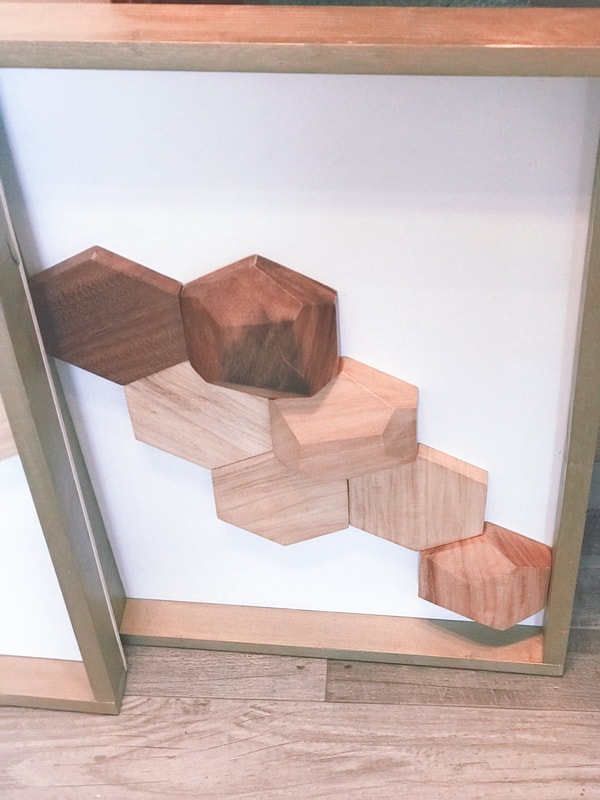
7. Glue your dimensional pieces
Using some clear gorilla glue, I glued the pieces and let dry for just .a few hours.
That's it! Just six super easy steps and Home Depot even did one for you! I loved how simple this project was but how much of a "wow factor" impact it leaves in the room.
Can't wait to see what your canvases get filled with! Feel free to share in the comments below.
Thinking through your plan before heading to the hardware store saves you many trips back and forth. I suggest thinking through the dimensions and make sure you take into account overlapping measurements and joining points.
2. Let Home Depot Do the Hard Part
You can absolutely always measure and saw your pieces yourself, however, if you already have the measurements, I've found that Home Depot is always super helpful and will cut the various pieces I need.
3. Sand the pieces
To help with a smooth finish on the paint, give each piece a light sanding so that it is smooth to the touch. I just did a couple seconds per side at 80 grit paper/
4. Hammer the frame
For this one, it is MUCH easier if you can get a partner to help hold the boards in place as you hammer. This will create a cleaner join as well as keep things in line. If you want to switch this up and do a more traditional 45 degree joiner, you can saw the pieces at 45 degrees instead and skip this part, going straight to the next step.
5. Paint
You can use spray paint or hand paint, just pick your favorite colors and let it roll. I did 3 coats to get the finish I was looking for.
6. Attach the backboard
I used underlayment for this step, but you could just as easily use a cork or canvas backing depending on your project. Just line up your frame pieces with the backboard and then hammer around the edges. I used just 2-3 nails per edge and it had .a really sturdy hold.
7. Glue your dimensional pieces
Using some clear gorilla glue, I glued the pieces and let dry for just .a few hours.
That's it! Just six super easy steps and Home Depot even did one for you! I loved how simple this project was but how much of a "wow factor" impact it leaves in the room.
Can't wait to see what your canvases get filled with! Feel free to share in the comments below.
xoxo,
Jessica
P.S. Don't miss out on bonus tips and content by subscribing to the newsletter. CLICK HERE to learn more.
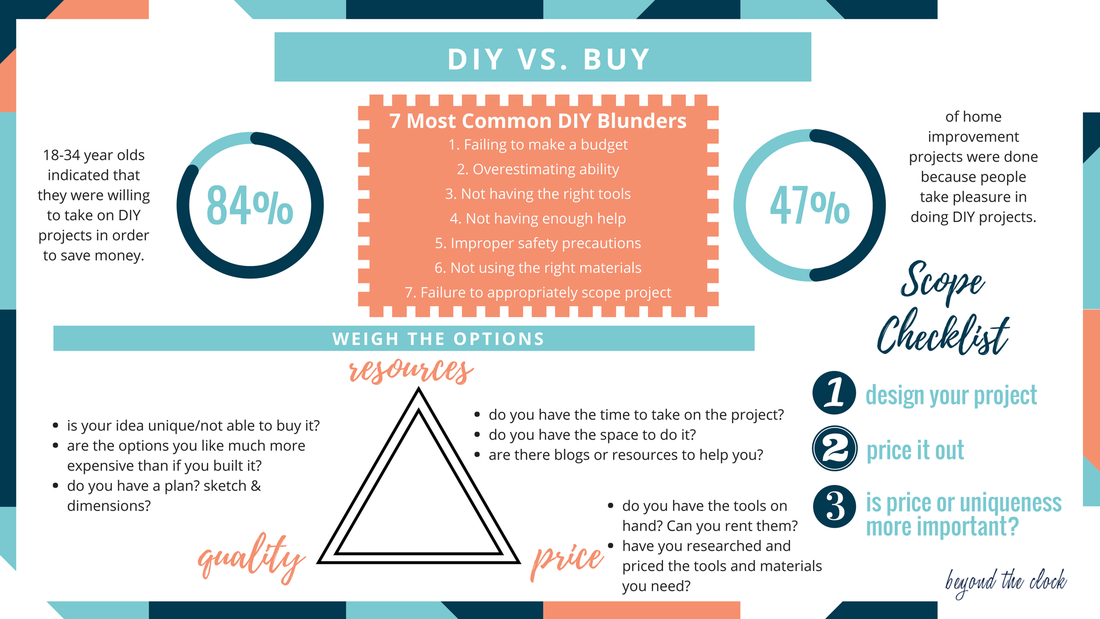
How to know if your DIY project is worth your time?

 |  |
In honor of #DIYday, I'm diving into the pros and cons of DIYing vs. buying right out of the box.
Clearly, I'm a huge fan of DIY projects. I love to be able to dream something unique in my head, combining inspirations and then digging in with my hands to make something I'm truly proud of.
However, I have also learned, that without the right planning, these projects can sometimes end up costing more than if I'd just gone and bought the darn thing.
So in order to avoid a few headaches, I now assess each idea, with a little planning (I must get this from my daytime gig - project manager :-P) It ends up being a fine balance between how much I value the custom aspect of the project over the price and time constraints to do it.
Ok so here is my method to know when to build or buy for your next project, hope it helps!
Archives
October 2019
September 2019
August 2019
July 2019
June 2019
May 2019
April 2019
March 2019
January 2019
December 2018
October 2018
September 2018
July 2018
June 2018
May 2018
April 2018
March 2018
February 2018
January 2018
December 2017
Categories
All Accent Pieces Action Planner Basket Baskets Bathroom Bedroom Branch Floral Arrangements Bud Vase Candles Cherry Blossoms Curtains Cylinder Vase Decor Accents DIY Door Mat Family Flare Vase Floral Notebook Floral Water Bottle Flowers Flower Wreath Flower Wreaths Furniture Gifts Greenery Guest Room Home Home Decor Indoor Plants Jeans Living Room Mirrors Narrow Neck Vase Nightstand Outdoor Living Pastels Personal Development Productiity Rugs Seat Cushions Shelf Decor Shower Sneakers Spring Spring Decor Spring Ideas Storage Ideas Style With Time Styling Tips Sunglasses Table Lamp Throw Blanket Vase Vases
 RSS Feed
