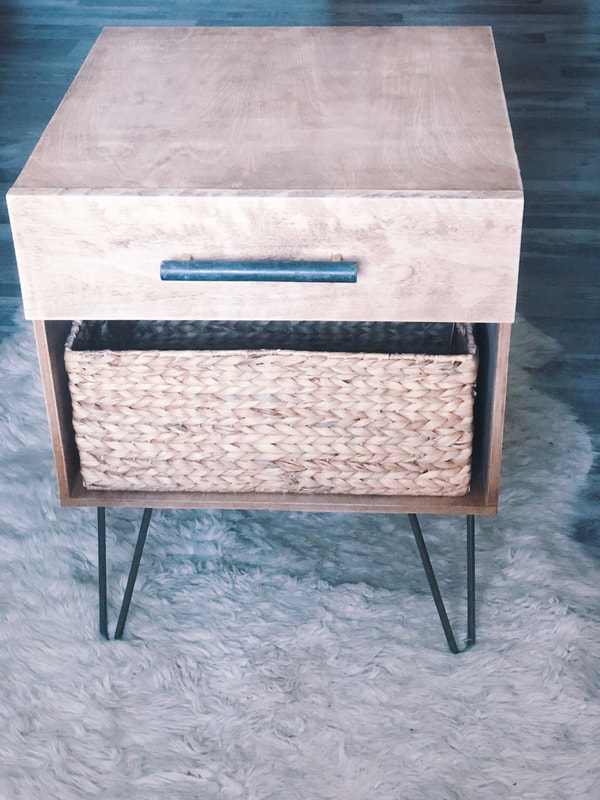
DIY Nightstands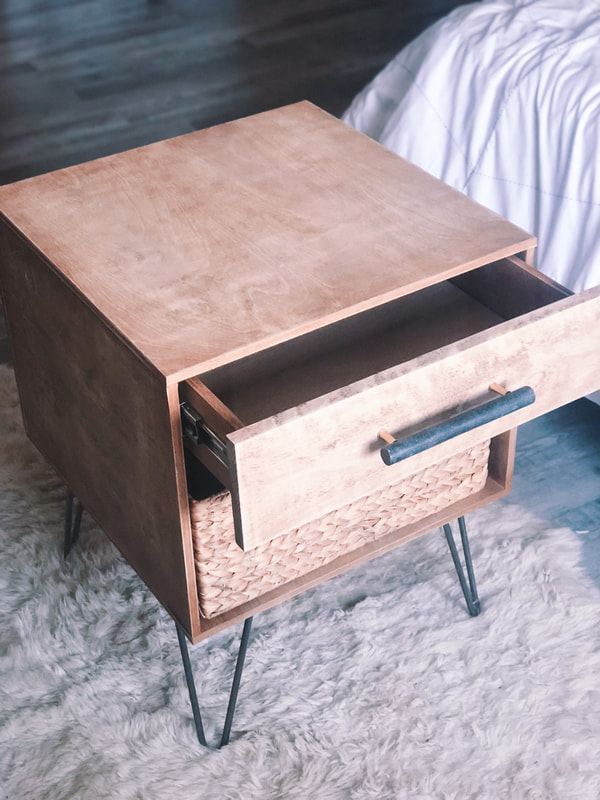
About a year and a half ago, I set out to transform my master bedroom. This was the first big room transformation I took on and my mid-century modern nightstands were the first big DIY project I took on. Yes, it was only 1 room, and only 1 project. I didn't do an entire renovation, I didn't knock down walls, but building the perfect nightstands for my husband and I to be able to fit all our things (and hide the junk) was the first step in making the room feel more practical, more calm, and more us. I originally posted about it right after the initial build, but I have learned so much since then and have also been getting lots of questions on some of the details so I thought I'd revamp this tutorial and give you the complete step by step guide. Here's what you'll need: SUPPLIES:
HARDWARE
WOOD: Below is what you need for 1 nightstand with all the cuts and dimensions, double it for 2.
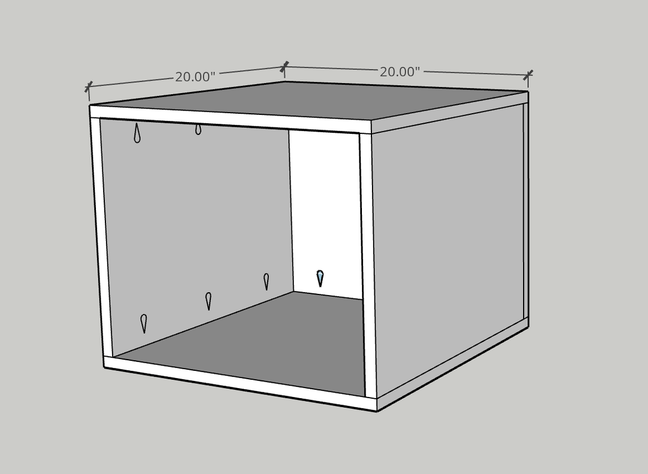
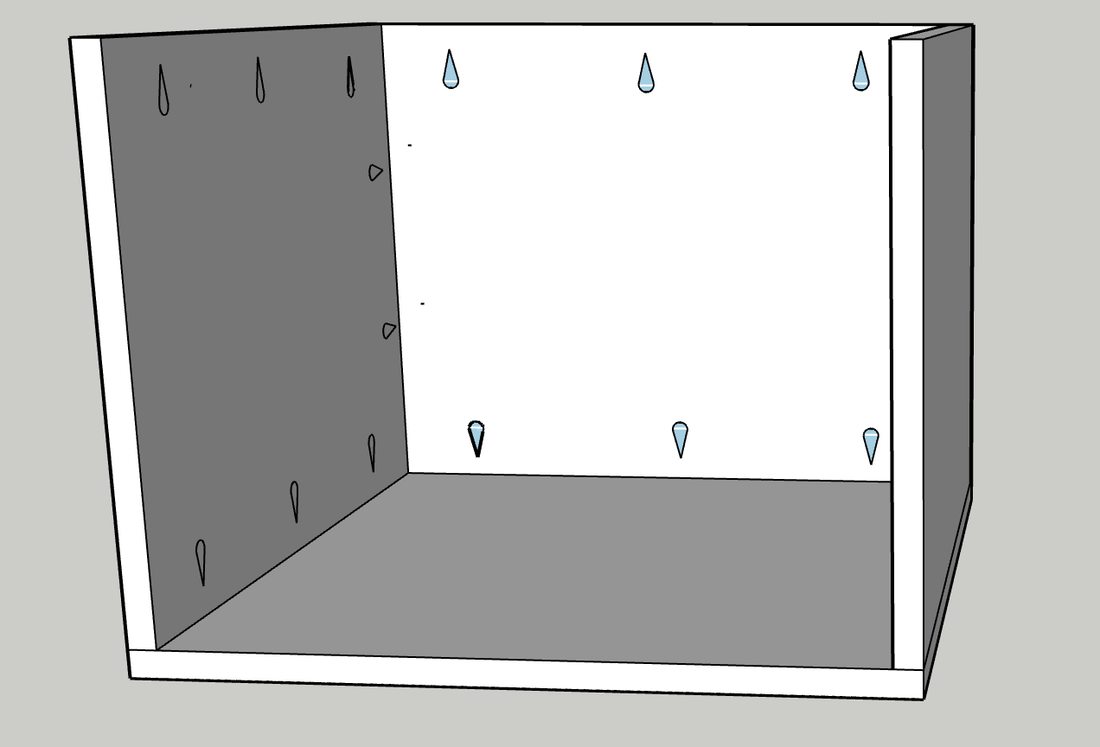
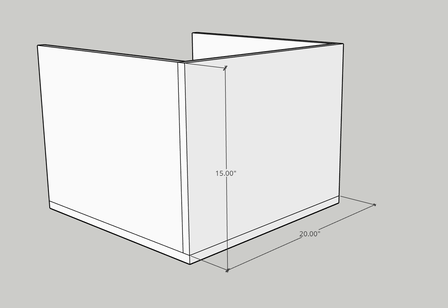
 PLANS & INSTRUCTIONS: Start with the 20" x 20" base piece. 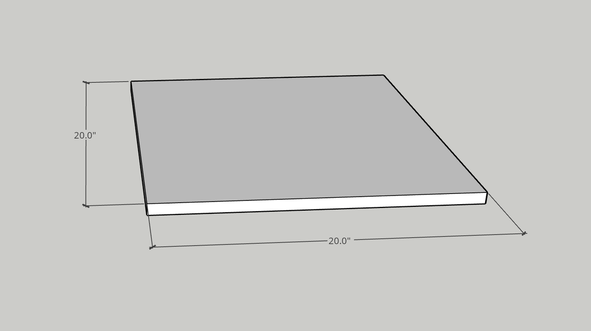 Next, utilize the pocket hole technique for creating your joins on the 15" x 19.25" boards. You will need to make pocket holes on 3 of the sides of these pieces so don't attach until all holes are drilled. For the first connection point, you will want to drill your wholes about 6.5" apart and 4.5" from the edges. 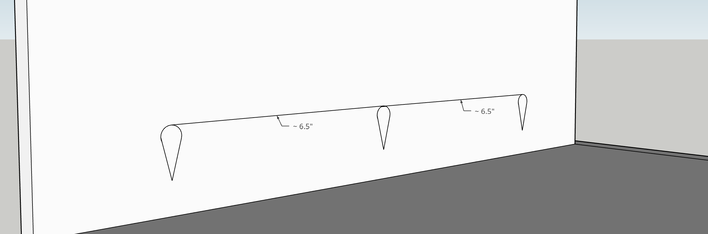 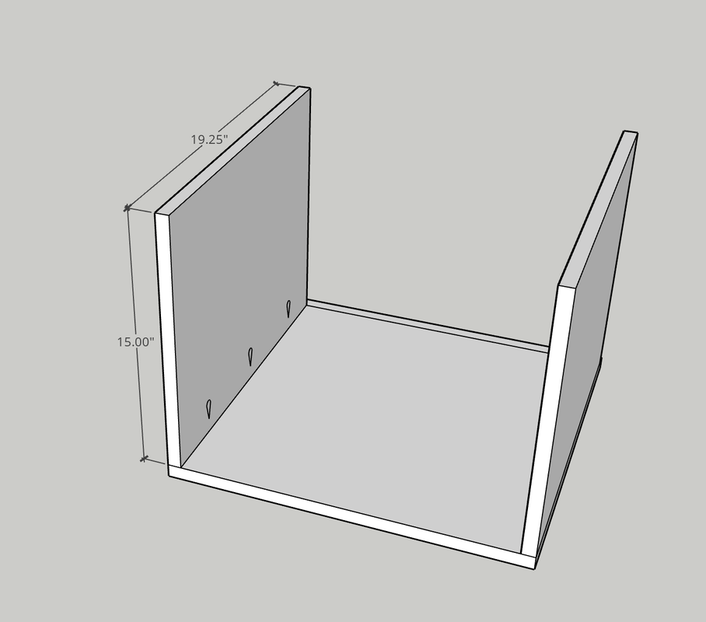  Repeat the pocket hole joineries on the back edge and upper edge to attach the beck and top of the nightstand. Keep the holes roughly a third apart.
 The next step is to make the drawer. Use the 17.5" x 3" pieces and connect them utilizing pocket holes on the side pieces that are spaced 1" apart and about 1/2" from the edge of the piece. ***Don't connect the pieces just yet, we will be hammering the drawer base prior to connecting. 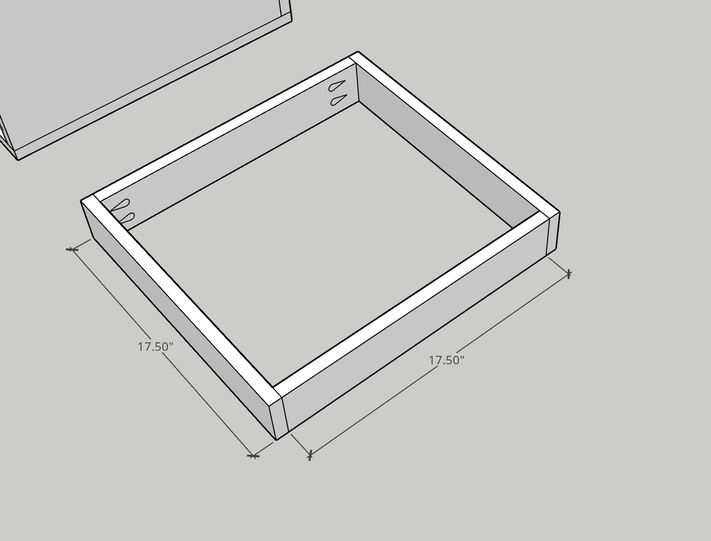 Next use the 1/4" pieces to create the drawer of your base. on the sides of the drawer, use 3-4 wire nails to connect the 17.5" pieces and on the front and back side of the drawer, use the 15.5" pieces. Once you have hammered in the nails, you can use the screws to connect the edges of the drawer at the pre-drilled pocket holes. 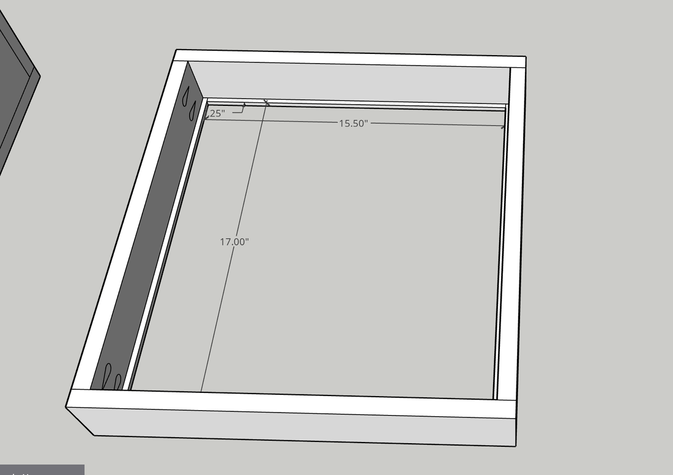 Next, wedge the 17.50" x 16" underlayment into the drawer. It should be a snug fit and rest on the ledge created by the 1/4" strips. Gravity will secure this one for you so no joineries needed! 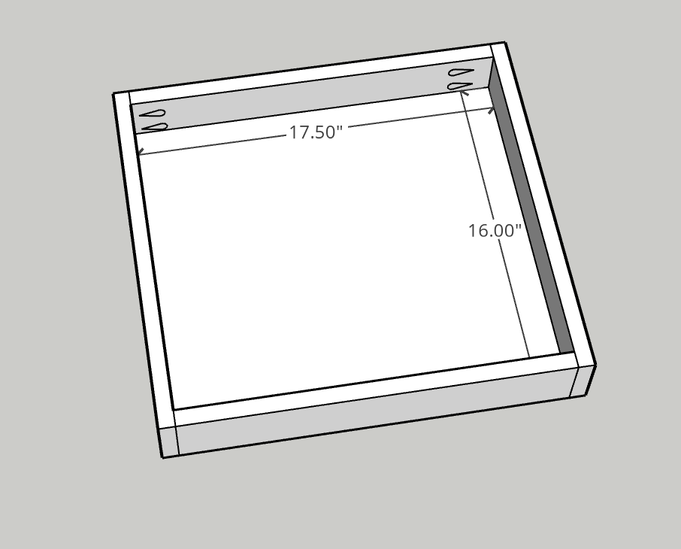 Attach the front face of the drawer to the drawer by screwing through the back side of the drawer. Screw as close to the edges as possible so you leave plenty of space to choose what ever handle in the center you would like. 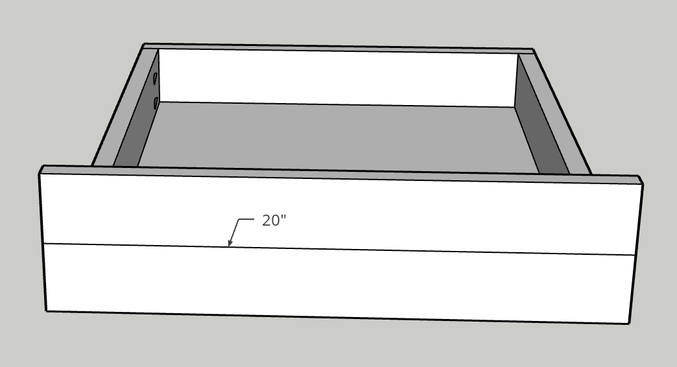 Now, it's time to put it together. Use the drawer slides installation instructions to attache the slides both to the drawer and the cabinet. I placed mine about 2" down from the top of the cabinet to the center of the slide. Once the screws are in, you can just slide the drawer into place. 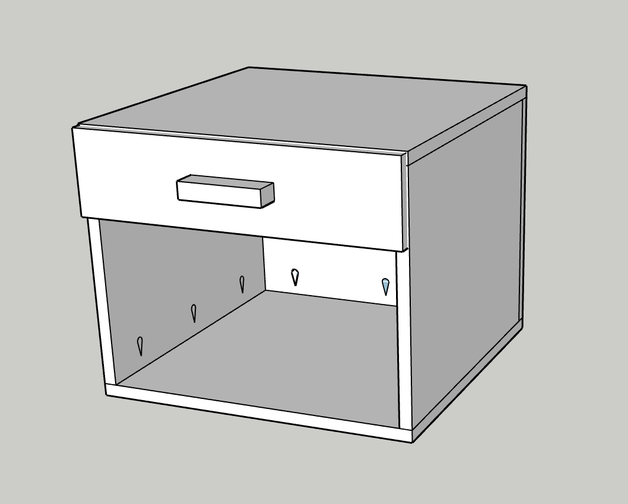 Once you have all the pieces in place you can add your finish. Use a stain or sealer to get your wood to the ideal color. I stained and sanded twice to get the color I wanted. Then attach the legs of your choice with screws at the base and you are finished!
I would say this DIY is intermediate to advanced. I did it as a total beginner though and with some persistence, it came together and turned out fantastically. They are still standing strong in our room 1.5 years later! I love building with all of you in this community and seeing you create things that make your home and work space feel fresh, fun, and YOU! Use the hashtag #beyondtheclock to share how you are making your home (and life) dreams happen today by taking action (no matter how small) and make sure to click here so you never miss a post or giveaway! (I promise, no spam and only the good stuff). Thanks for being here and following along! xoxo, |

 |  |
2 Comments
4/23/2019 0 Comments
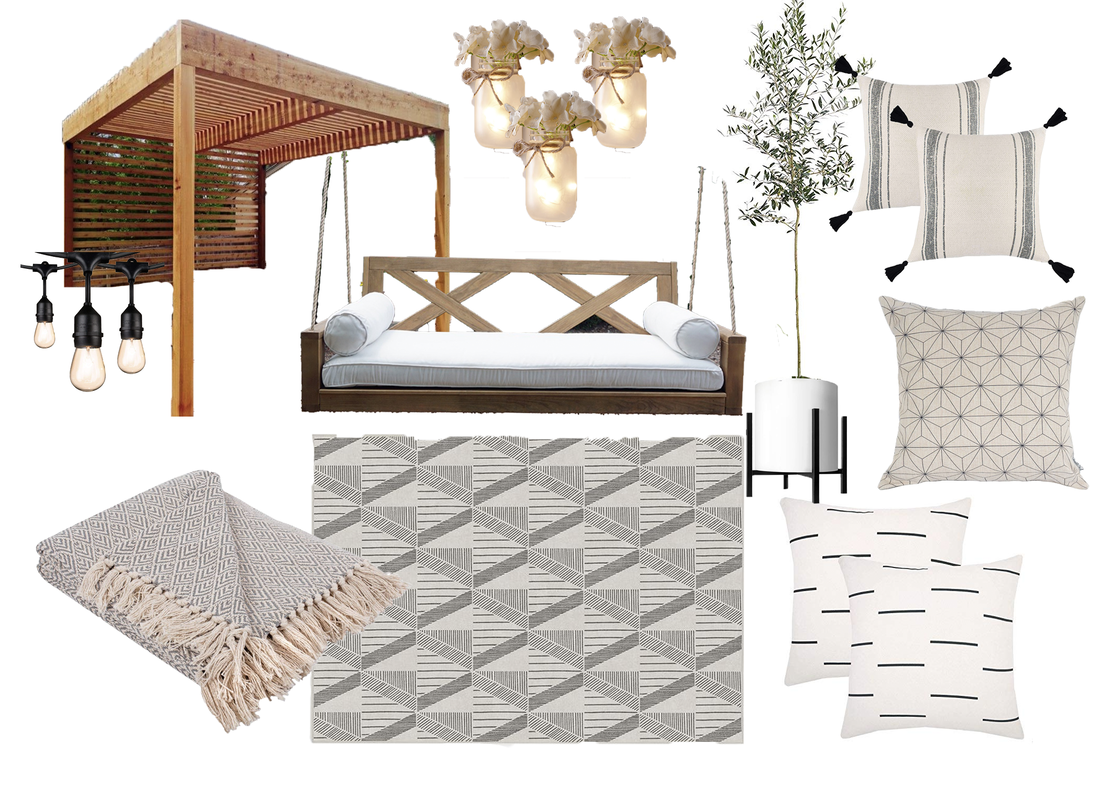
Summer Balcony Refresh Design
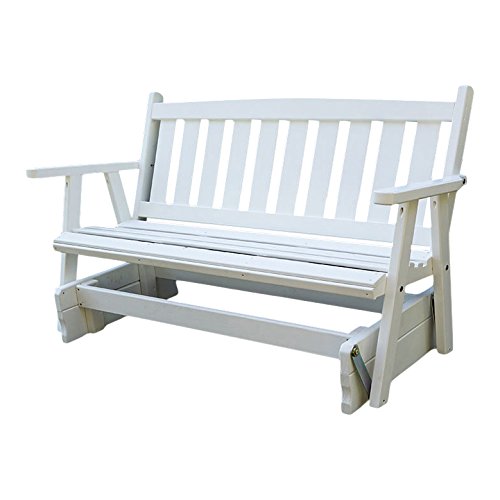
A couple weeks ago on instagram, I mentioned the fun new project that I have planned with a BTC version of a porch swing.
I have quite literally been dreaming of a porch swing/balcony sofa for at least 2 years now. We don’t exactly have the biggest balcony and it doesn’t have any hooks nor can we drill into the ceiling because that is technically owned by the unit above ours. So after many hours of googling a solution that may be on the market, I have decided to instead build a custom seat just for us. Here are my requirements:
I drew up the plans for the glider bench and I’m pretty excited for how it will turn out. I’m still debating on whether or not to make it a glider chair. I like the idea of it rocking but the foundation will take up space that we could use for storage instead. I’d love to hear what you guys think. Glider or no glider?
As I got into the design of the chair, I realized lots of other ways I could refresh the balcony at the same time.
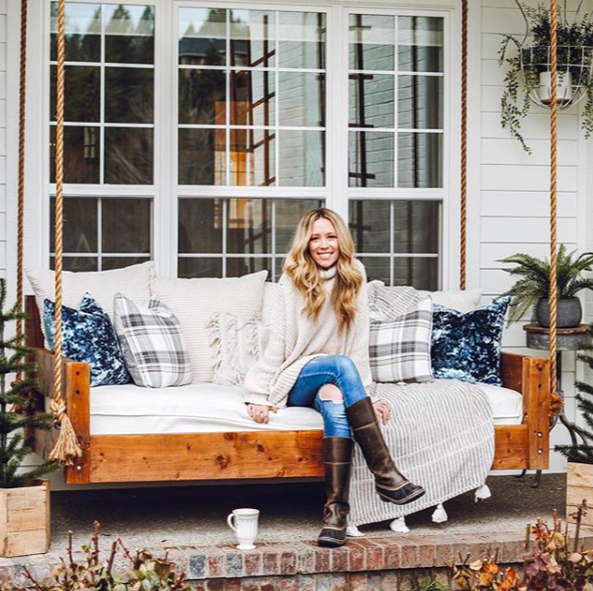
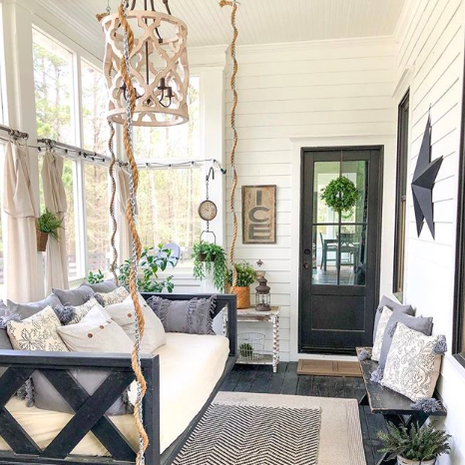
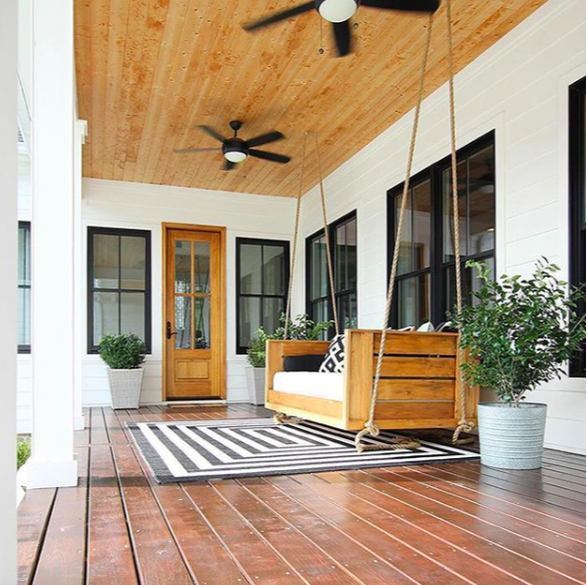
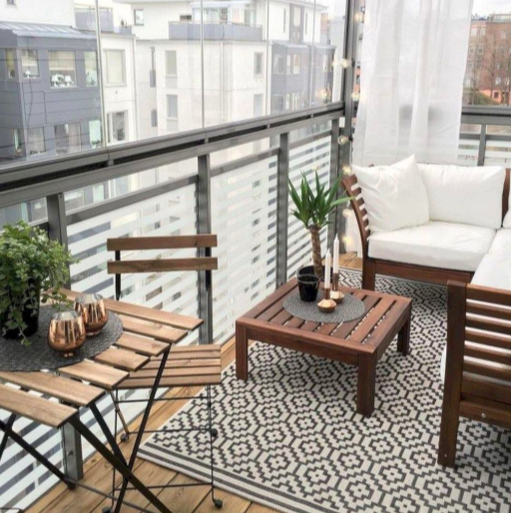
Here are a few places I’ve been getting inspiration from.
I have quite literally been dreaming of a porch swing/balcony sofa for at least 2 years now. We don’t exactly have the biggest balcony and it doesn’t have any hooks nor can we drill into the ceiling because that is technically owned by the unit above ours. So after many hours of googling a solution that may be on the market, I have decided to instead build a custom seat just for us. Here are my requirements:
- Comfortable
- Tall enough to see over the railing when sitting (but still safe height)
- Cute and modern look
- Relatively easy to build
- Still able to fit the rest of the balcony furniture on the deck (this part may prove to be the trickiest)
I drew up the plans for the glider bench and I’m pretty excited for how it will turn out. I’m still debating on whether or not to make it a glider chair. I like the idea of it rocking but the foundation will take up space that we could use for storage instead. I’d love to hear what you guys think. Glider or no glider?
As I got into the design of the chair, I realized lots of other ways I could refresh the balcony at the same time.
Here are a few places I’ve been getting inspiration from.
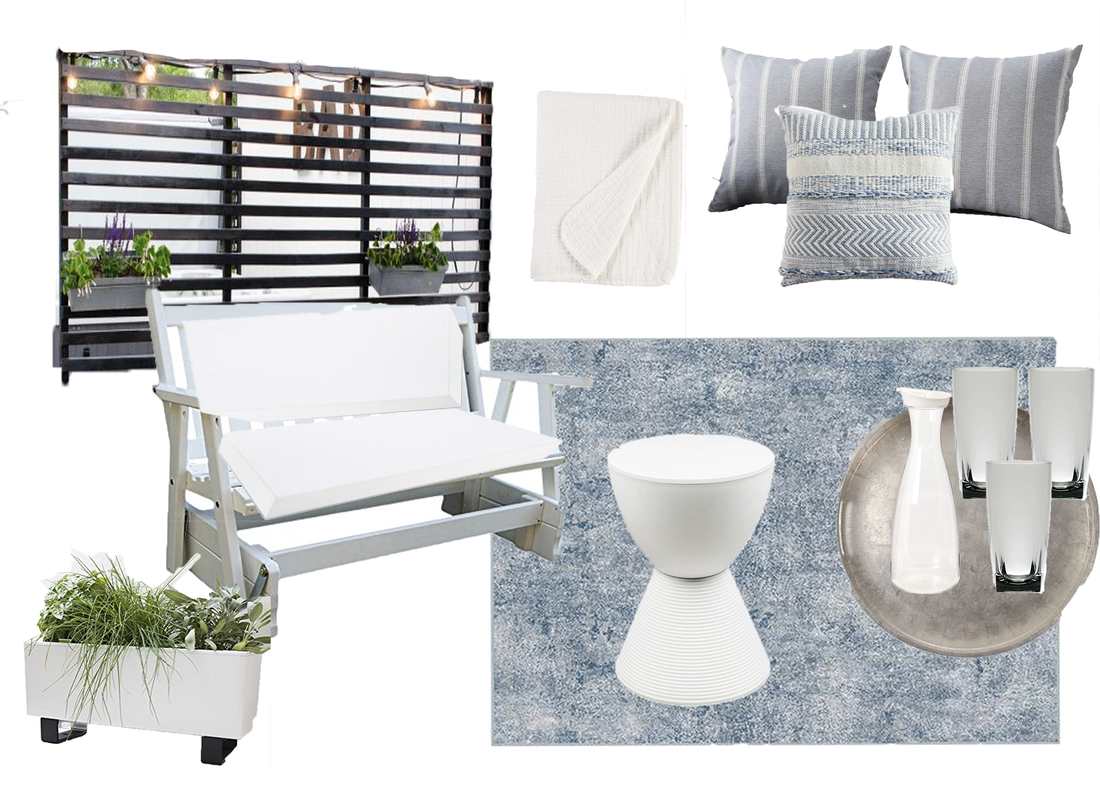
Although, I won’t be able to start work on this one for a while, I’m excited to keep finalizing plans and get your feedback along the way. Here are the two concept designs I've come up with so far. Which one is your favorite?
DESIGN #1
DESIGN #2
shop the post
DESIGN #1
   |    |    |    |
DESIGN #2
   |    |    |   |
Sooo which one do you like better? Comment below or click here and come weigh in on instagram . Can't wait to see what you think and thanks for following along! I'm so glad you are here. Make sure to subscribe so you never miss a post or giveaway!
xoxo,
Jessica
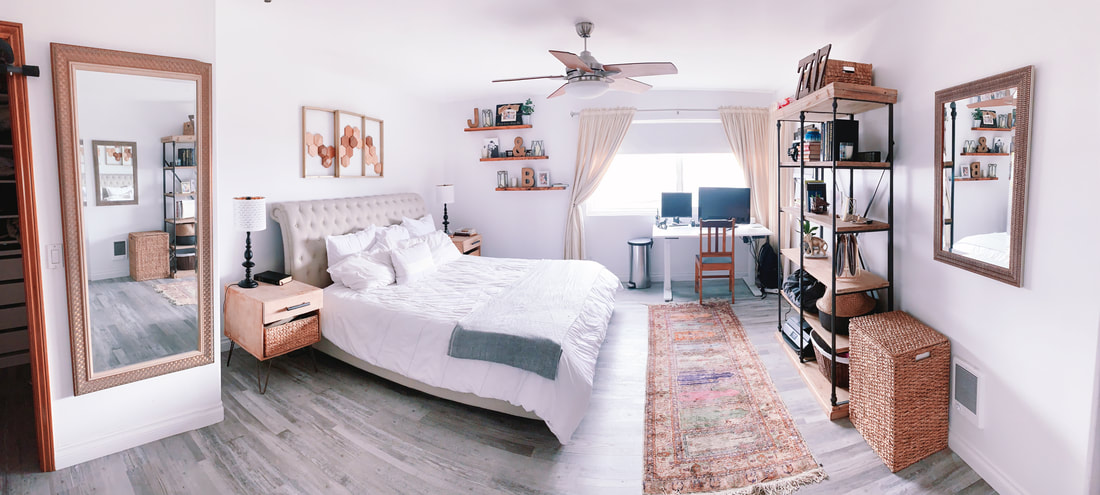
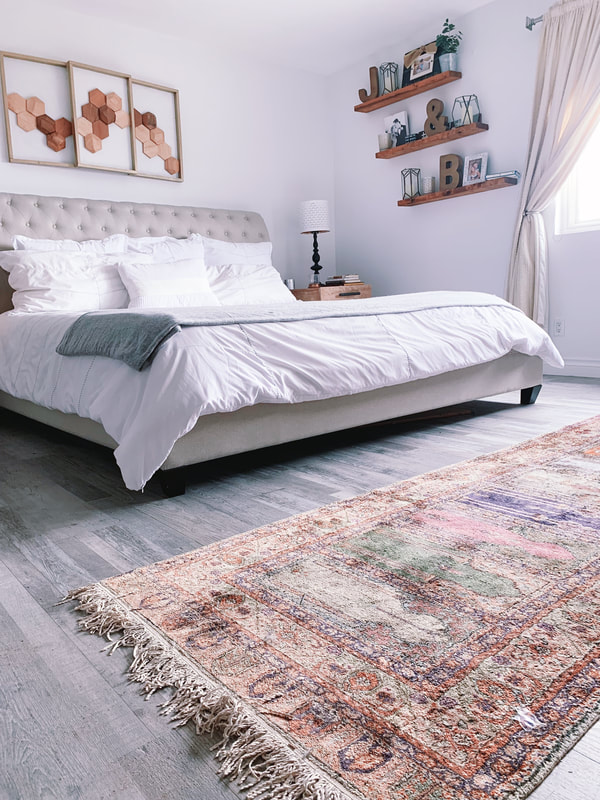
before
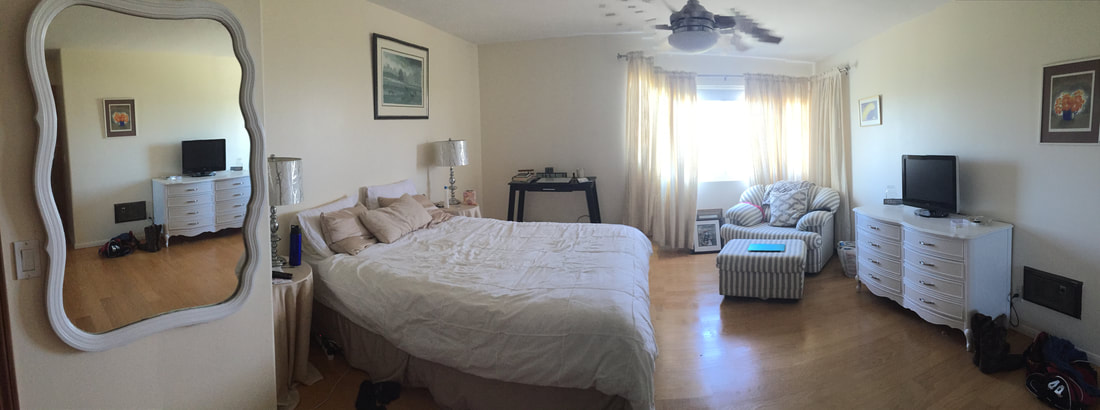
after
 |  |
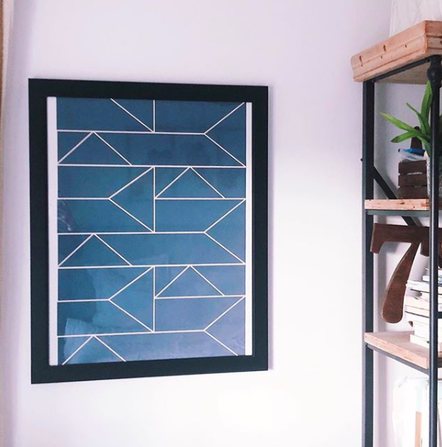 | 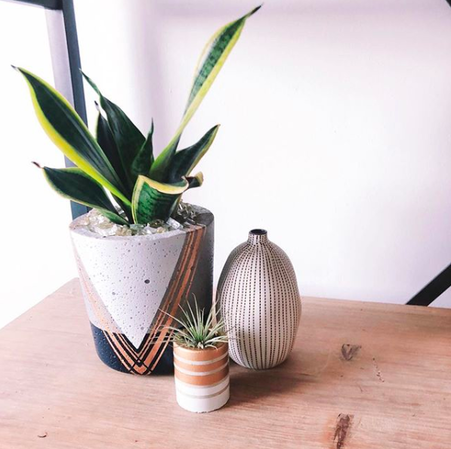 |
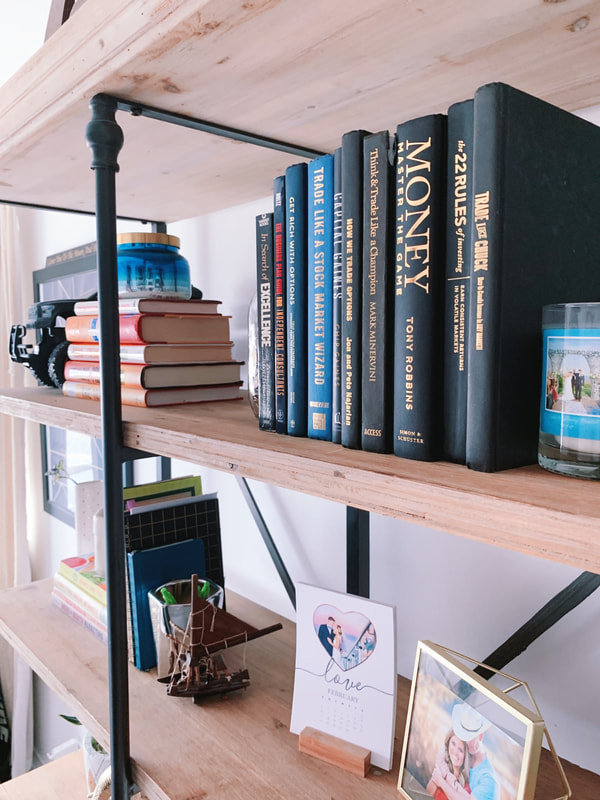
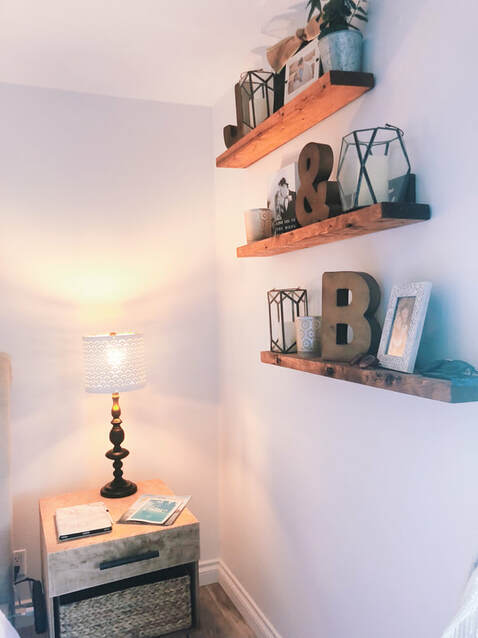
This post has honestly been a long time coming! And the reason for that is the foundational mission of Beyond the Clock which is to style with time. I have had a vision for our master bedroom for probably almost 3 years. It took savings and slowly moving things around, upgrading furniture pieces and styling with the perfect details that I gathered throughout the years.
I know a lot of you followed along the way as I put these together and now is the big reveal of the full master bedroom transformation!
The thing is, as much as we would all love to click our heels together and transform a room instantly, one of the best things about styling a room is seeing how things come together. It helps both on a budget perspective, but also as an organic way for things to fit together and evolve as your day to day changes as well.
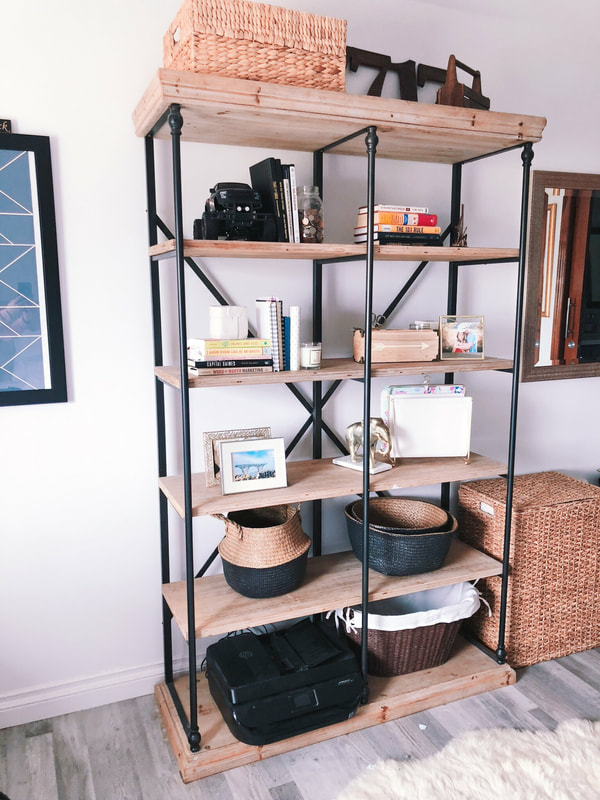
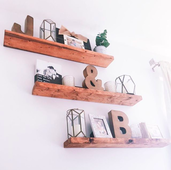
When I first began getting inspiration for the room, we had an office. Shortly into starting the room, we changed that into a guest room and had to find a place for some of the office furniture. With a bit of rearranging, we brought the bookshelf into our room since we don’t really watch TV there and then moved the TV stand to the living room. It ended up being a great way to refresh all 3 rooms and make good use of the space for how we were using it.
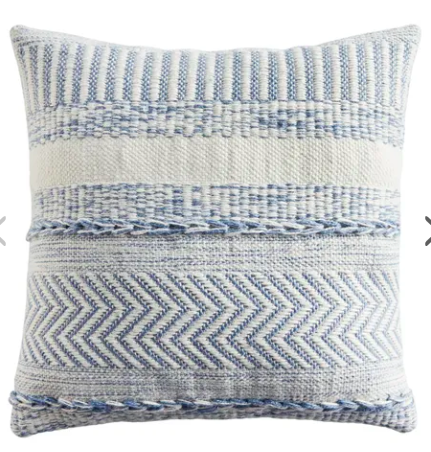
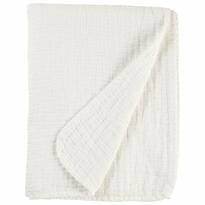
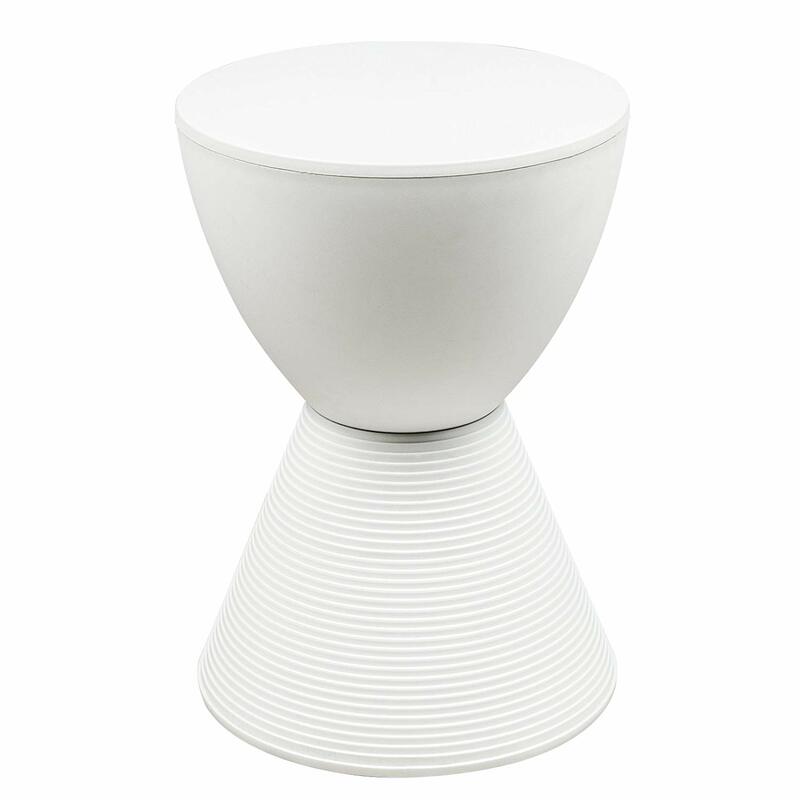
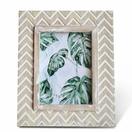
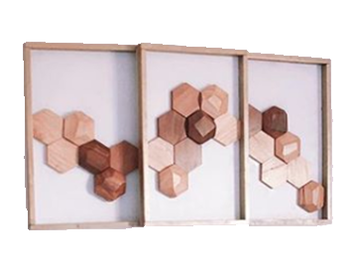
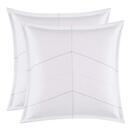
So here is the big reveal, all items and DIY upgraded projects linked. My curtains and rug are family heirlooms but I linked similar ones for you guys.
Thank you for stopping by the blog today! Hope you all have a wonderful weekend. Make sure to CLICK HERE and subscribe so you never miss a post or giveaway!
UPDATED: Style with Time - Bedroom, the complete guide for styling a room overtime to fit your style and budget.
I know a lot of you followed along the way as I put these together and now is the big reveal of the full master bedroom transformation!
The thing is, as much as we would all love to click our heels together and transform a room instantly, one of the best things about styling a room is seeing how things come together. It helps both on a budget perspective, but also as an organic way for things to fit together and evolve as your day to day changes as well.
When I first began getting inspiration for the room, we had an office. Shortly into starting the room, we changed that into a guest room and had to find a place for some of the office furniture. With a bit of rearranging, we brought the bookshelf into our room since we don’t really watch TV there and then moved the TV stand to the living room. It ended up being a great way to refresh all 3 rooms and make good use of the space for how we were using it.
So here is the big reveal, all items and DIY upgraded projects linked. My curtains and rug are family heirlooms but I linked similar ones for you guys.
Thank you for stopping by the blog today! Hope you all have a wonderful weekend. Make sure to CLICK HERE and subscribe so you never miss a post or giveaway!
UPDATED: Style with Time - Bedroom, the complete guide for styling a room overtime to fit your style and budget.
     |      |      |      |
P.S. Don't miss out on bonus tips and content by subscribing to the newsletter. CLICK HERE to learn more.
4/26/2018 4 Comments
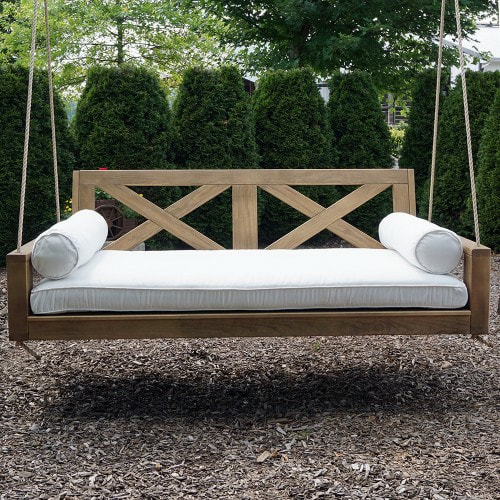
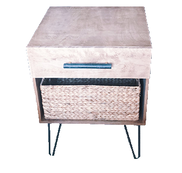
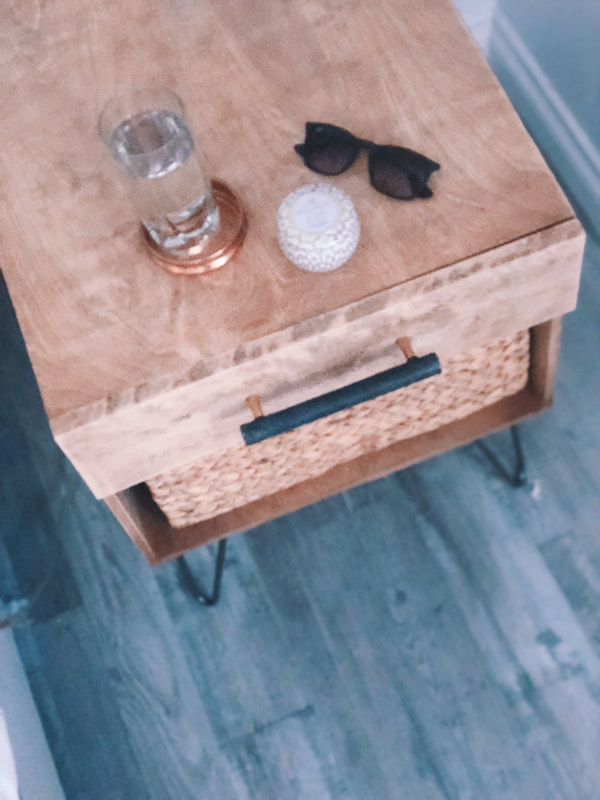
Mid-Century Modern DIY Nightstand
 |  |


DIY Bedside Tables
If you have been following along on my instagram stories, you know that I've been working on some nightstands for our bedroom. I'm excited to share with you the complete how to guide for creating one of your own with the good, the bad and they why the heck I did this in the first place.
I've been looking for nightstands for about 6 months. I know that sounds crazy, like why can't I make a freaking decision, but the battle between what I wanted and what I could afford were REAL. At one point, I had found what I thought were the perfect ones on wayfair.com but they were on backorder with no date of when they would be back in stock and I was wanting to transform our $6 straight out of college nightstands STAT!
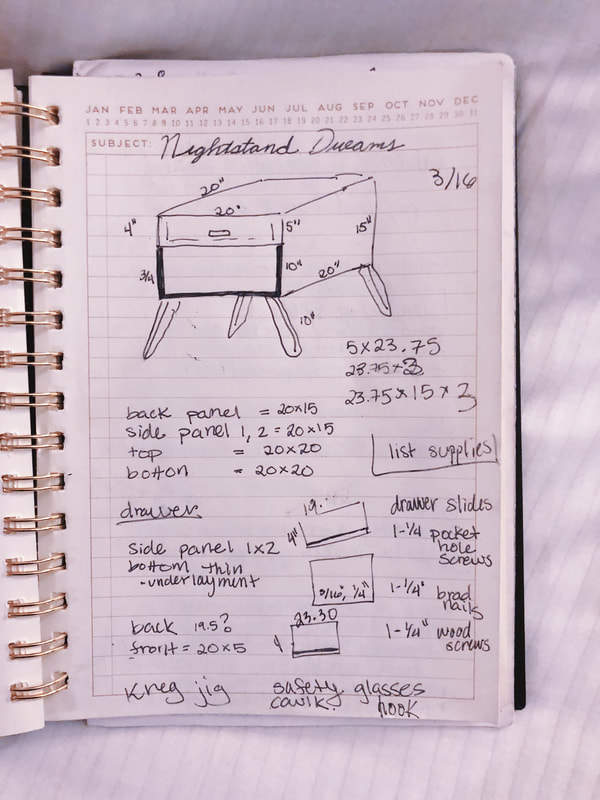
So one day, I started sketching in my notebook what I thought I would want. It took a few sketches and the design evolved but I eventually ended up with a design, the optimal dimensions for our new bed frame (plus all the stuff I like to keep on my nightstand) and voila!
I then decided to google supplies on Home Depot and Amazon and I priced out a rough order of magnitude of what it would cost to build (including purchasing tools that I didn't have at home) and I was super excited to find out that I could build 2 nightstands just the way I wanted them for the price of 1 that I'd picked out on wayfair. Score!
And so, the DIYing began.
I've been looking for nightstands for about 6 months. I know that sounds crazy, like why can't I make a freaking decision, but the battle between what I wanted and what I could afford were REAL. At one point, I had found what I thought were the perfect ones on wayfair.com but they were on backorder with no date of when they would be back in stock and I was wanting to transform our $6 straight out of college nightstands STAT!
So one day, I started sketching in my notebook what I thought I would want. It took a few sketches and the design evolved but I eventually ended up with a design, the optimal dimensions for our new bed frame (plus all the stuff I like to keep on my nightstand) and voila!
I then decided to google supplies on Home Depot and Amazon and I priced out a rough order of magnitude of what it would cost to build (including purchasing tools that I didn't have at home) and I was super excited to find out that I could build 2 nightstands just the way I wanted them for the price of 1 that I'd picked out on wayfair. Score!
And so, the DIYing began.
Supplies
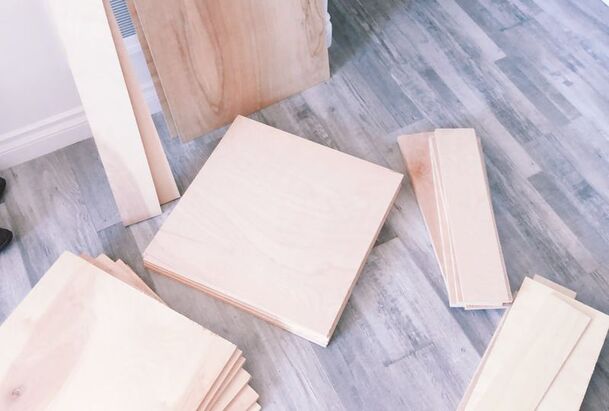
- 1/2" Birch Plywood - I used three sheets and had them cut at Home Depot with my dimensions I had sketched out. Next time I would use 3/4 inch plywood. See my Pocket Hole post for why I say that.
- Birch Underlayment - one piece was enough for both drawers, again requested cutting done at Home Depot
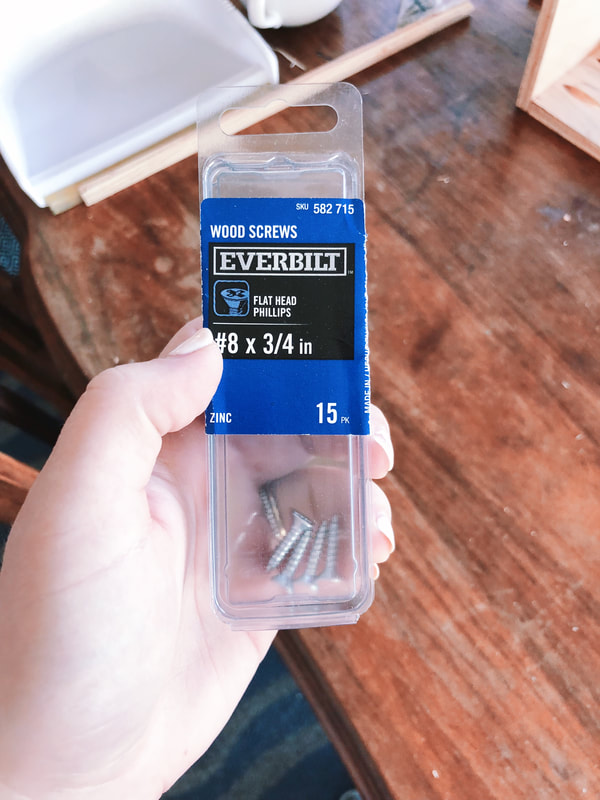
- 3/4" Wood Screws - 4 bags, 10 per pack
- Wire Nails - 1 Pack
- Wood Stain
Tools
- Kreg Jig - see Pocket Hole post for more details
- Saw - if you have a table saw already, that is great too.
- Hammer
- Electric Sander - you can hand sand as well, but an electric sander will save you TONS of time.
- Power Drill
Hardware
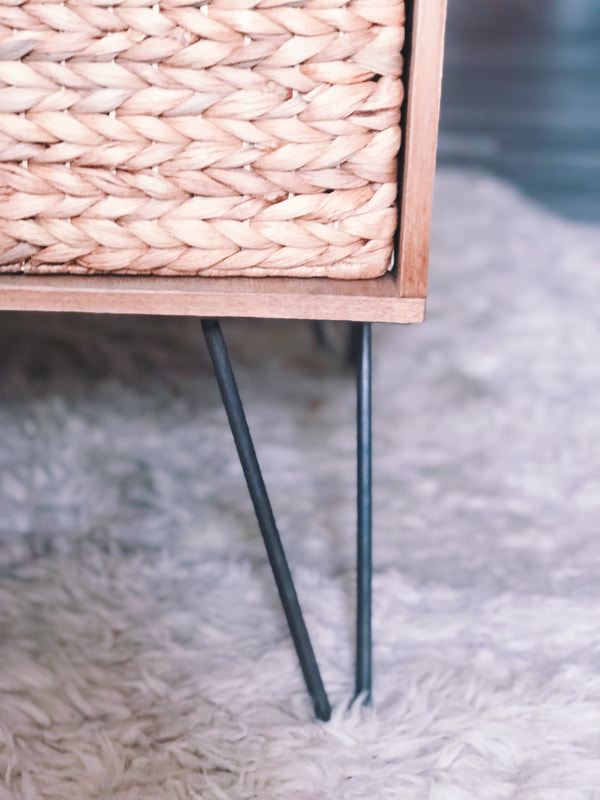
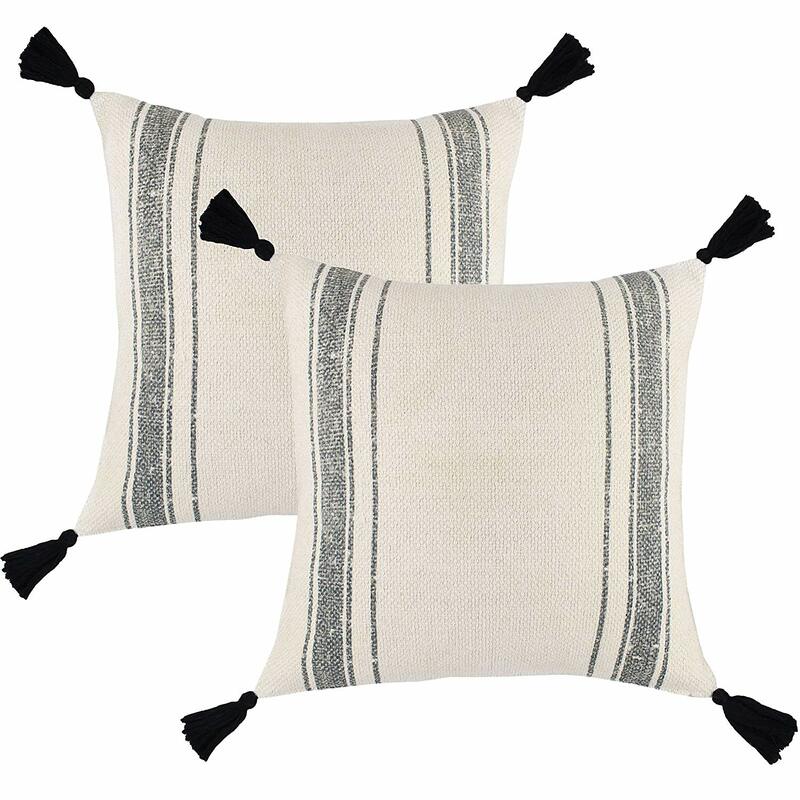
- Table Legs - You can choose legs to fit your style, these were the ones I got
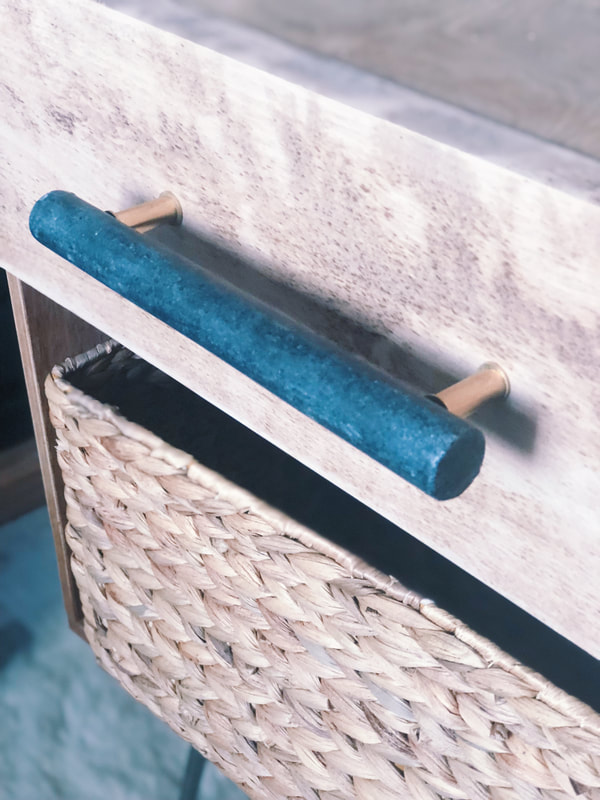
- Handles - Again, choose for your style. There are so many great options at Anthropologie and CB2
- Drawer Slides - These ones are soft close but if you want to save, you can get the plain ones.

 |  |
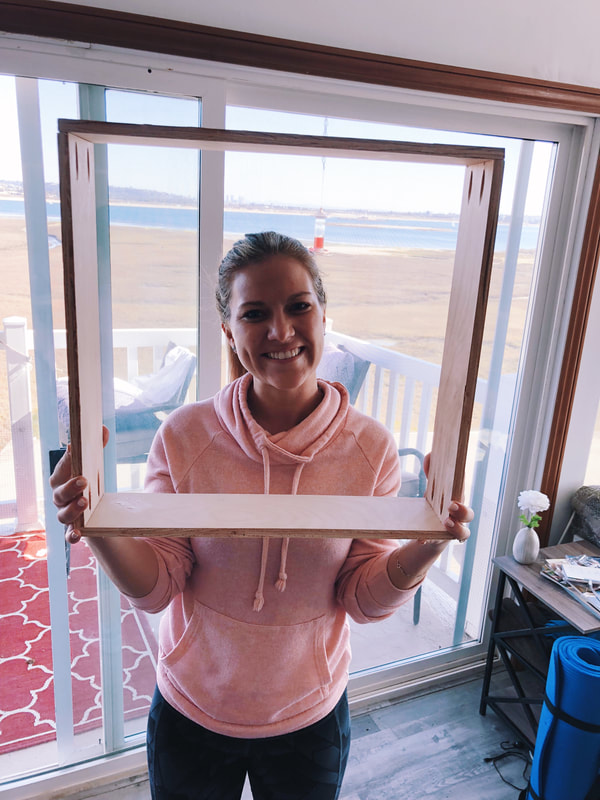
Start the Build
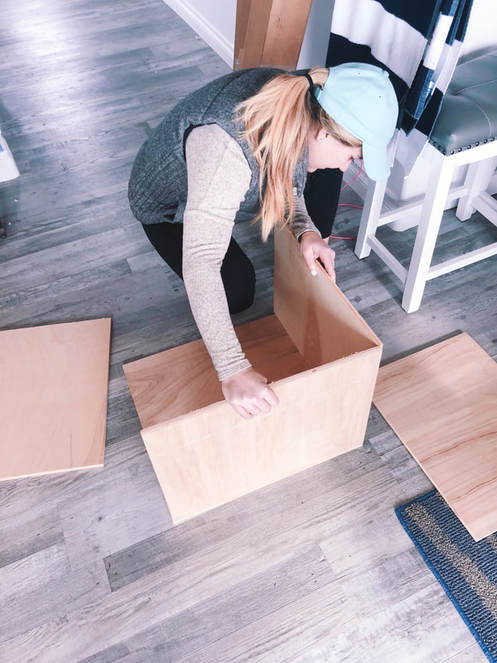
The Main Compartment
- Layout the first 5 pieces *(top, bottom, sides x2, and back). And mark an "x" for where you will drill your pocket holes. Roughly 1/3 a part from each other. I utilized this link for guidance on this part,
- Since I was building a relatively large nightstand, I used 3 pocket holes for connect the bottom and top per connection and 2 pocket holes for the side connections
- If you haven't checked out the pocket hole post yet, definitely do that, I promise it helps big time.

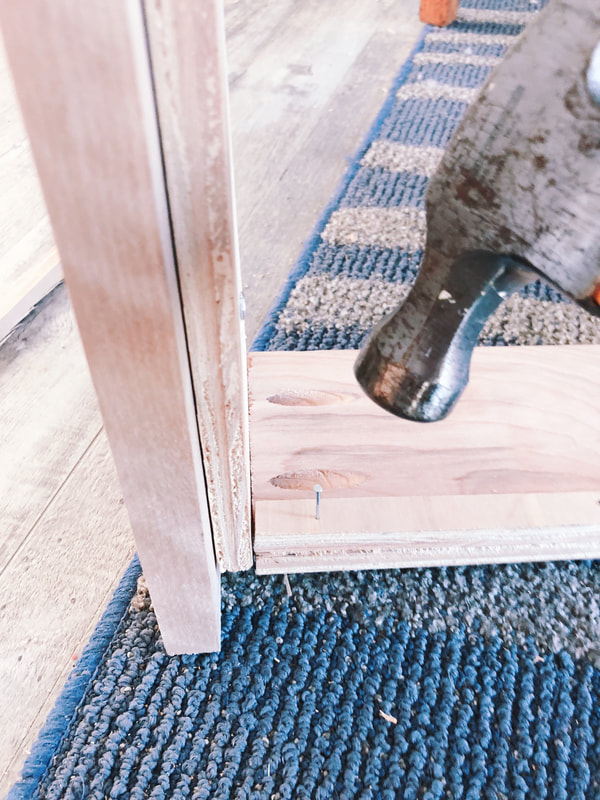
The Drawer
- For the first part, measure and cut your drawer sides to your preference. Make sure the width of your drawer leaves enough space for whatever drawer slides you purchased. I left 1/2" on each side for mine. I used these directions and they were really helpful.
- Next, cut a thin, long piece for the drawer support. I used some of the excess from the main board. You can also have these pre-cut at Home Depot, I was learning as I went so cut them by hand at home.
- Use your nails to hammer the drawer support on the bottom part of each drawer side piece.
- Connect the four pieces of the drawers utilizing 2 pocket holes on the front and back.
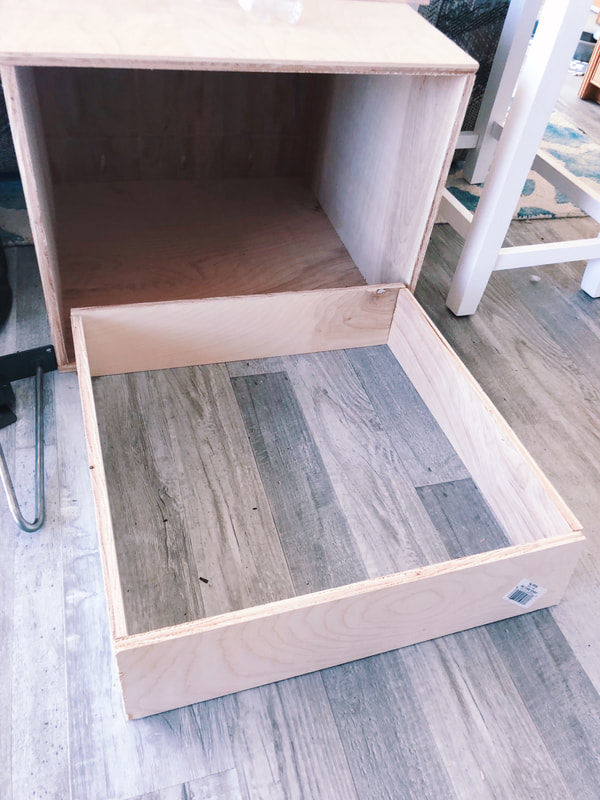
- Cut the underlayment to fit just inside your compartment. I had to sand the edges just a bit to get a smooth but cozy fit.
- Use the directions on the drawer slides to screw them into the main compartment and attache the sides to the drawer. As long as you are patient with the measuring and centering process, they will fit like a glove.
 |  |
The Finish
- Prior to connecting the drawer and main compartment, sand down the exterior facing edges. You can sand the interior as well (except for the interior of the main compartment), I didn't feel I needed to as no one would be touching those places.
- Using a damp rag, wipe down all the saw dust and let dry for 5-10 minutes.
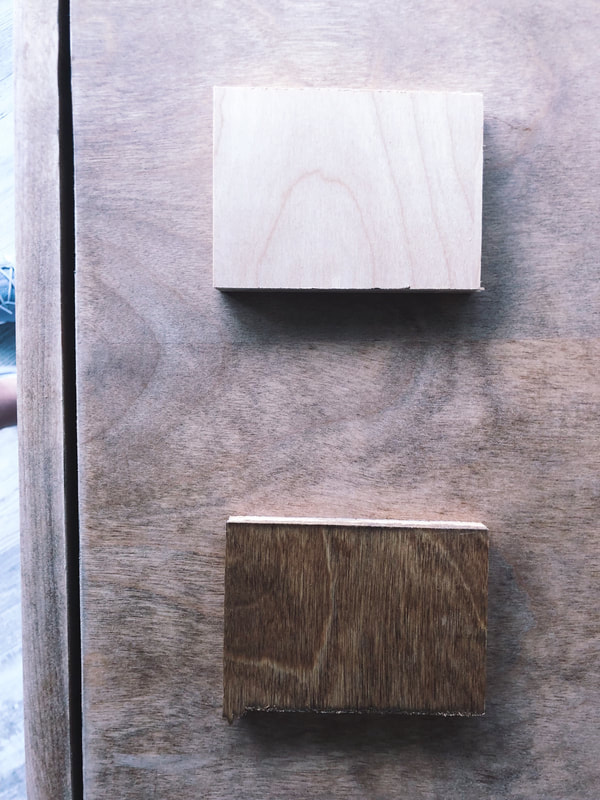
- Use a cloth or foam brush to apply the stain of your choice. I used 3 coats of the Golden Oak stain and let dry for about 24 hours.
- The color of the stain was a little bit darker than I was hoping, I wanted more of a sun-bleached look but couldn't find the perfect color. So, I took a chance and sanded the stain down just a bit and it turned out to be the PERFECT color. A little worn looking with the sanding, but perfect natural shade.
- I took one more damp rag to wipe it all down.
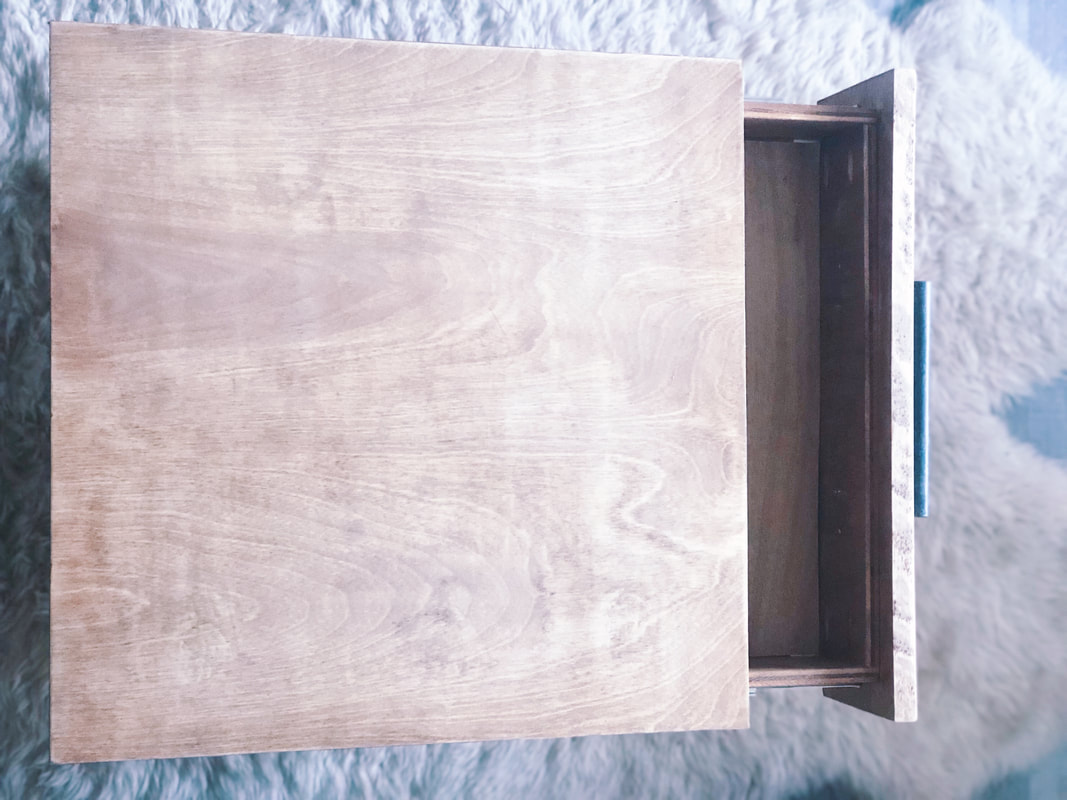
- Lastly, I applied all the hardware (handles and legs) and did a happy dance as to how awesome it turned out.
 |  |
This project wasn't easy since it was my first time doing anything like this. I learned A LOT along the way but I am so excited with how it turned out. My rustic mid-century modern look is perfect next to the new bed frame. Stay tuned for the complete bedroom remodel, I'm excited to share it with you soon. Just a few more finishing touches left.
Thanks so much for being a part of this fun journey.
Thanks so much for being a part of this fun journey.
xoxo,
Jessica
P.S. Don't miss out on bonus tips and content by subscribing to the newsletter. CLICK HERE to learn more.
Archives
October 2019
September 2019
August 2019
July 2019
June 2019
May 2019
April 2019
March 2019
January 2019
December 2018
October 2018
September 2018
July 2018
June 2018
May 2018
April 2018
March 2018
February 2018
January 2018
December 2017
Categories
All Accent Pieces Action Planner Basket Baskets Bathroom Bedroom Branch Floral Arrangements Bud Vase Candles Cherry Blossoms Curtains Cylinder Vase Decor Accents DIY Door Mat Family Flare Vase Floral Notebook Floral Water Bottle Flowers Flower Wreath Flower Wreaths Furniture Gifts Greenery Guest Room Home Home Decor Indoor Plants Jeans Living Room Mirrors Narrow Neck Vase Nightstand Outdoor Living Pastels Personal Development Productiity Rugs Seat Cushions Shelf Decor Shower Sneakers Spring Spring Decor Spring Ideas Storage Ideas Style With Time Styling Tips Sunglasses Table Lamp Throw Blanket Vase Vases
 RSS Feed
