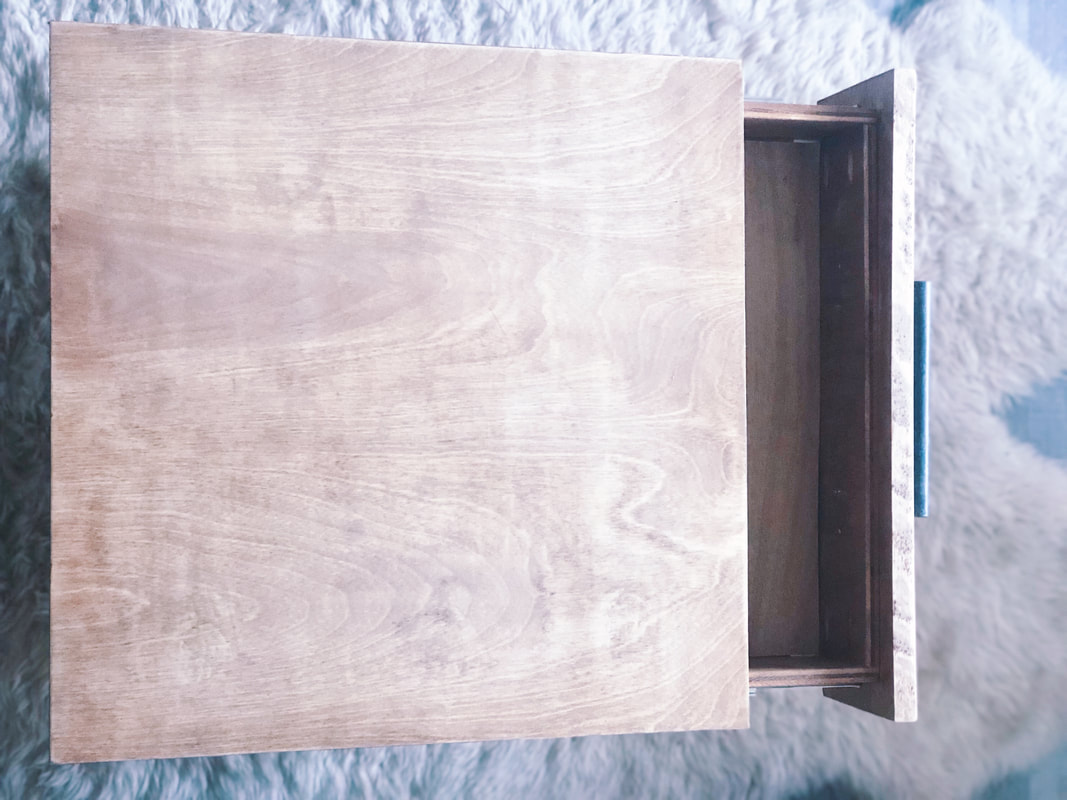
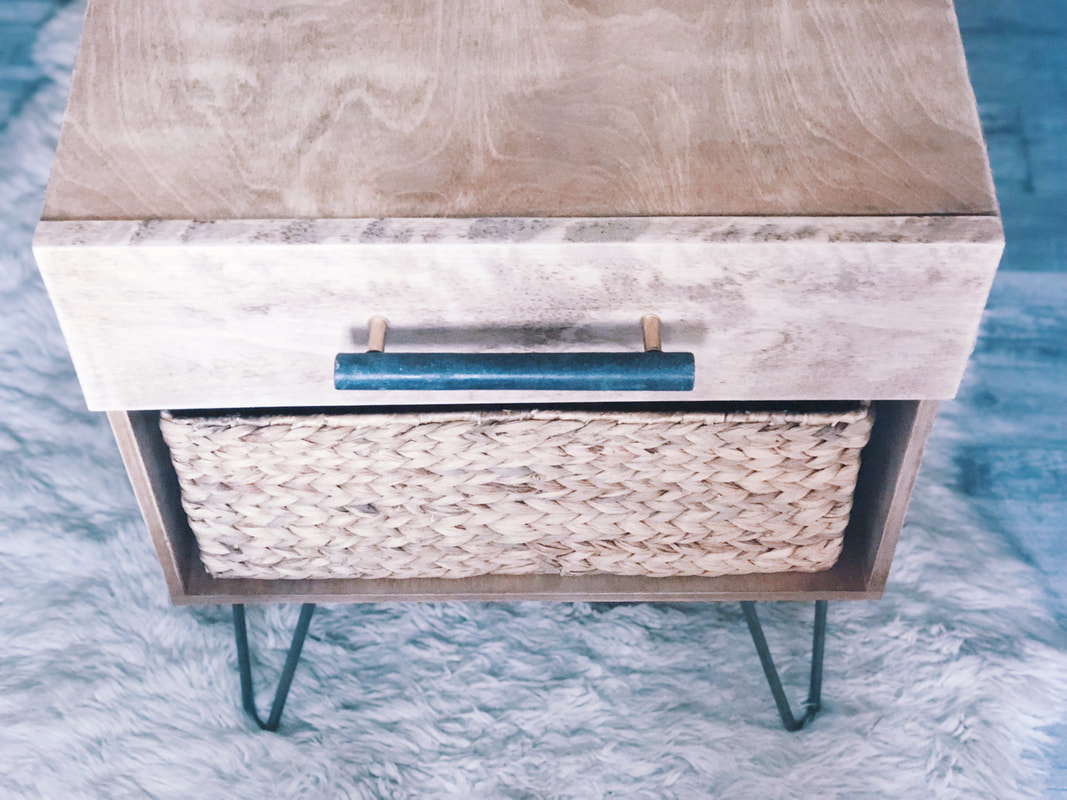
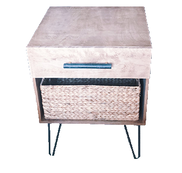
DIY Nightstands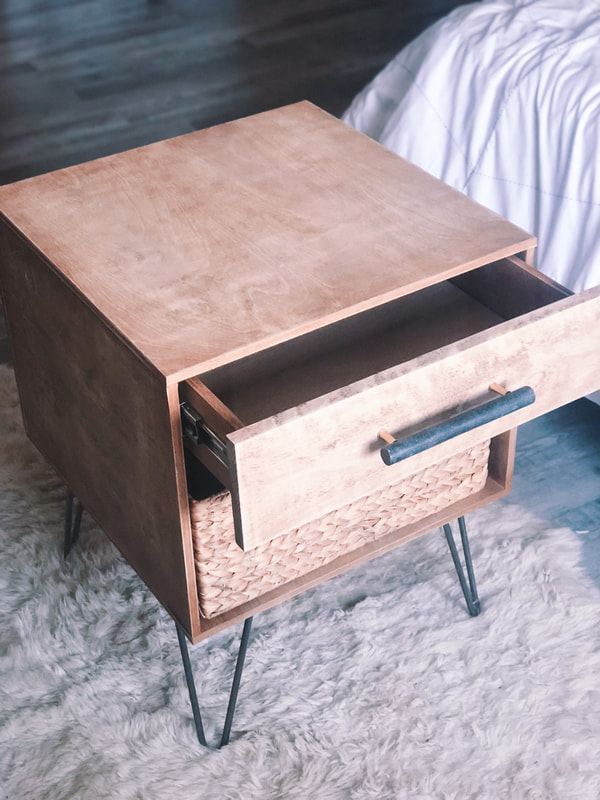
About a year and a half ago, I set out to transform my master bedroom. This was the first big room transformation I took on and my mid-century modern nightstands were the first big DIY project I took on. Yes, it was only 1 room, and only 1 project. I didn't do an entire renovation, I didn't knock down walls, but building the perfect nightstands for my husband and I to be able to fit all our things (and hide the junk) was the first step in making the room feel more practical, more calm, and more us. I originally posted about it right after the initial build, but I have learned so much since then and have also been getting lots of questions on some of the details so I thought I'd revamp this tutorial and give you the complete step by step guide. Here's what you'll need: SUPPLIES:
HARDWARE
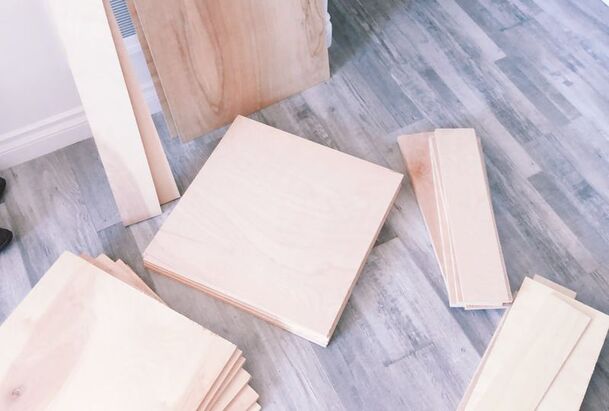
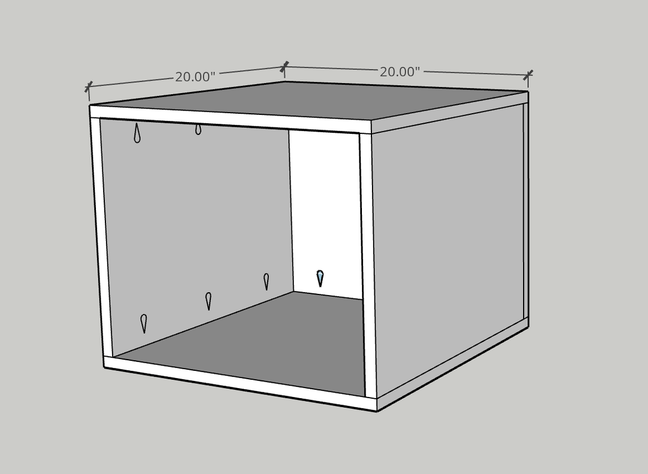
WOOD: Below is what you need for 1 nightstand with all the cuts and dimensions, double it for 2.
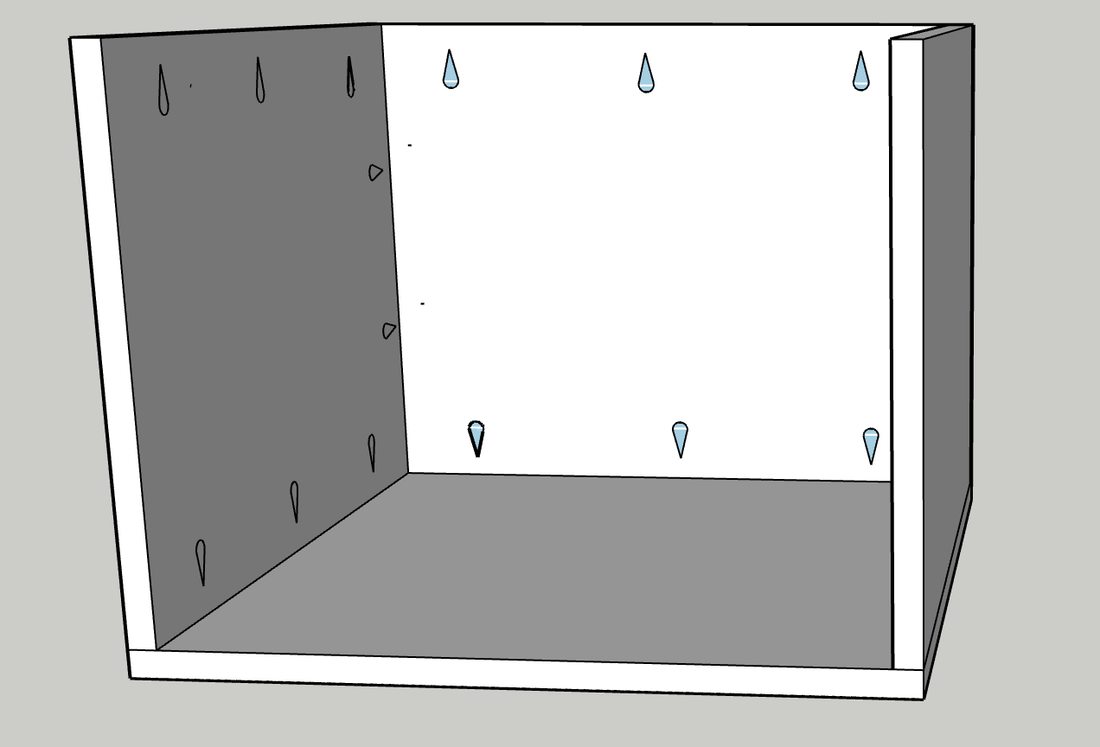
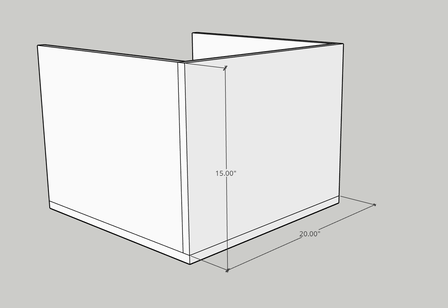
 PLANS & INSTRUCTIONS: Start with the 20" x 20" base piece. 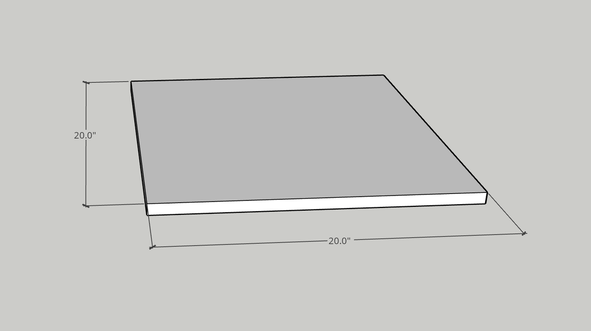 Next, utilize the pocket hole technique for creating your joins on the 15" x 19.25" boards. You will need to make pocket holes on 3 of the sides of these pieces so don't attach until all holes are drilled. For the first connection point, you will want to drill your wholes about 6.5" apart and 4.5" from the edges. 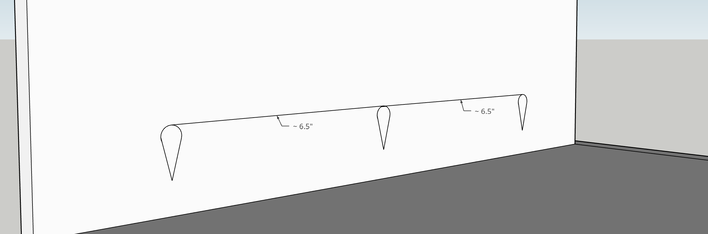 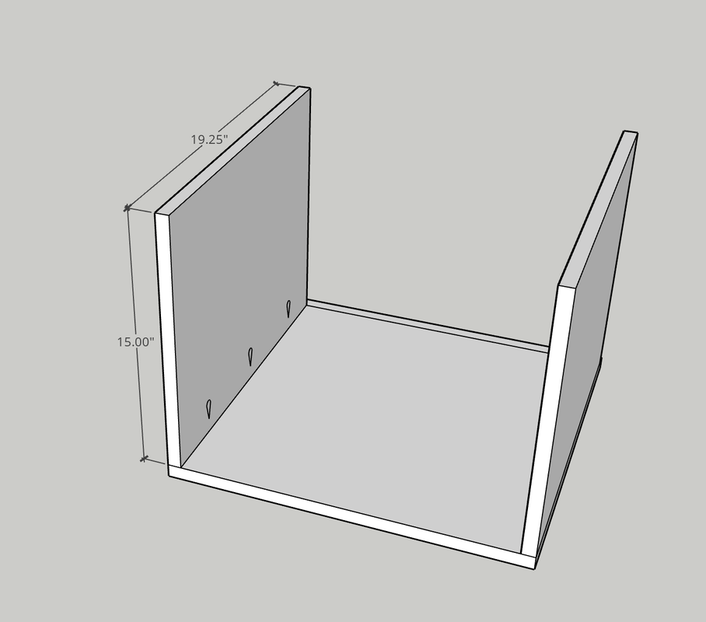  Repeat the pocket hole joineries on the back edge and upper edge to attach the beck and top of the nightstand. Keep the holes roughly a third apart.
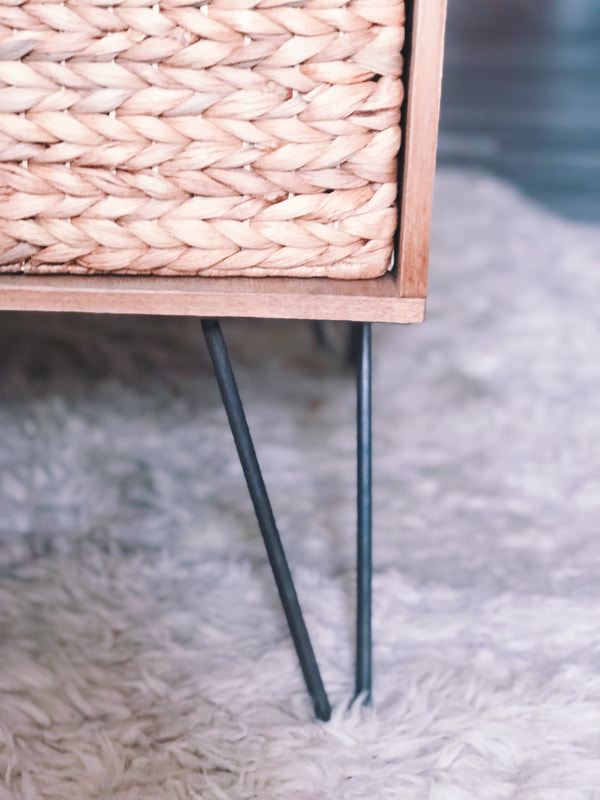
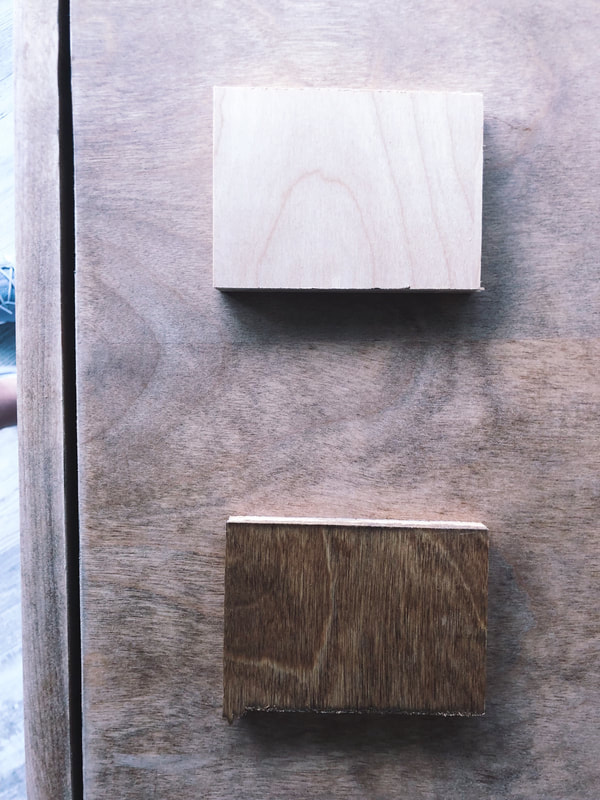
 The next step is to make the drawer. Use the 17.5" x 3" pieces and connect them utilizing pocket holes on the side pieces that are spaced 1" apart and about 1/2" from the edge of the piece. ***Don't connect the pieces just yet, we will be hammering the drawer base prior to connecting. 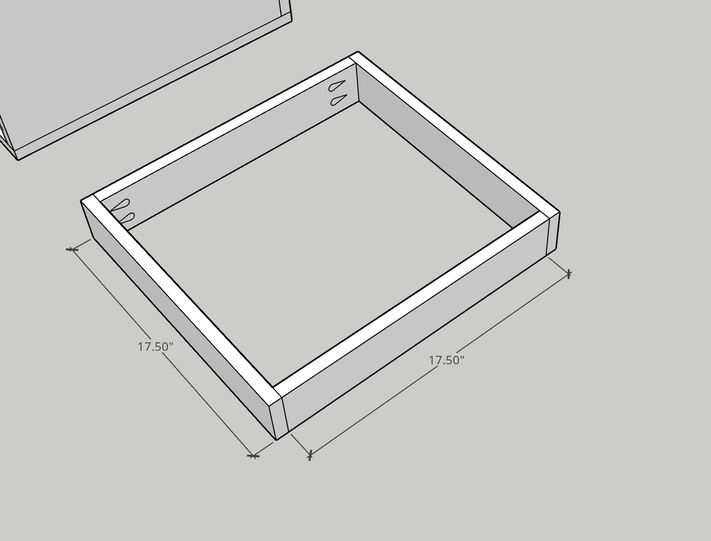 Next use the 1/4" pieces to create the drawer of your base. on the sides of the drawer, use 3-4 wire nails to connect the 17.5" pieces and on the front and back side of the drawer, use the 15.5" pieces. Once you have hammered in the nails, you can use the screws to connect the edges of the drawer at the pre-drilled pocket holes. 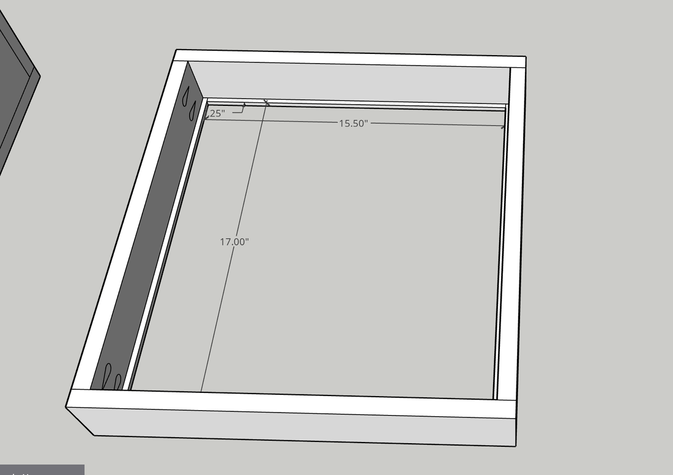 Next, wedge the 17.50" x 16" underlayment into the drawer. It should be a snug fit and rest on the ledge created by the 1/4" strips. Gravity will secure this one for you so no joineries needed! 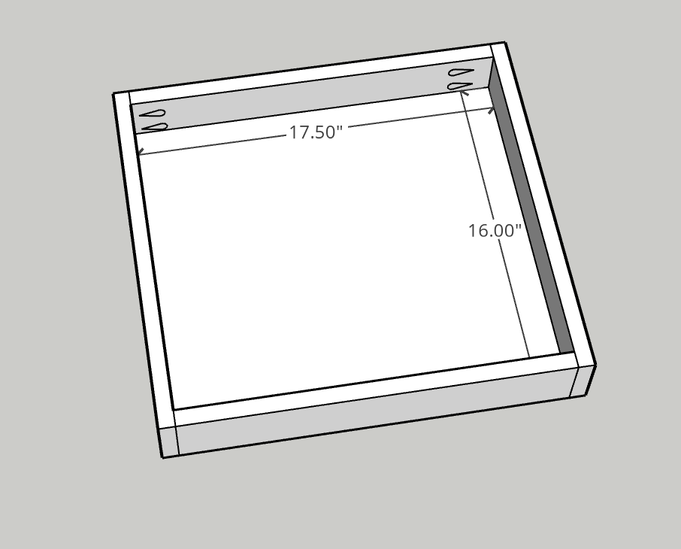 Attach the front face of the drawer to the drawer by screwing through the back side of the drawer. Screw as close to the edges as possible so you leave plenty of space to choose what ever handle in the center you would like. 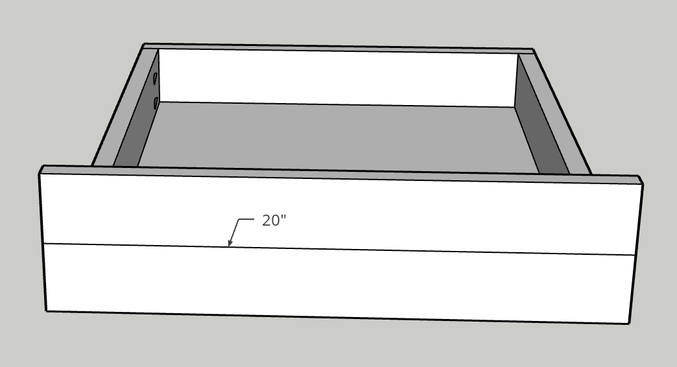 Now, it's time to put it together. Use the drawer slides installation instructions to attache the slides both to the drawer and the cabinet. I placed mine about 2" down from the top of the cabinet to the center of the slide. Once the screws are in, you can just slide the drawer into place. 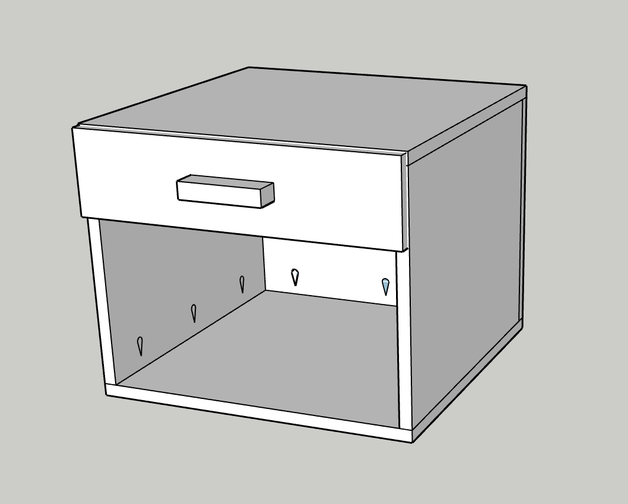 Once you have all the pieces in place you can add your finish. Use a stain or sealer to get your wood to the ideal color. I stained and sanded twice to get the color I wanted. Then attach the legs of your choice with screws at the base and you are finished!
I would say this DIY is intermediate to advanced. I did it as a total beginner though and with some persistence, it came together and turned out fantastically. They are still standing strong in our room 1.5 years later! I love building with all of you in this community and seeing you create things that make your home and work space feel fresh, fun, and YOU! Use the hashtag #beyondtheclock to share how you are making your home (and life) dreams happen today by taking action (no matter how small) and make sure to click here so you never miss a post or giveaway! (I promise, no spam and only the good stuff). Thanks for being here and following along! xoxo, |
 |  |
2 Comments
3/17/2019 0 Comments
Style With Time: Bedroom
How to renovate a room on a budget, including best time of year to buy key furniture and decor pieces
First of all, I just have to say thank you for all the love and kind words about the master bedroom refresh reveal. It feels amazing to know that all the patience and decisions that went into it was worthwhile. (In case you missed it, here is the full reveal.)
I also got a lot of questions about the process of refreshing a room overtime instead of all at once. A few of you asked:
- Why did it take you 3 years?
- Didn’t the feeling of not being complete drive you nuts?
- How did you keep it top of mind without forgetting what pieces you wanted to add?
- What if something you wanted went out of stock?
I wanted to spend some time sharing why the room took time and also how to help you do the same!
The reason it took so long is really financial. It’s definitely not inexpensive to buy new furniture and buying it all at once makes it even harder.
Now that being said, what I learned from the process is that the slow transformation made it so much more practical for us. Instead of getting all new furniture, there were pieces that happened to cross our paths over the course of time that were perfect fits for the space but nothing we would have considered previously.
Some were reorganized from other spaces in our house, some were new vendors we discovered and loved, and some were family heirlooms that we blew the dust off of and gave new life. In this way we were able to save money and adjust the design to fit where we were and are in life.
I remember when I originally did my office makeover a few years ago, I bought a bunch of pieces all at once and then a couple months later I realized it wasn’t exactly what I had wanted.
With my bedroom it has been a slow but deeply personal evolution ensuring that the space transforms with us rather than a splash in the pan makeover.
Not only is the function of the space something that has been a great realization but also the deals you find by timing things up. There are times of the year where you can find retailers giving huge discounts on pricey purchases that can keep your budget on track and give you more bang for your buck in the long run.
So to help you guys style your next room overtime, I’ve put together my list of where and when to get some of the best deals for a bedroom (CLICK HERE to download).. It includes the template I like to use to track my wish list items (of course, I use Pinterest for that too). Last year I did similar blog posts and checklists for the living room and outdoor patio.
Now this year I’m starting on another room in the house to style with time. The living room! I’m excited about this transformation and although it will be slow and steady just like the master, I’ll be sharing my design inspiration for the space in a few weeks so stay tuned!
What’s a room in your house that has been needing some love and attention? Join me on the style with time makeover. As you do your room, I’ll work on mine and we can enjoy the fun and frustration together!
Xoxo,
Jessica
xoxo,
Jessica
P.S. Don't miss out on bonus tips and content by subscribing to the newsletter. CLICK HERE to learn more.
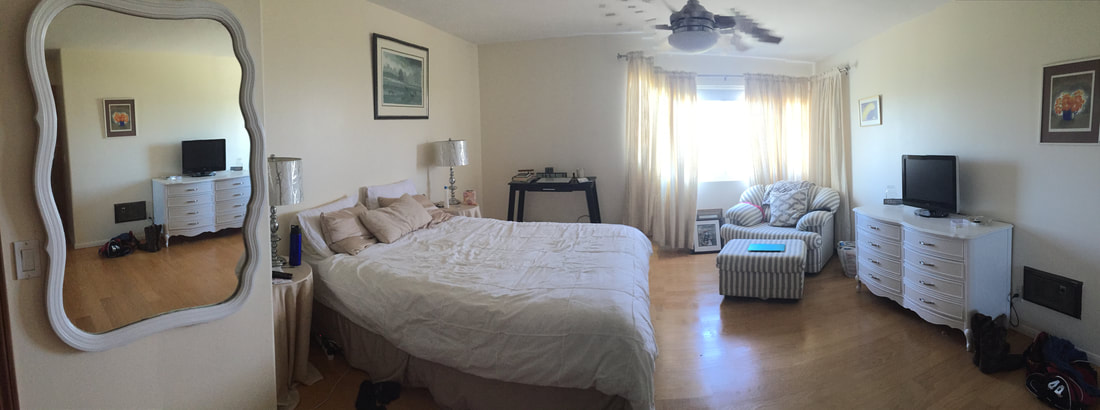
before
after
 |  |
 |  |
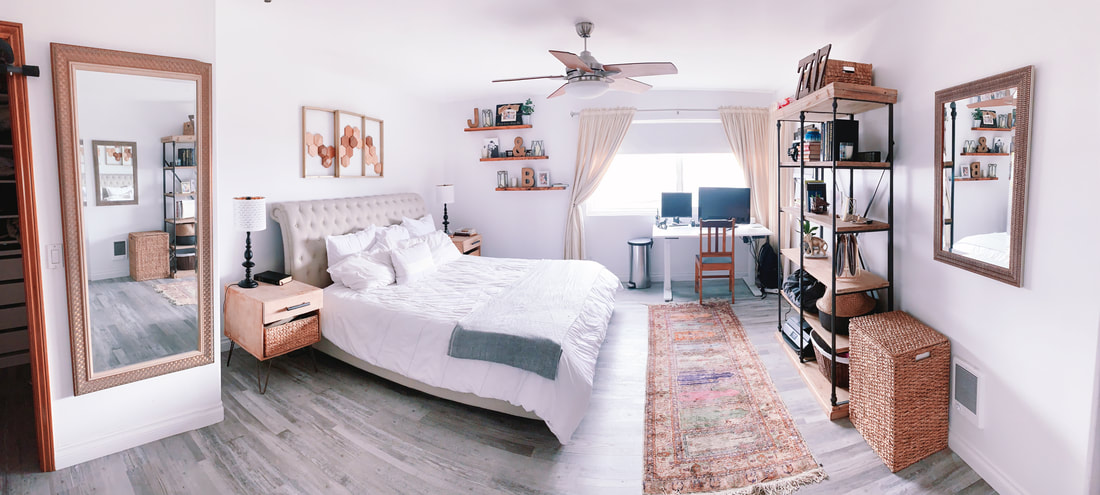
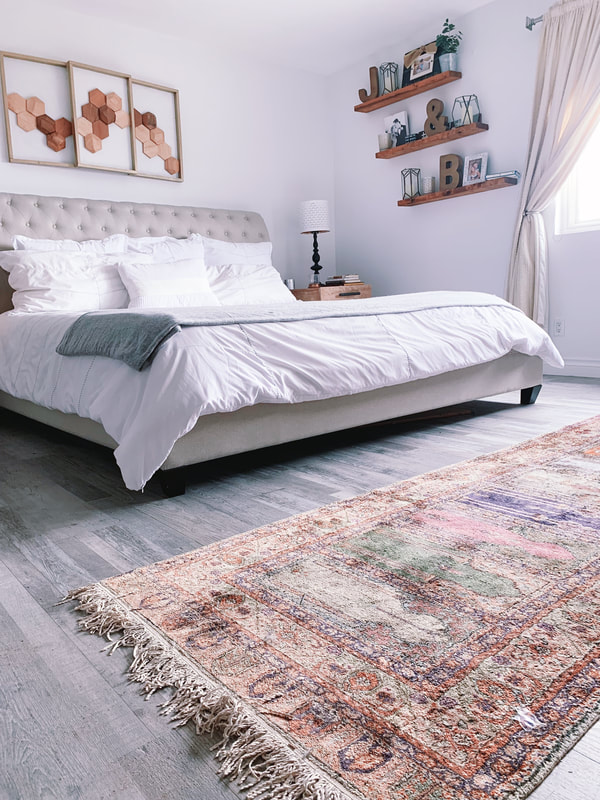
This post has honestly been a long time coming! And the reason for that is the foundational mission of Beyond the Clock which is to style with time. I have had a vision for our master bedroom for probably almost 3 years. It took savings and slowly moving things around, upgrading furniture pieces and styling with the perfect details that I gathered throughout the years.
I know a lot of you followed along the way as I put these together and now is the big reveal of the full master bedroom transformation!
The thing is, as much as we would all love to click our heels together and transform a room instantly, one of the best things about styling a room is seeing how things come together. It helps both on a budget perspective, but also as an organic way for things to fit together and evolve as your day to day changes as well.
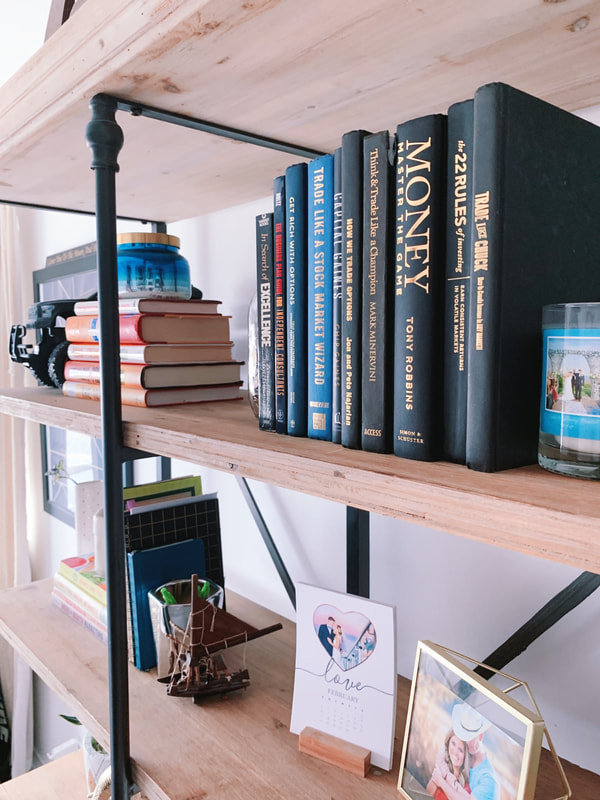
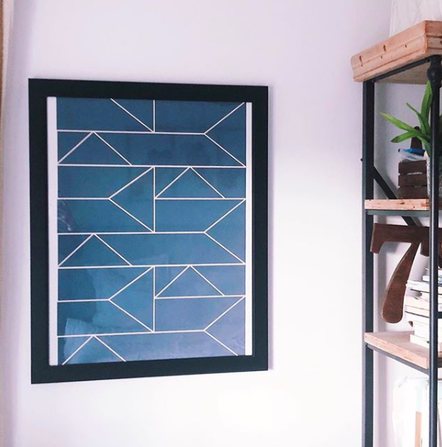
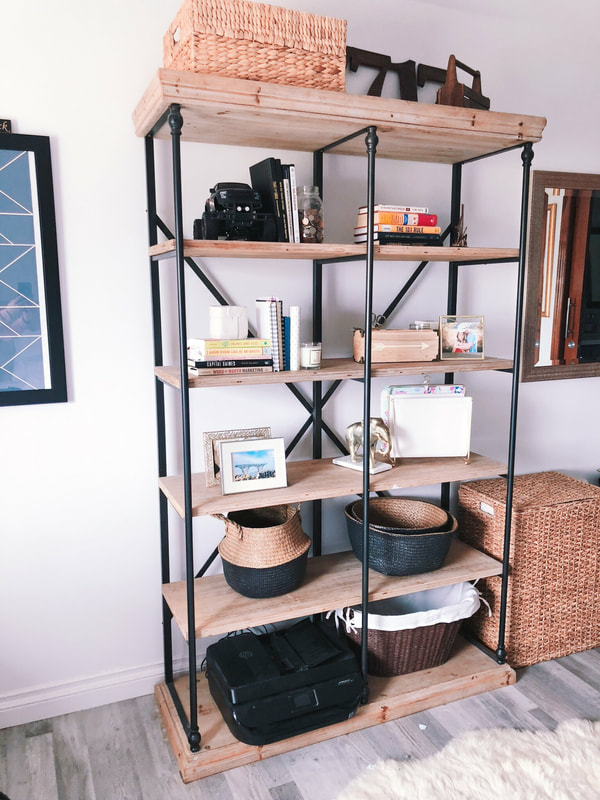
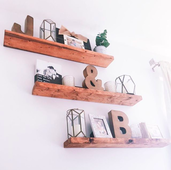
When I first began getting inspiration for the room, we had an office. Shortly into starting the room, we changed that into a guest room and had to find a place for some of the office furniture. With a bit of rearranging, we brought the bookshelf into our room since we don’t really watch TV there and then moved the TV stand to the living room. It ended up being a great way to refresh all 3 rooms and make good use of the space for how we were using it.
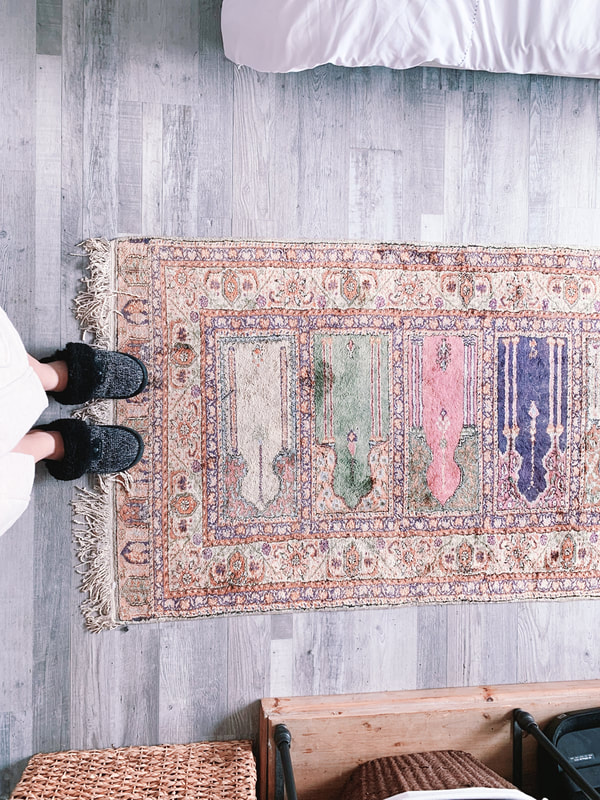
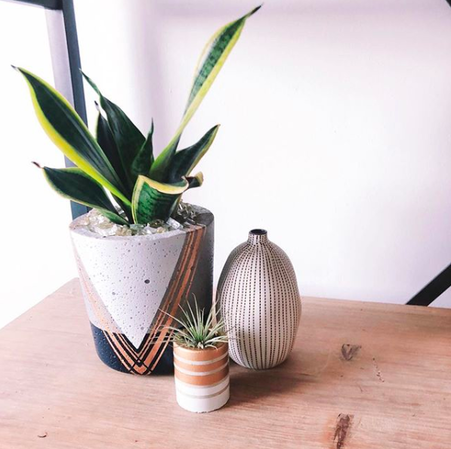
So here is the big reveal, all items and DIY upgraded projects linked. My curtains and rug are family heirlooms but I linked similar ones for you guys.
Thank you for stopping by the blog today! Hope you all have a wonderful weekend. Make sure to CLICK HERE and subscribe so you never miss a post or giveaway!
UPDATED: Style with Time - Bedroom, the complete guide for styling a room overtime to fit your style and budget.
I know a lot of you followed along the way as I put these together and now is the big reveal of the full master bedroom transformation!
The thing is, as much as we would all love to click our heels together and transform a room instantly, one of the best things about styling a room is seeing how things come together. It helps both on a budget perspective, but also as an organic way for things to fit together and evolve as your day to day changes as well.
When I first began getting inspiration for the room, we had an office. Shortly into starting the room, we changed that into a guest room and had to find a place for some of the office furniture. With a bit of rearranging, we brought the bookshelf into our room since we don’t really watch TV there and then moved the TV stand to the living room. It ended up being a great way to refresh all 3 rooms and make good use of the space for how we were using it.
So here is the big reveal, all items and DIY upgraded projects linked. My curtains and rug are family heirlooms but I linked similar ones for you guys.
Thank you for stopping by the blog today! Hope you all have a wonderful weekend. Make sure to CLICK HERE and subscribe so you never miss a post or giveaway!
UPDATED: Style with Time - Bedroom, the complete guide for styling a room overtime to fit your style and budget.
     |      |      |      |
P.S. Don't miss out on bonus tips and content by subscribing to the newsletter. CLICK HERE to learn more.
6/12/2018 0 Comments
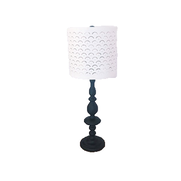
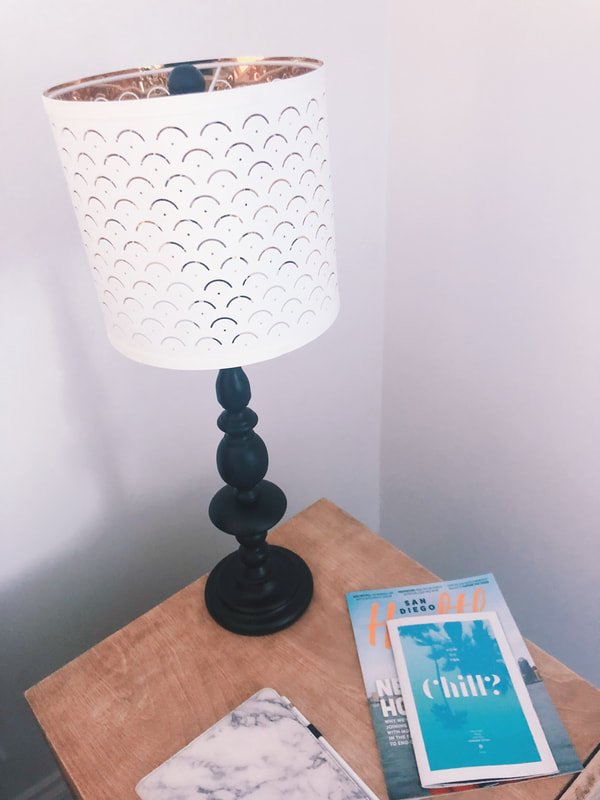
DIY Table Lamp Upgrade
This post contains affiliate links. See affiliate disclaimer here.

 | 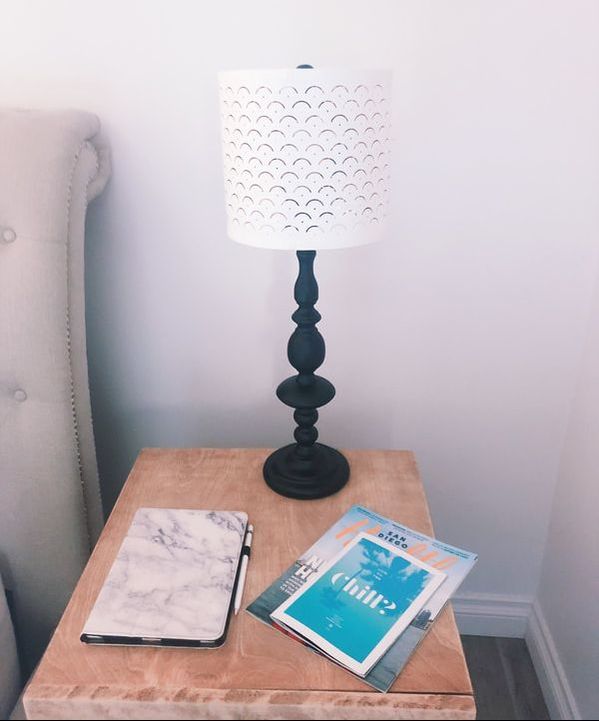 |
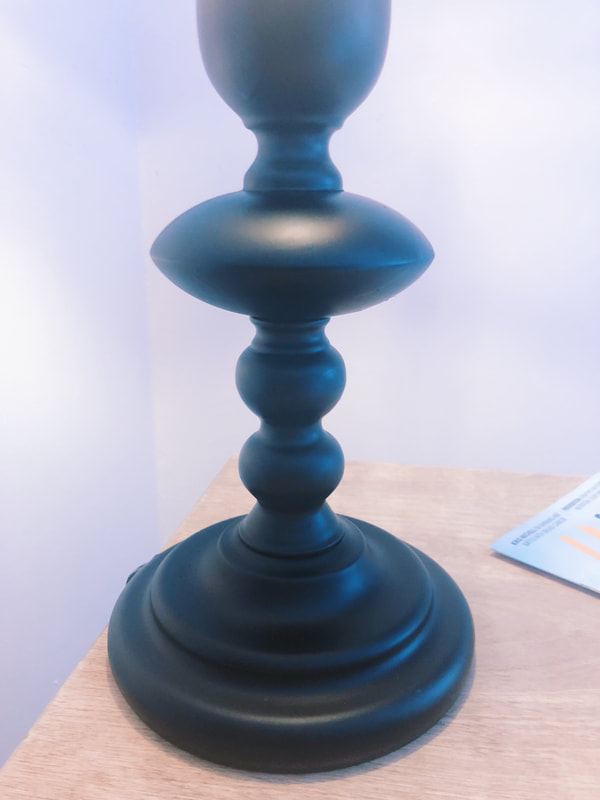
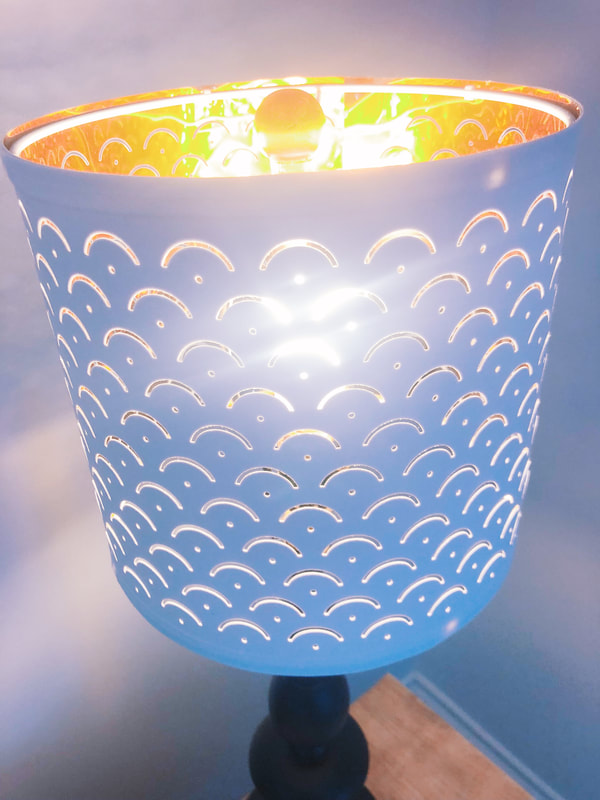

For those of you who have been following along my master bedroom upgrade, you know that I've been looking for creative ways to refresh the space (see the DIY night stands here). Just like with the night stands, I had been looking for a while to find some lamps that combined the industrial and airy modern look to go with the rest of the room. Sadly, once again I was coming up either empty or looking to spend $350 per lamp.
The pair that I fell in love with was on sale over Easter weekend and I was ready to go on a big purchase when my dad talked some sense into me and said, "you DIY tons of things anyways, why not just DIY to upgrade the lamps you already have". I started brainstorming immediately that if I found the perfect shade, I could repaint the stand and add a contraption so that the switch was much easier to use.
That's what led to this project and I have to say it was super quick and easy to do and cost less than $50. See the step by step below and check out the video tutorial here.
Supplies
- Black Spray Paint (if you haven't downloaded the Michael's app on your phone, I highly recommend it, I saved 50% on the spray paint with a coupon scanned right from my phone.)
- Lamp Shade x 2
- Extension Cable
- Command Strips
Stand
- Prep your area to avoid spray paint going everywhere. I used large black trash bags and painters tape.
- Take a wet rag and dust off/clean the surface of the stand
- Tape off areas such as the light socket and cord to avoid painting unwanted areas.
- Spray even coat onto stand, rotating gradually.
- Use a small paint brush to touch up any drips or smudges and follow up those areas with another even spray.
- Let dry for about 30 minutes and give a second coat following steps 4 and 5 from above.
Shade and Electrical
- Follow installation of shades as per Ikea directions.
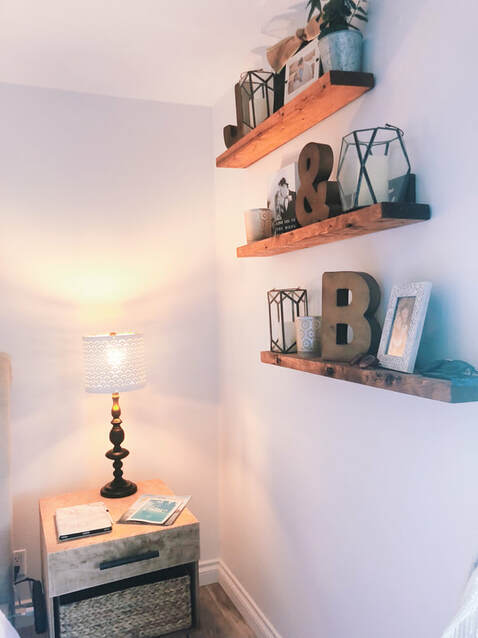
- The original switch was a socket turn knob that was hard to reach and clunky to turn. When I had originally looked for new lamps, I was wanting a base or in line switch, so during the refresh, I came up with a way to make the switch convenient with a single switch extension cable. I installed it to the side of the nightstand closest to the bed so it was hidden, used command strips to secure it and now it is an easy switch within arms reach when I'm sleepy and ready for bed.
If you have any lamps needing a refresh, send a picture to [email protected] and I'll help source the perfect upgrades. Have a great Tuesday!
xoxo,
Jessica
Archives
October 2019
September 2019
August 2019
July 2019
June 2019
May 2019
April 2019
March 2019
January 2019
December 2018
October 2018
September 2018
July 2018
June 2018
May 2018
April 2018
March 2018
February 2018
January 2018
December 2017
Categories
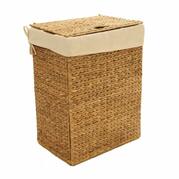
All Accent Pieces Action Planner Basket Baskets Bathroom Bedroom Branch Floral Arrangements Bud Vase Candles Cherry Blossoms Curtains Cylinder Vase Decor Accents DIY Door Mat Family Flare Vase Floral Notebook Floral Water Bottle Flowers Flower Wreath Flower Wreaths Furniture Gifts Greenery Guest Room Home Home Decor Indoor Plants Jeans Living Room Mirrors Narrow Neck Vase Nightstand Outdoor Living Pastels Personal Development Productiity Rugs Seat Cushions Shelf Decor Shower Sneakers Spring Spring Decor Spring Ideas Storage Ideas Style With Time Styling Tips Sunglasses Table Lamp Throw Blanket Vase Vases
 RSS Feed
