|
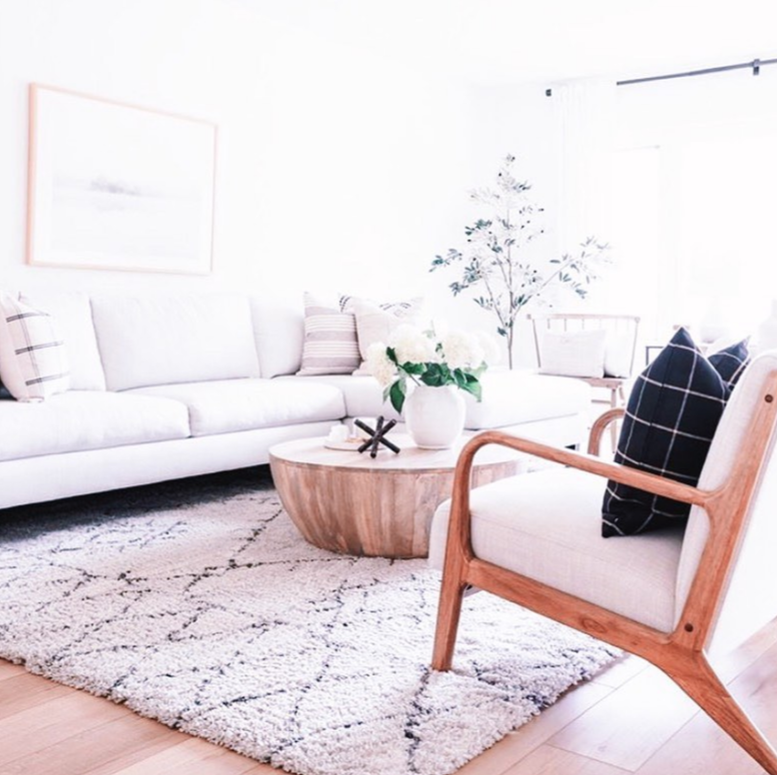
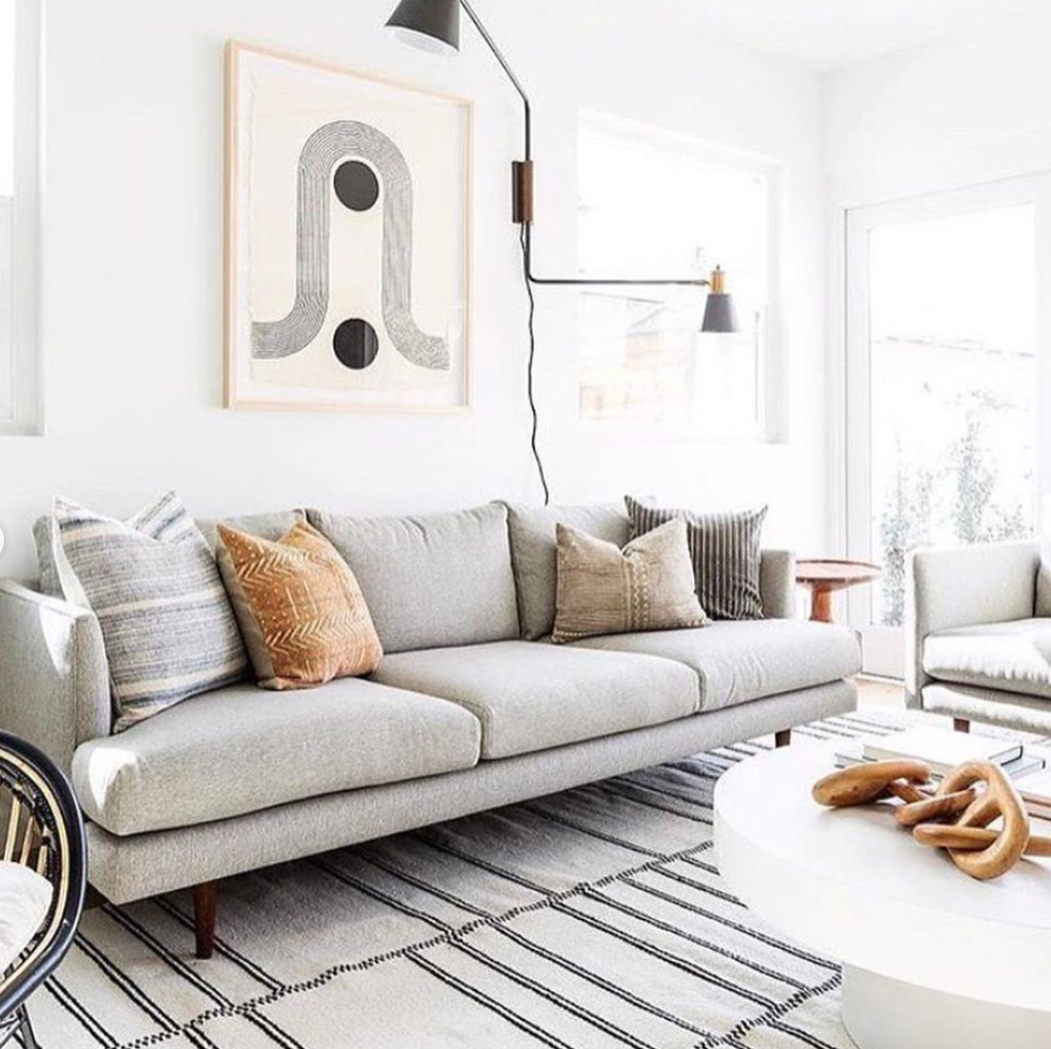
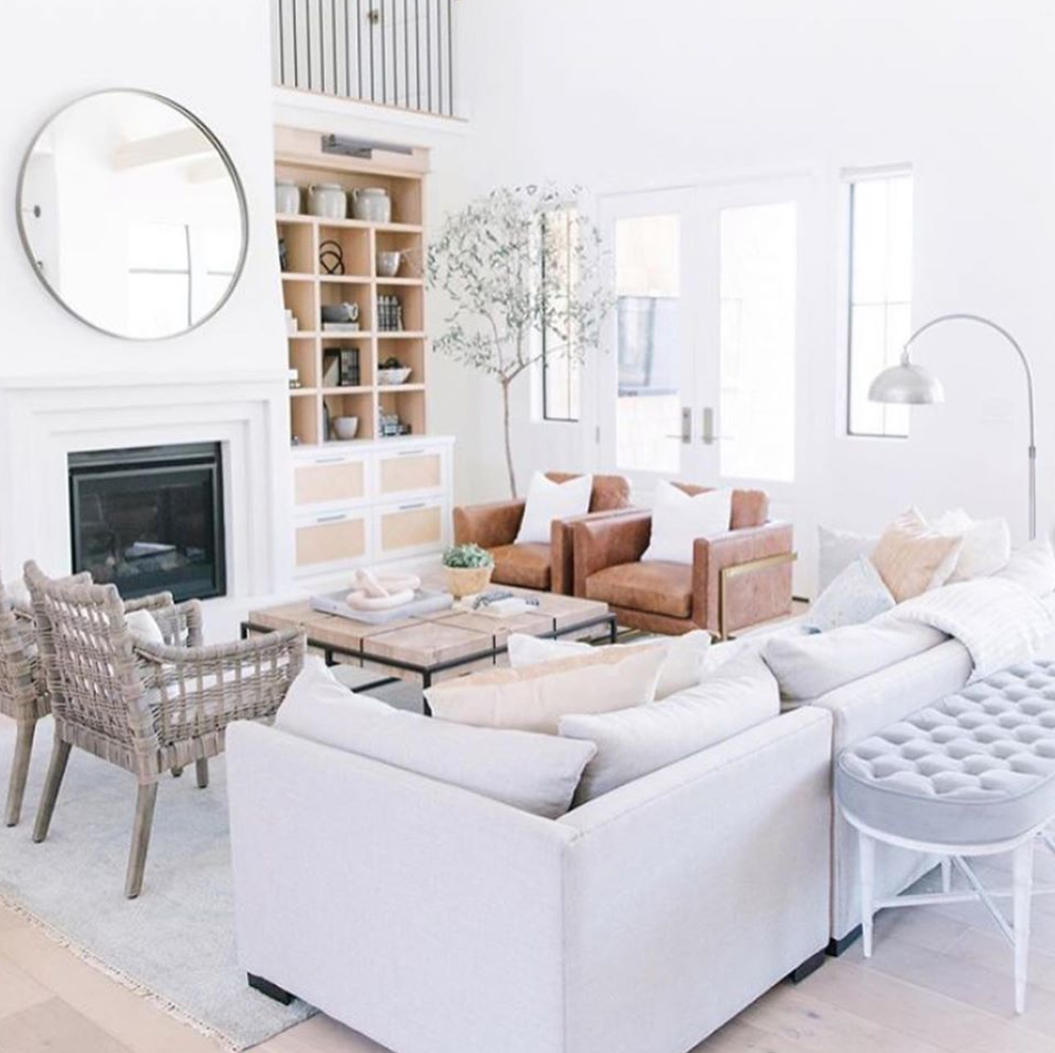
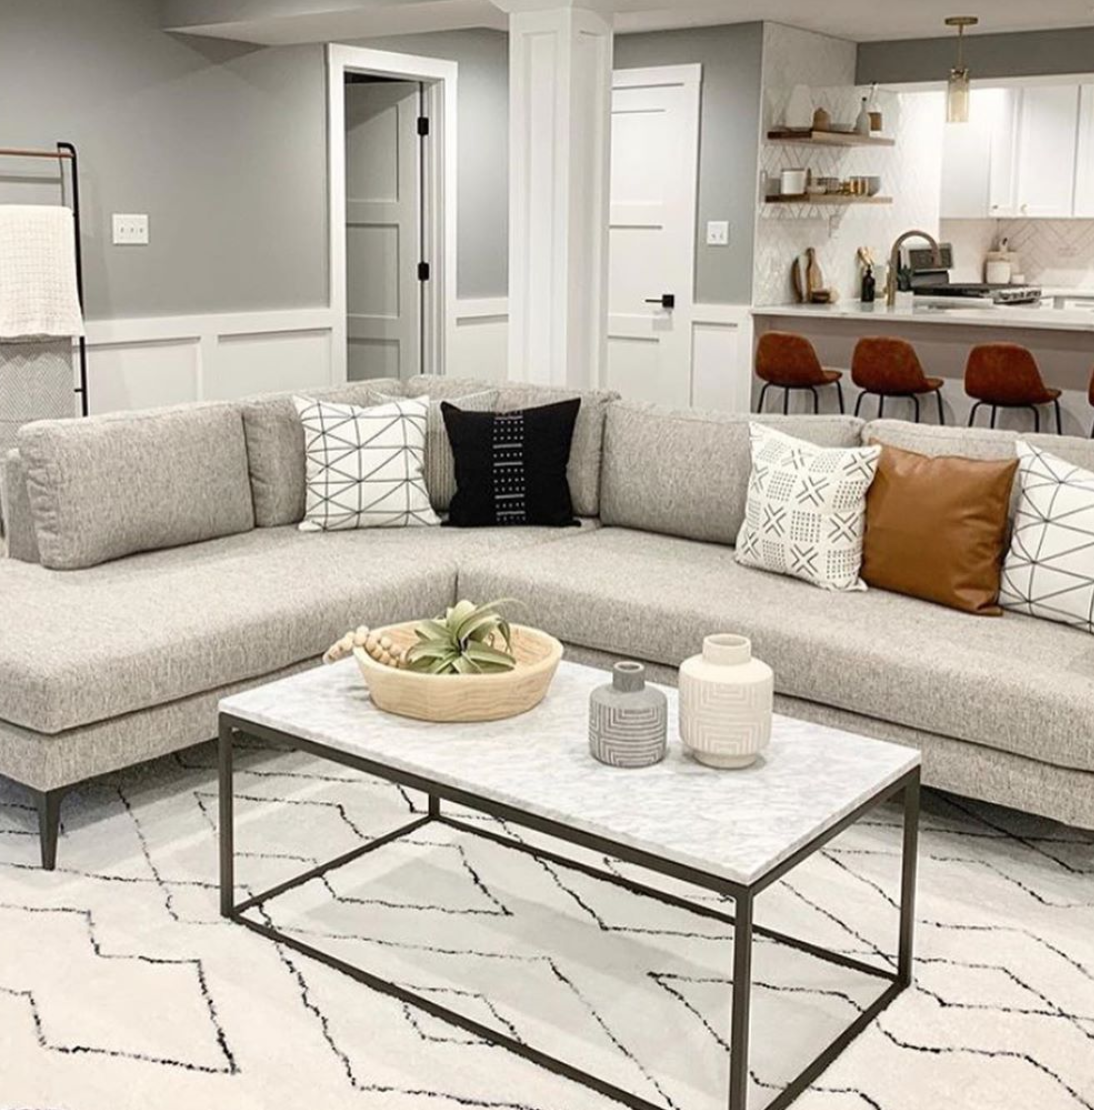
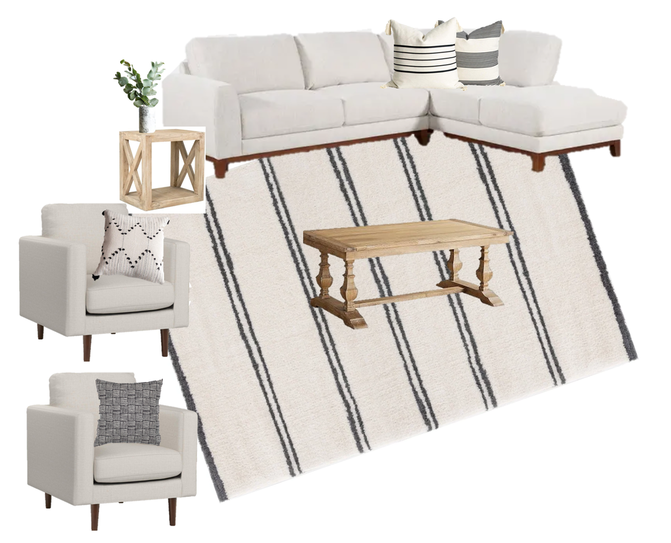
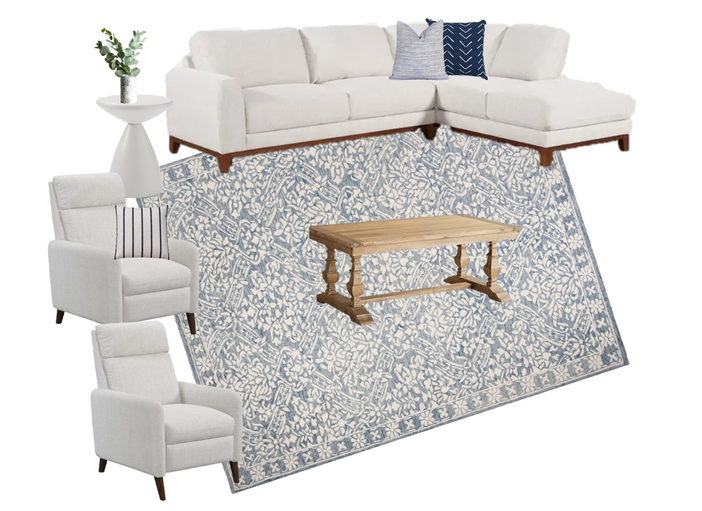
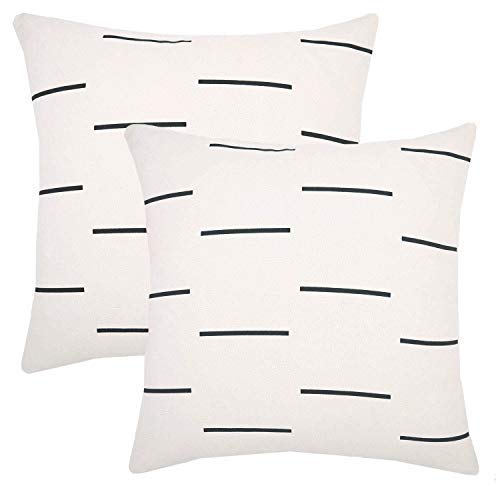
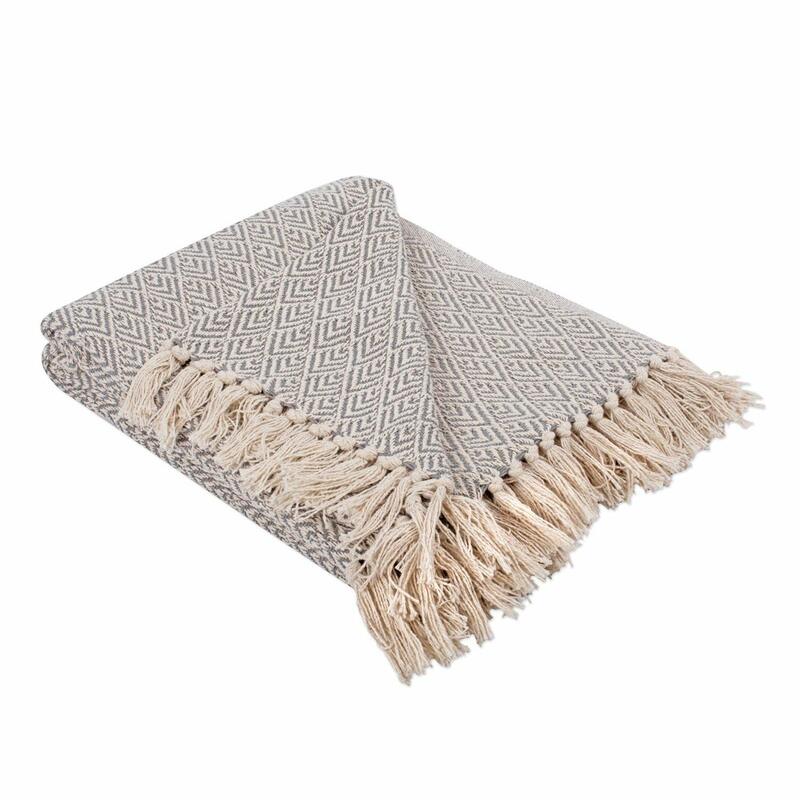
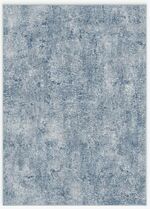
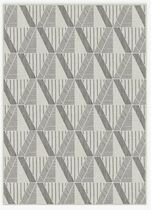
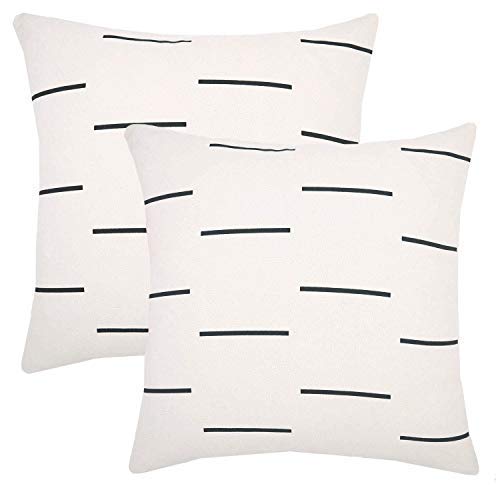
10/27/2019 3 Comments Living Room Update PlansIt's long overdue since our living room needed an update, but like with many bigger projects, you have to be patient with time and savings before your ideas come to life! I've been thinking about this room for over a year, I even wrote a couple blog posts on planning a living room refresh and picking the perfect rug for your room last year in preparation for when I was finally able to transform this space. Currently, the best way to do describe the room is "hodge podge". Our couches and tables are from my parents and grandparents and they don't exactly match. Our rug is from my old office before we made that into a bedroom and our TV stand is my first every DIY project that although may be cool, doesn't fit in with any of the styles or furnishings in our home now. With Black Friday deals around the corner, I've put together some ideas for how I want this room to come together. Since I live right by the water, I wanted it to have a coastal feel but in a very classic and minimalistic way. I also have a few family pieces that I want to incorporate into the overall design, like the coffee table. I love the combinations of neutrals and wood. Scrolling through instagram and Pinterest is always a great way to find inspiration for how to combine colors and textures. Here are a few I love and helped guide my design in the planning process. THE PLAN I put together a couple concepts and am still trying to decide if I should keep it all neutral or add some blue. What do you guys think? Option 1 or Option 2? OPTION 1 OPTION 2 Let me know which one you prefer in the comments below! And be sure to follow along in stories as I get all the pieces in and make this space feel like home. xoxo, |
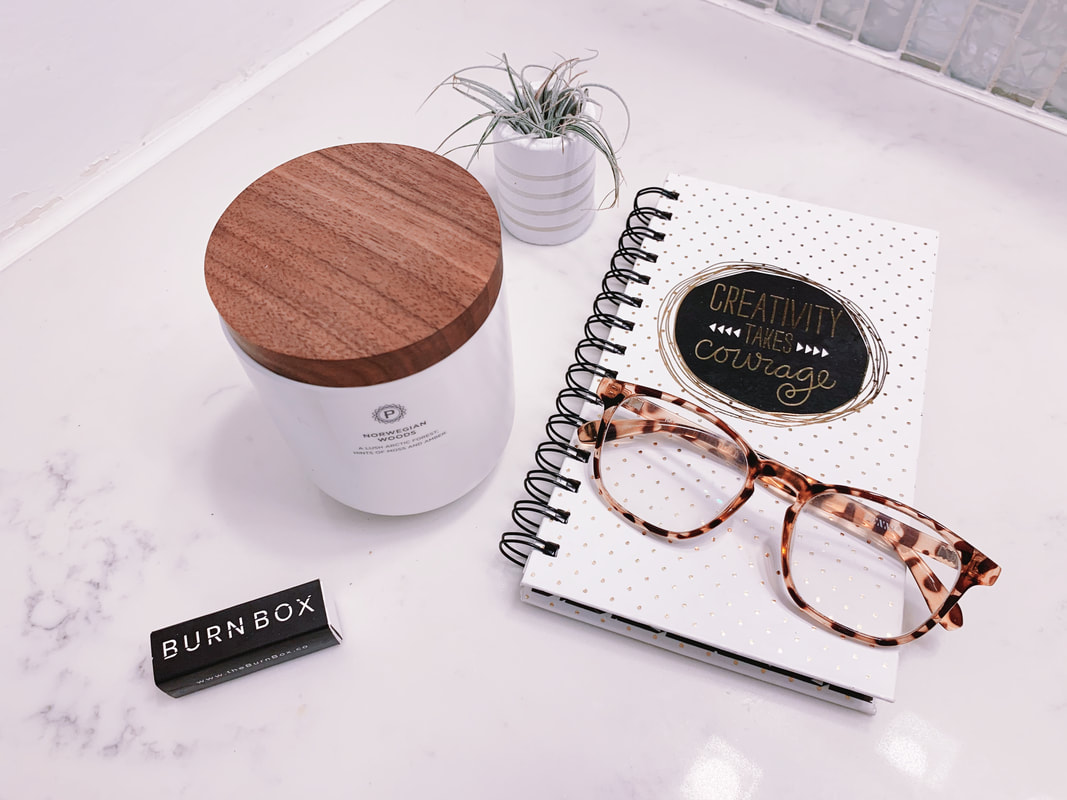
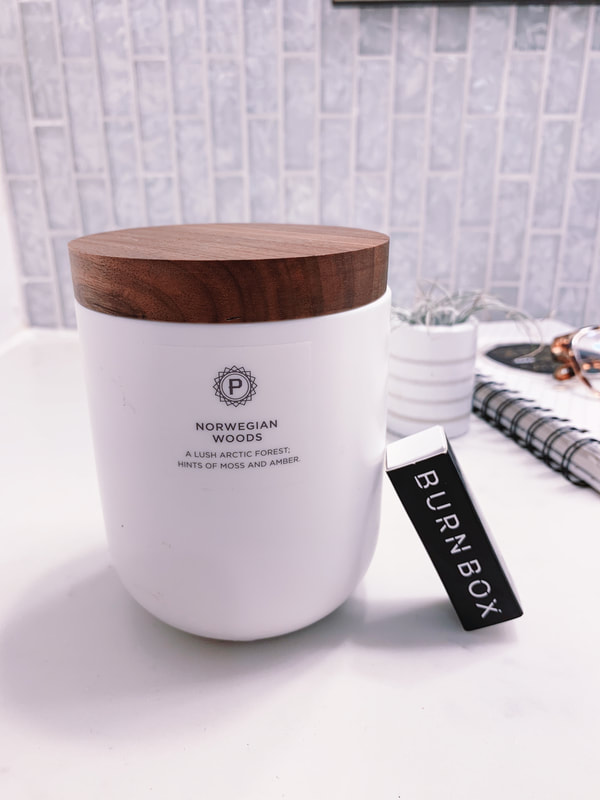
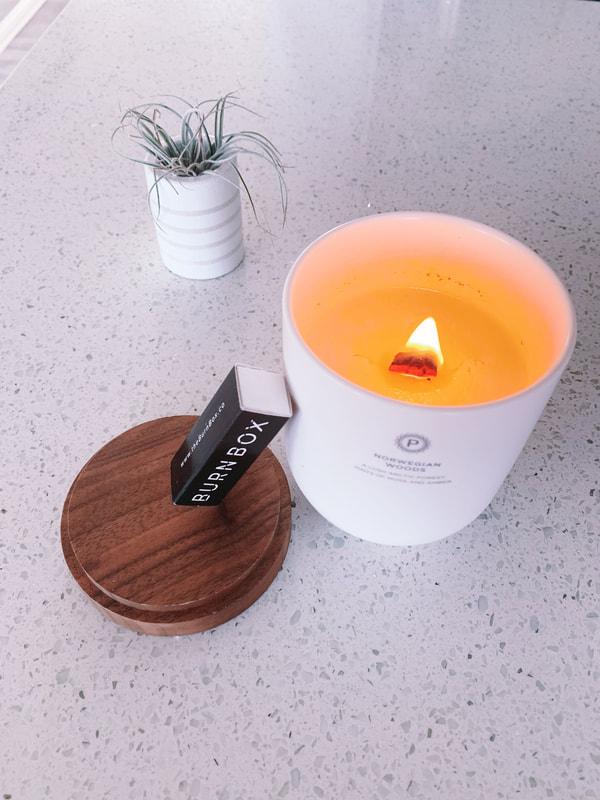
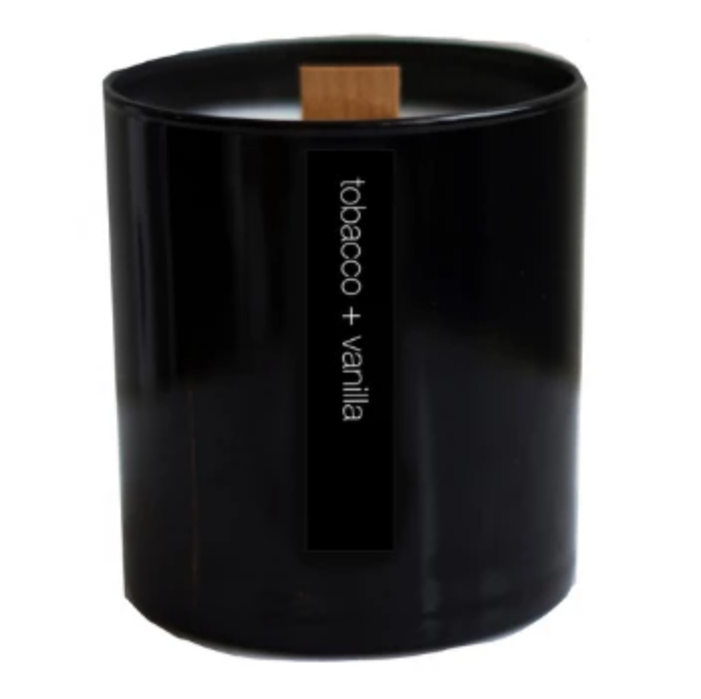
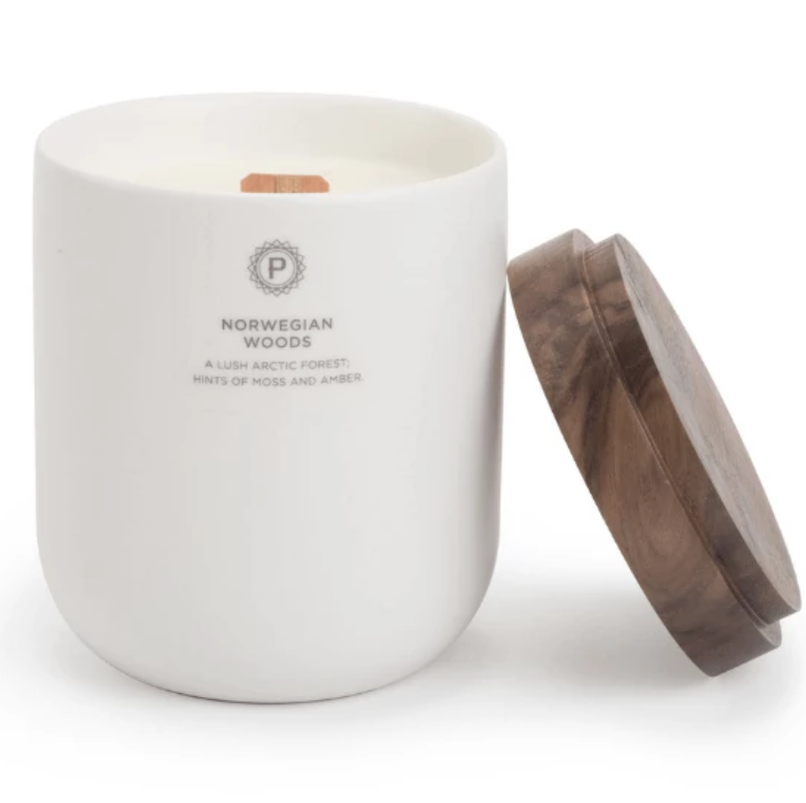
| Craft + Foster Orchid and Amber Vancouver Candle Company Silentium | Diptyque FEU DE BOIS Sable & Co Tabacco + Vanilla | Penrose Candles : Norwegian Woods DEHV Woodland | Rituals Wild Fig Vancouver Candle Company Ortus |
Behind the Scenes of Burn Box with Kristana
What led you to start Burn Box?
I actually tried making my own candles and failed miserably! After spending multiple hours trying to make scented candles and ruining multiple all clad pans – I only produced 2 small candles that didn’t even smell when I lit them. At that point I realized it is best to leave it to the professionals.
What is the best feedback you have received from a customer?
We are always checking in with our customers and love getting feedback. Probably the best feedback was from our customer Ryan Kulig, he recommended we also sell travel size candles (originally we only carried full size). We took his recommendation and ran with it!
Where is your favorite place to put/burn candles?
Hotel room when I am traveling…I am telling you it is a game changer. Try it!! You are already out of your element and probably off your daily routine. You are sleeping in a different bed than usual meaning you will either sleep well or not. When you come back to your hotel room and light your travel candle, it will give you the vibe you never knew you needed.
Which one is your favorite so far?
Jessica….that is too tough of a question. I am realllyyyy happy about the designers we partner with. I am always looking for designers with high quality, sophisticated and stylish candles. Our goal is to know about the best upcoming designers before Anthro & Nordstrom does.
9/15/2019 0 Comments
DIY Tile Door Mat for Under $15
How to give your front door a high-end designer look
There are thousands of different door mats out there and even customizable ones from Etsy, but even after searching for a long time, I wasn't able to find one that I loved and really stood out as unique and high-end without spending a fortune.
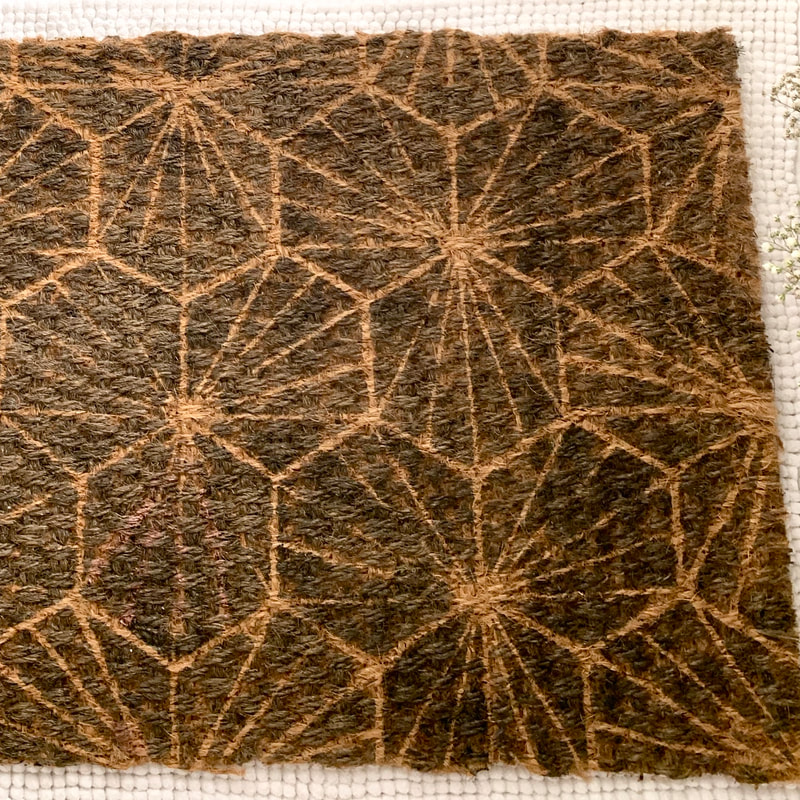
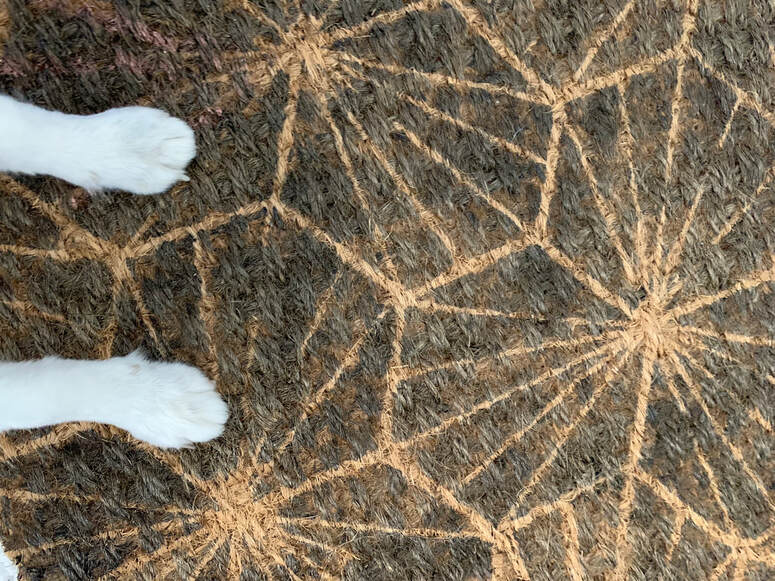
I have seen a lot of people do painted tiles in their home lately, so I thought I'd give it a try on my front door mat and I couldn't be more excited about how it turned out. I love the pattern and since I don't have tile in my home to paint or a remodel on the horizon, it was an easy and affordable way to add that high-end look without spending a fortune (for less than $15 actually)!
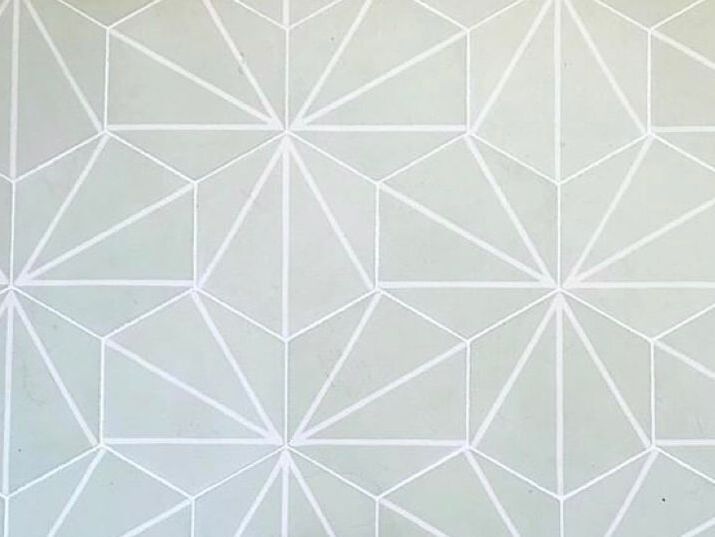
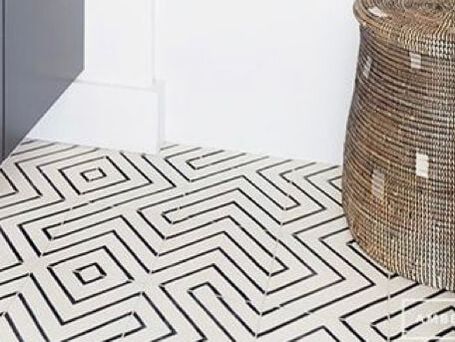
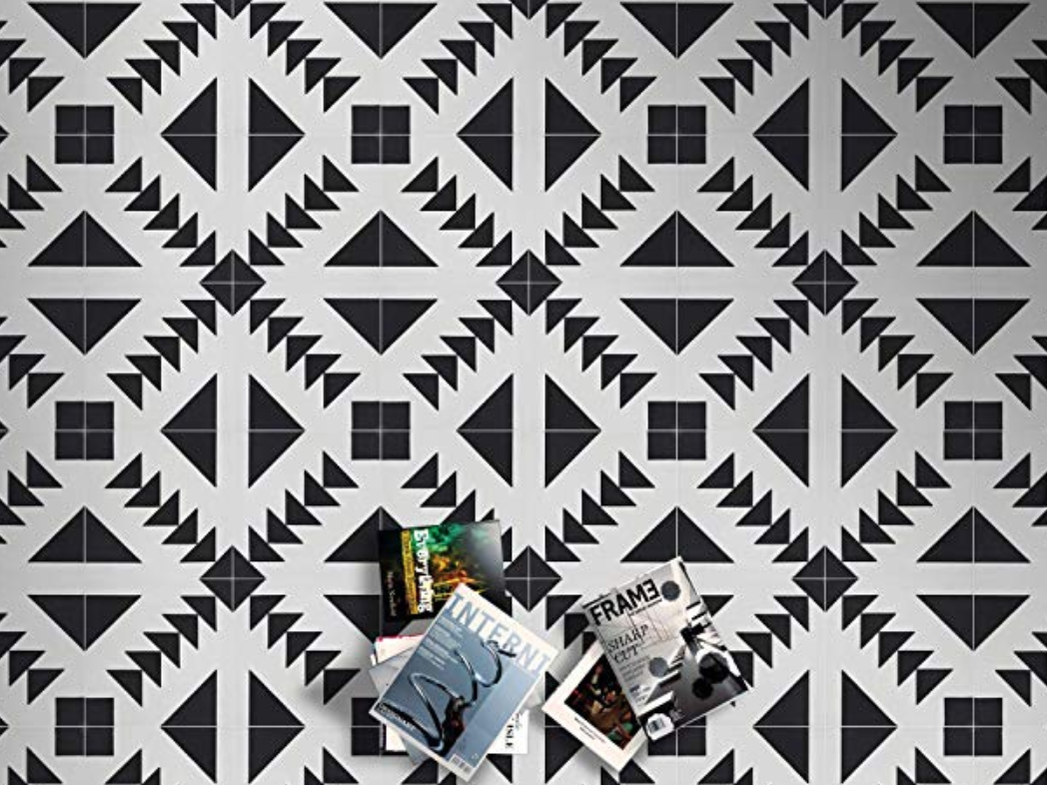
You can do this one too! Not only is it affordable, but it's super easy to do and takes less than an afternoon (once you finally pick your tape design) That part actually took me the longest. I just didn't know which one I wanted to commit to! Here were some of the contenders for layout.
I ended up going with option 4, but there are so many great tile designs that are geometric and you can use tape to create or you could try a stencil for something with more curves. The options are also endless in terms of colors you can use to completely customize the mat to your space. Whichever avenue you choose, here is the complete breakdown so you can make your own designer tile door mat.
SUPPLIES:
- Door mat (super affordable option from Target and I used this one I had from Ikea)
- Rustoleum Indoor/Outdoor Ultra Cover Paint (I used flat black) I had tons of leftover paint so a smaller option would work really well too.
- 1/4 inch tape
- Sponge (I used an extra makeup sponge I had on hand and it worked really well)

INSTRUCTIONS:
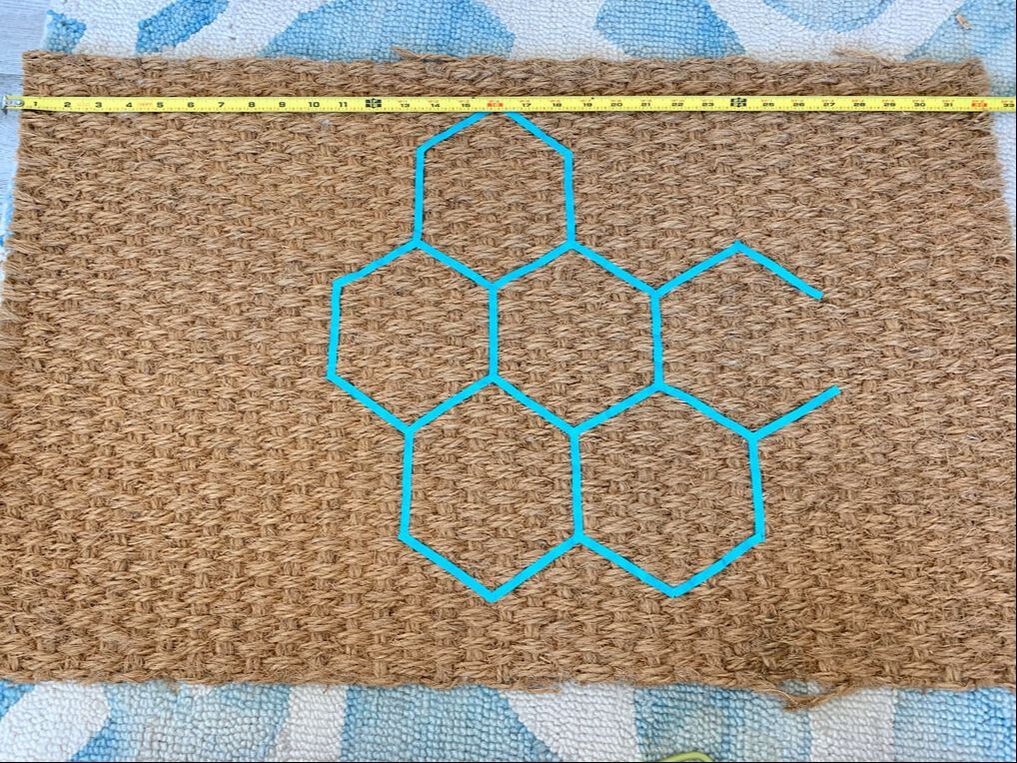
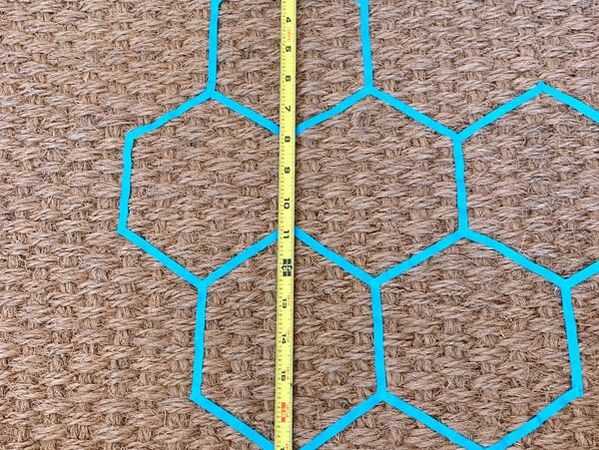
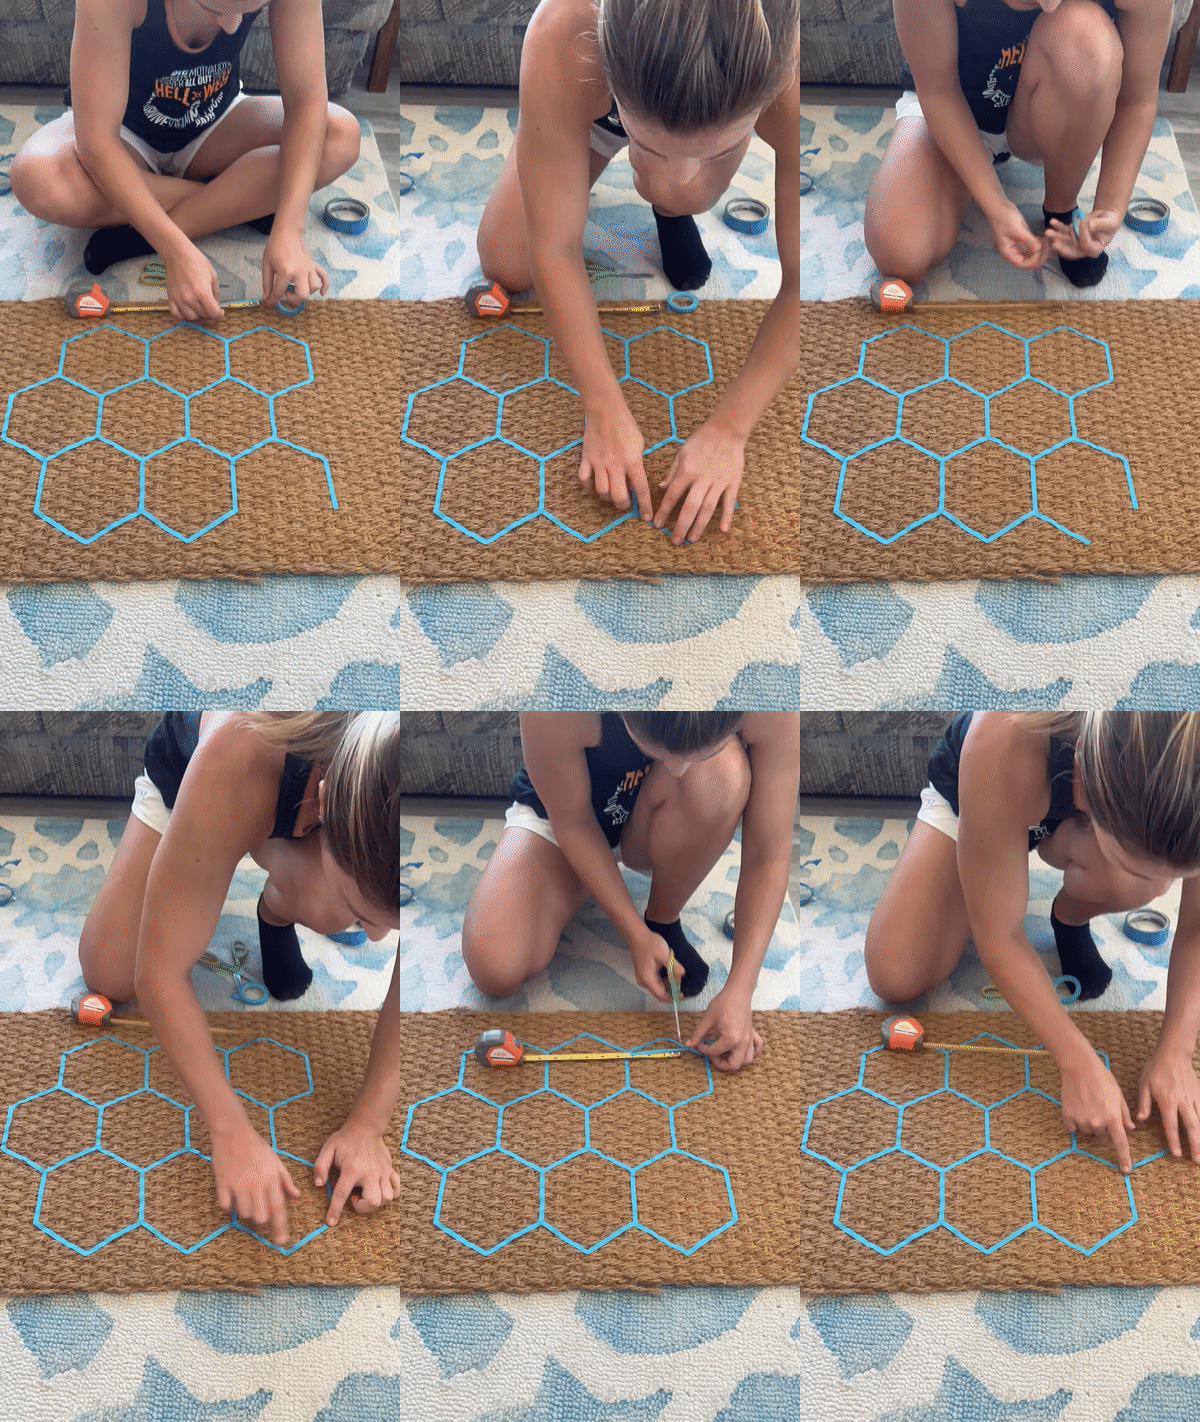
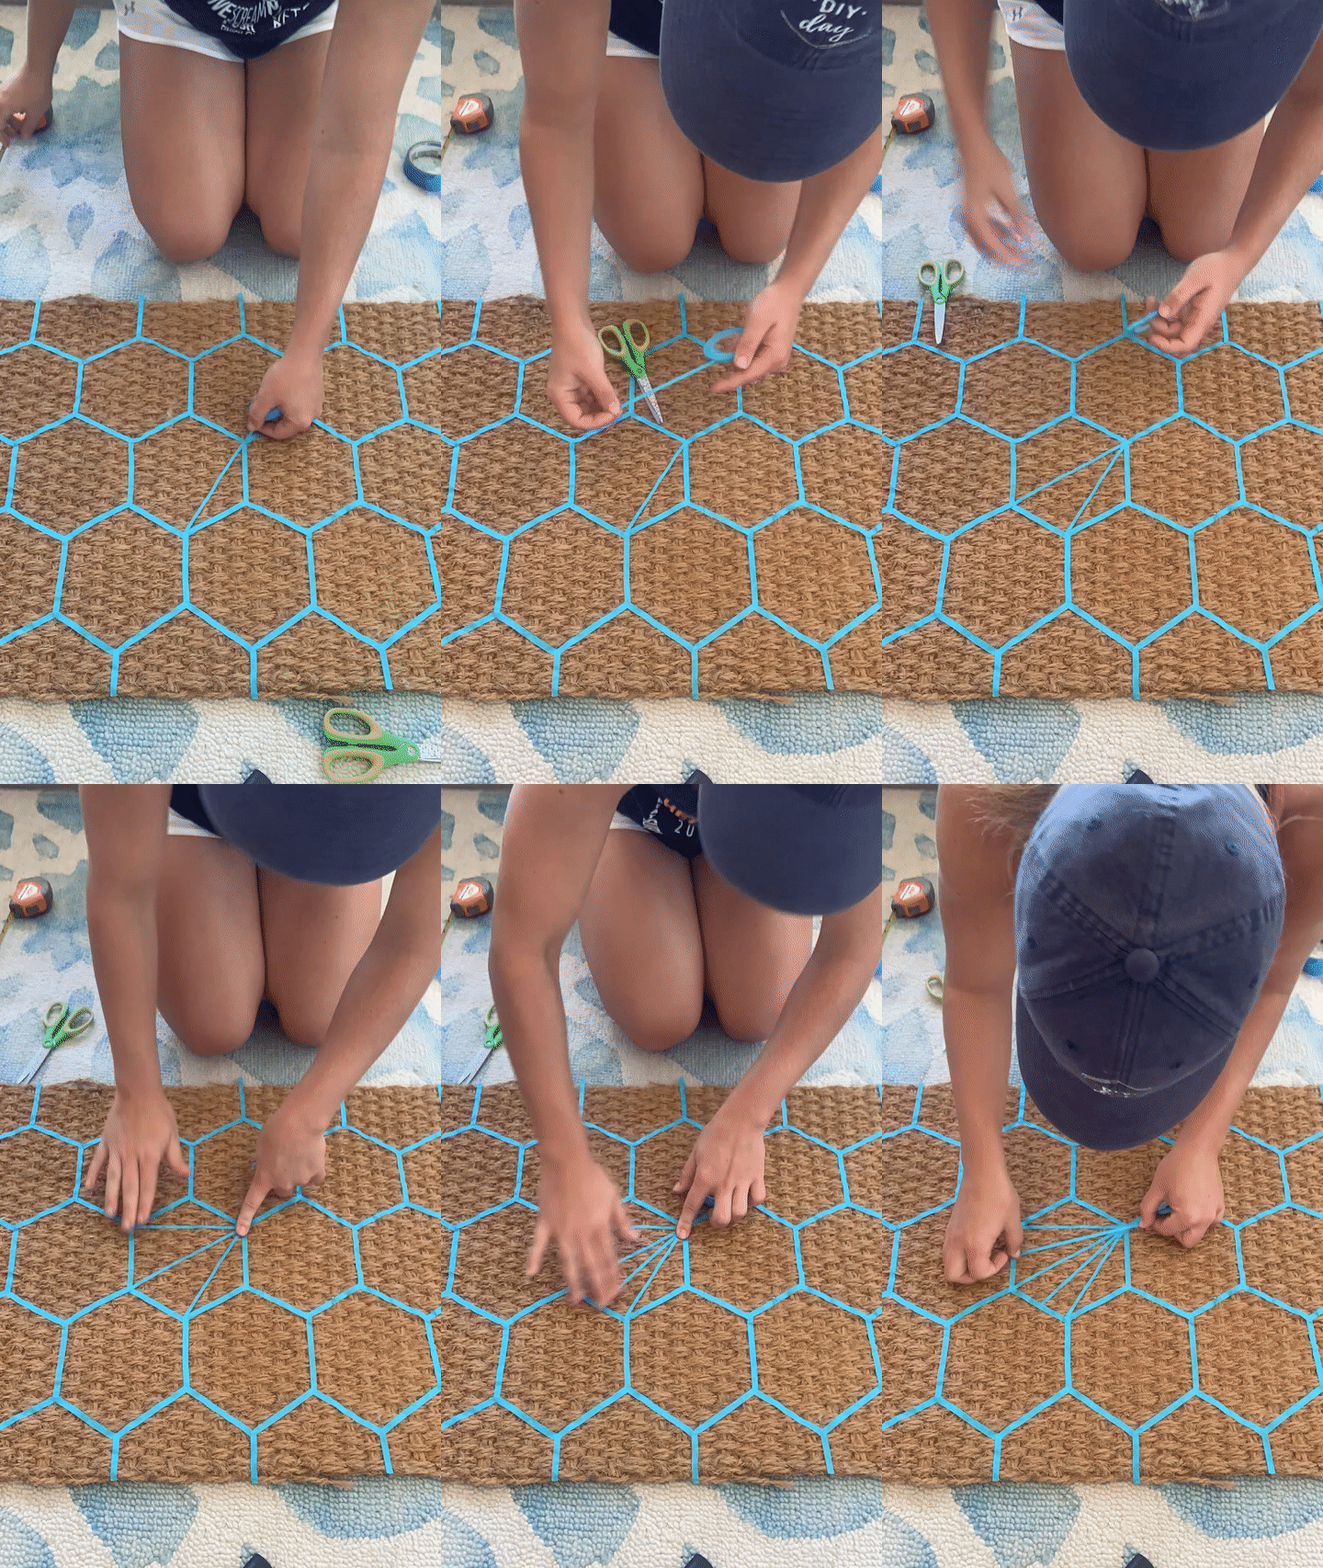
Once you decide on the style you want, you can decide on the scale you want to utilize it with. I cut 3" strips to form the hexagons. Keeping all of them consistently 3" kept the pattern on track. I centered the center of the first hexagon across the width and aimed to center the overall pattern across the length too. Once I had centered the core of the design, I proceeded with the rest of the design, taping away!
Next continue to tape the finer details.
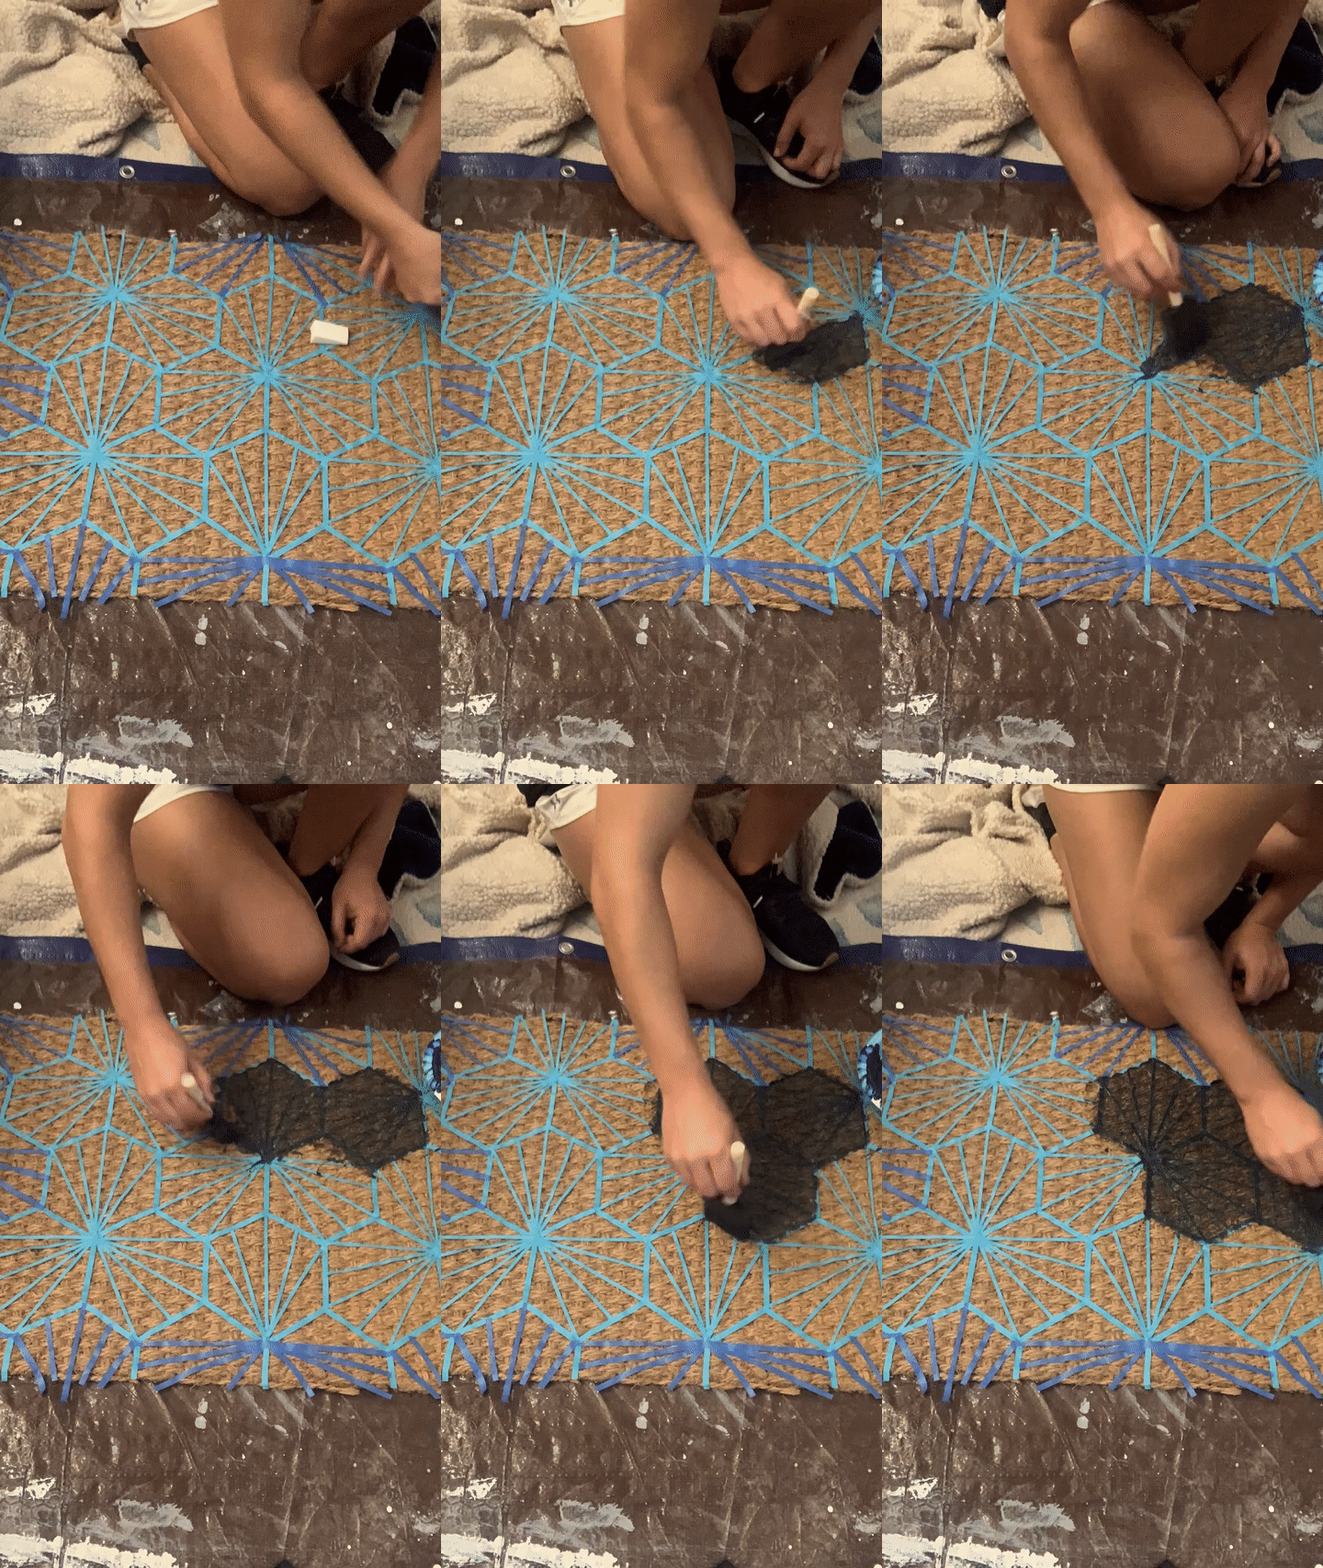
Now it's time to paint. To make sure the tape stays in place, I sponged the paint onto the mat. Pressing the tape down as I went and avoiding any sideways motion so that I didn't accidentally paint underneath the tape.
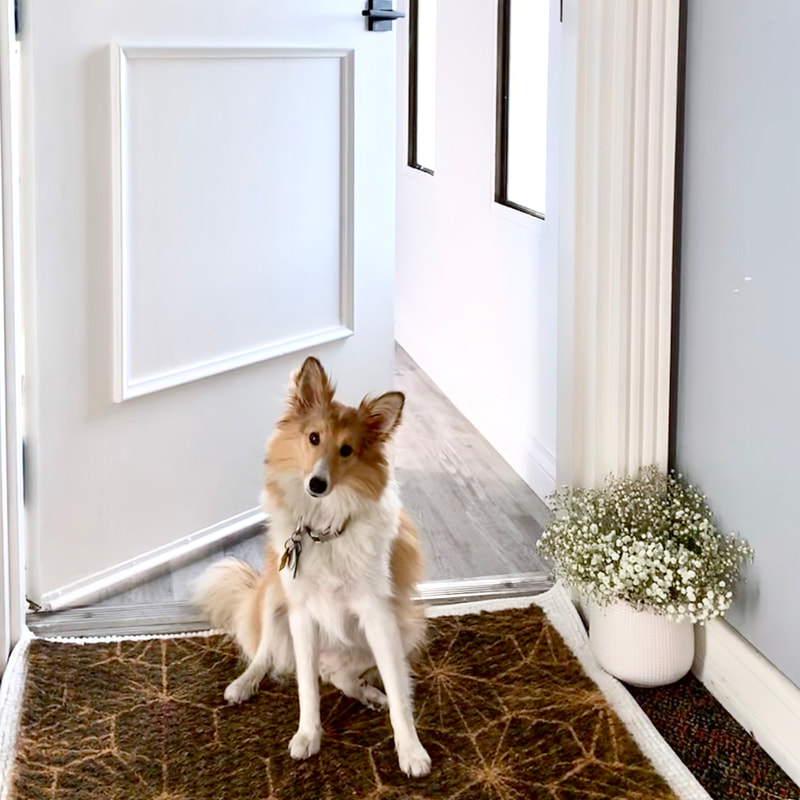
Luckily the paint dried pretty quickly (I think it just soaked right into the rug) which was amazing because I didn't have to wait long to take off the tape. This is seriously the best part! Such a fun reveal to see the crisp pattern emerge!
That's it! A super easy and quick DIY that will add a big upgrade to your entryway and give you a designer look without the cost of retiling your entire entryway. Be sure to tag #btcproject on your door mat transformations so I can repost them and we can start a painted door mat revolution! Haha or at least share the creative love! Can't wait to see how yours turn out!
xoxo,
Jessica
· · · SHOP FOR SUPPLIES · · ·

DIY Nightstands
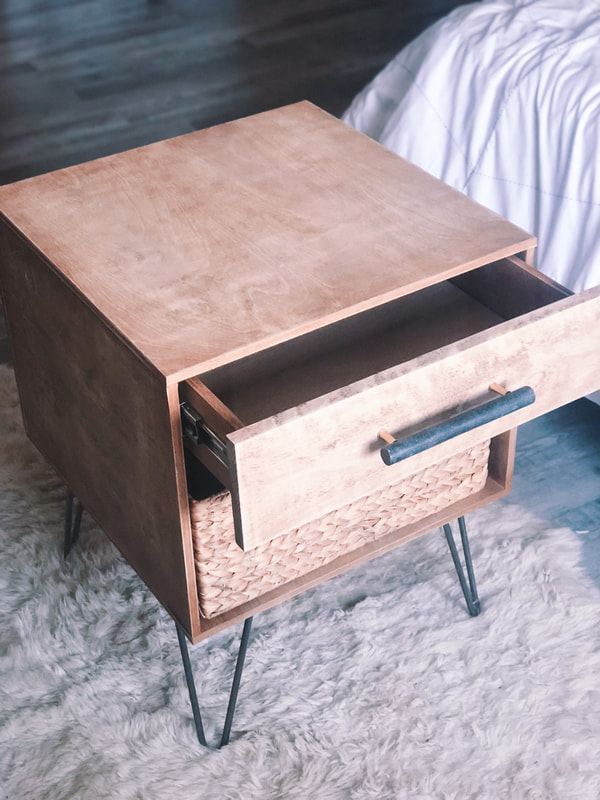
About a year and a half ago, I set out to transform my master bedroom. This was the first big room transformation I took on and my mid-century modern nightstands were the first big DIY project I took on. Yes, it was only 1 room, and only 1 project. I didn't do an entire renovation, I didn't knock down walls, but building the perfect nightstands for my husband and I to be able to fit all our things (and hide the junk) was the first step in making the room feel more practical, more calm, and more us.
I originally posted about it right after the initial build, but I have learned so much since then and have also been getting lots of questions on some of the details so I thought I'd revamp this tutorial and give you the complete step by step guide.
I originally posted about it right after the initial build, but I have learned so much since then and have also been getting lots of questions on some of the details so I thought I'd revamp this tutorial and give you the complete step by step guide.
Here's what you'll need:
SUPPLIES:
HARDWARE
WOOD:
Below is what you need for 1 nightstand with all the cuts and dimensions, double it for 2.
SUPPLIES:
- 3/4" Wood Screws - 4 bags, 10 per pack
- Wire Nails - 1 Pack
- Wood Stain
- Kreg Jig - see Pocket Hole post for more details
- Saw - if you have a table saw already, that is great too (also you can rent a circular saw from Home Depot, it's the best thing ever!)
- Hammer
- Electric Sander - you can hand sand as well, but an electric sander will save you TONS of time.
- Power Drill
HARDWARE
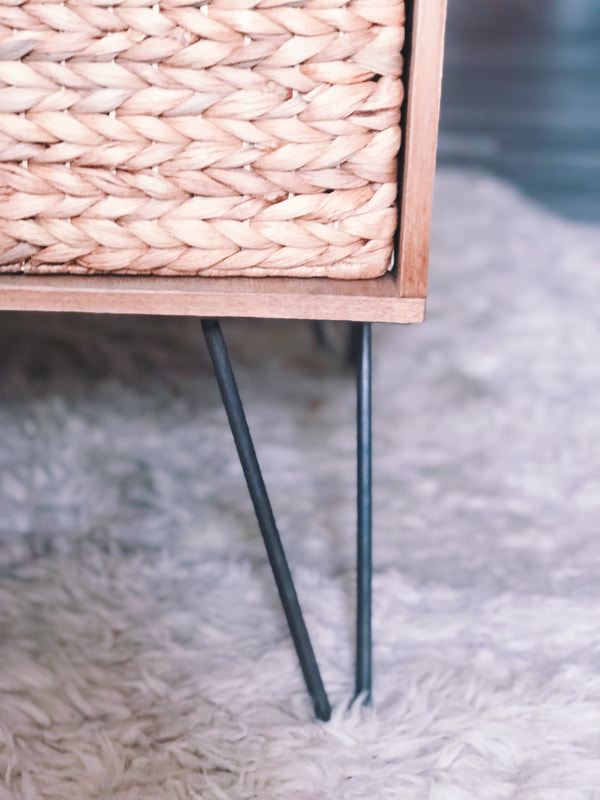
- Table Legs - You can choose legs to fit your style, these were the ones I got
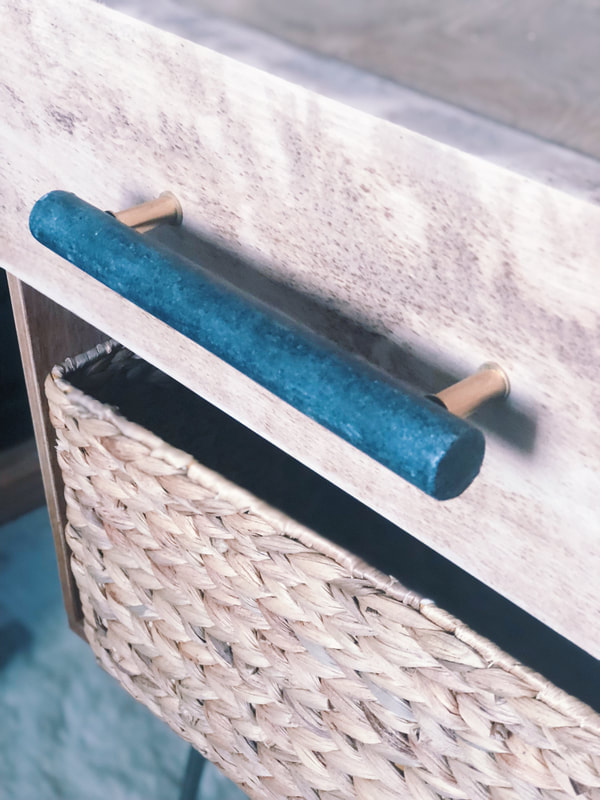
- Handles - Again, choose for your style. There are so many great options at Anthropologie and CB2
- Drawer Slides - These ones are soft close but if you want to save, you can get the plain ones.
WOOD:
Below is what you need for 1 nightstand with all the cuts and dimensions, double it for 2.
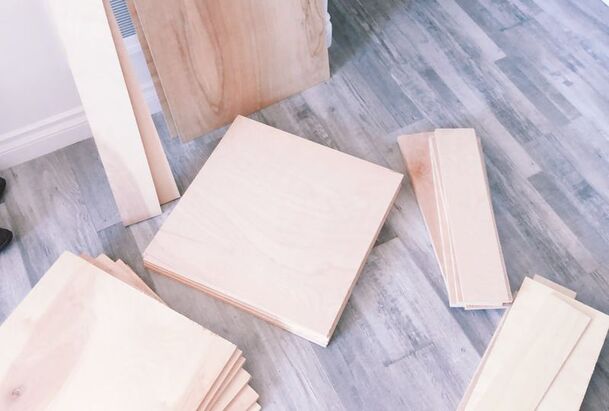
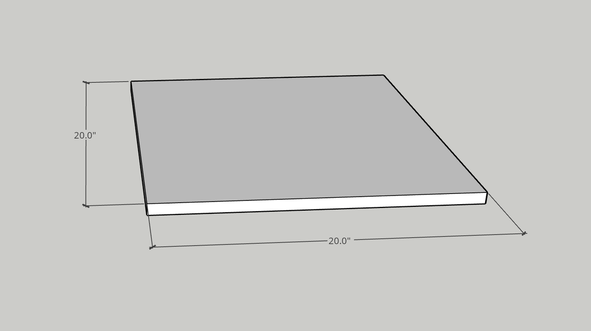
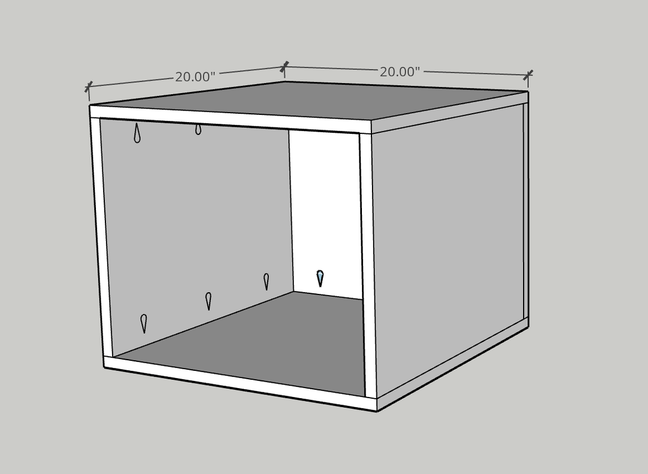
- 2 pieces of 20″ x 20″ , 3/4″ Birch plywood
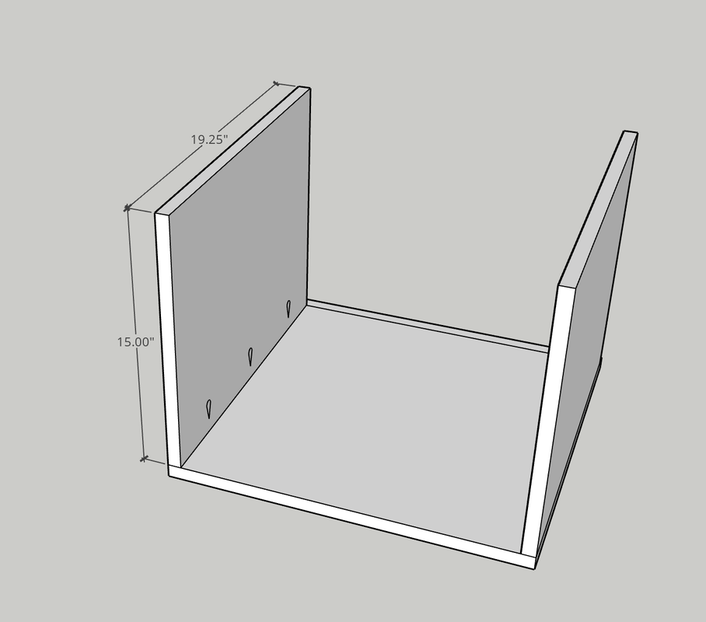
- 2 pieces of 15″ x 19.25″ , 3/4″ Birch plywood
- 1 piece of 15″ x 20″ , 3/4″ Birch plywood
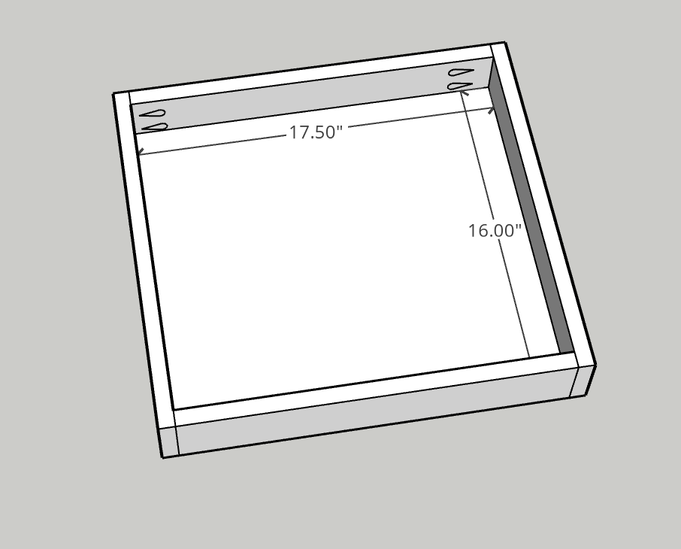
- 4 pieces of 17.50″ x 3″, 3/4″ Birch plywood
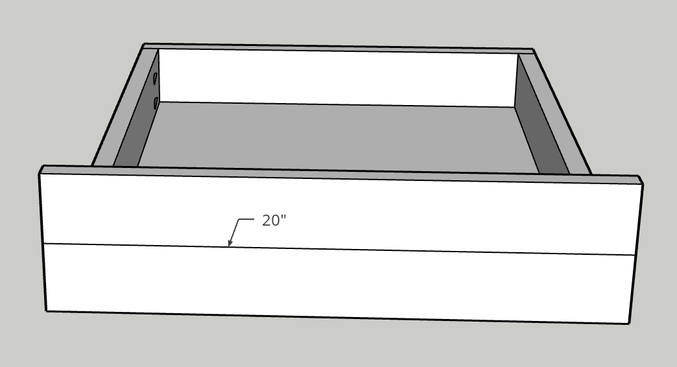
- 1 piece of 20″ x 5″ x 3/4″ SOLID Birch Wood (This will be used for the drawer front so solid looks better for the side cuts
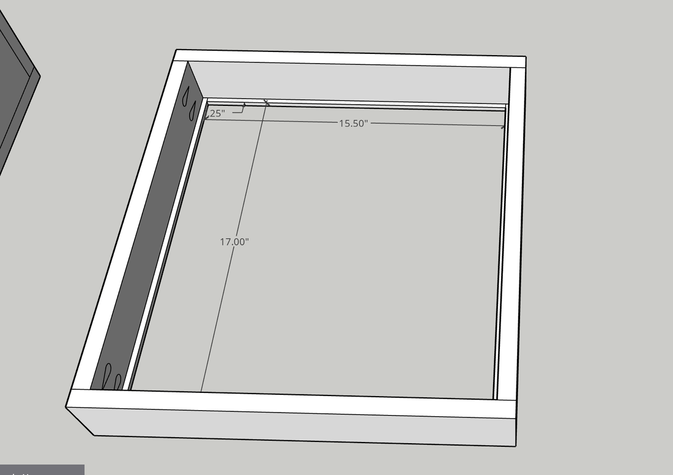
- 2 pieces of 17″ x 1/4″ x 1/4″ Birch plywood
- 2 pieces of 15.50″ x 1/4″ x 1/4″ Birch plywood
- 1 pieces of 17.50″ x 16″ x 1/4″ Birch underlayment
- 1 roll of Birch edge finish adhesive
PLANS & INSTRUCTIONS:
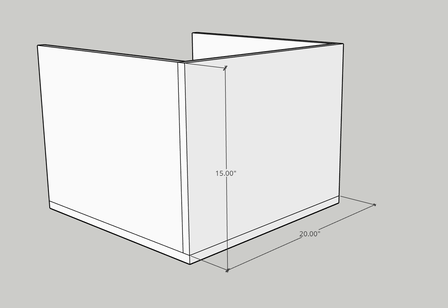
Start with the 20" x 20" base piece.
Start with the 20" x 20" base piece.
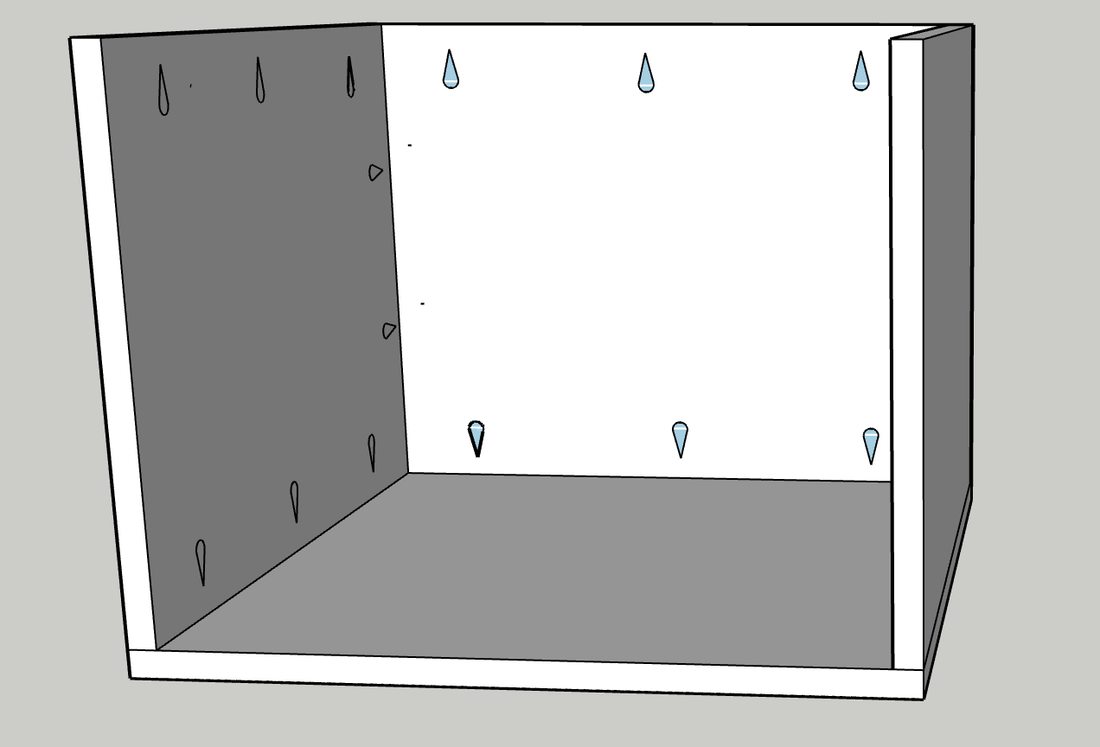
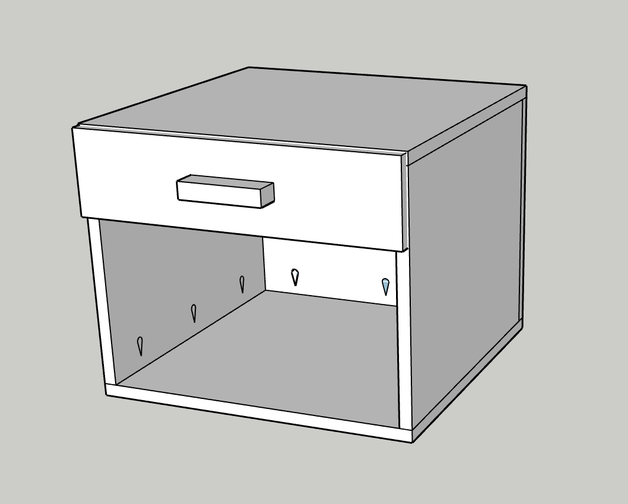
Next, utilize the pocket hole technique for creating your joins on the 15" x 19.25" boards. You will need to make pocket holes on 3 of the sides of these pieces so don't attach until all holes are drilled. For the first connection point, you will want to drill your wholes about 6.5" apart and 4.5" from the edges.
Repeat the pocket hole joineries on the back edge and upper edge to attach the beck and top of the nightstand. Keep the holes roughly a third apart.
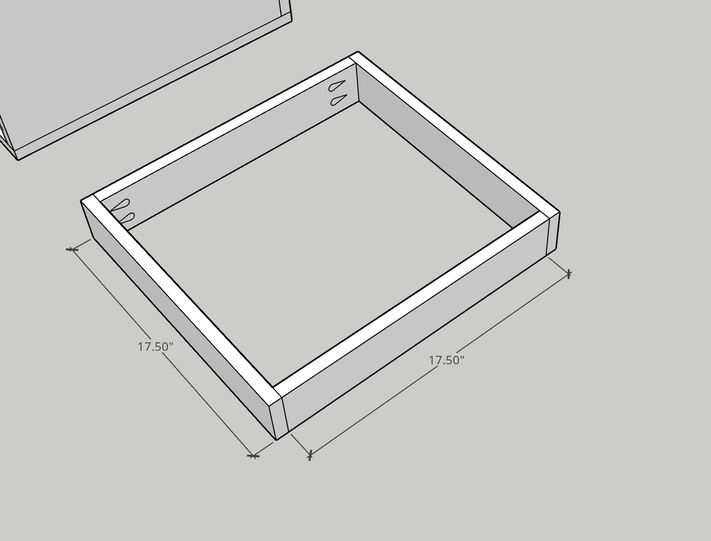
The next step is to make the drawer. Use the 17.5" x 3" pieces and connect them utilizing pocket holes on the side pieces that are spaced 1" apart and about 1/2" from the edge of the piece.
***Don't connect the pieces just yet, we will be hammering the drawer base prior to connecting.
***Don't connect the pieces just yet, we will be hammering the drawer base prior to connecting.
Next use the 1/4" pieces to create the drawer of your base. on the sides of the drawer, use 3-4 wire nails to connect the 17.5" pieces and on the front and back side of the drawer, use the 15.5" pieces.
Once you have hammered in the nails, you can use the screws to connect the edges of the drawer at the pre-drilled pocket holes.
Once you have hammered in the nails, you can use the screws to connect the edges of the drawer at the pre-drilled pocket holes.
Next, wedge the 17.50" x 16" underlayment into the drawer. It should be a snug fit and rest on the ledge created by the 1/4" strips. Gravity will secure this one for you so no joineries needed!
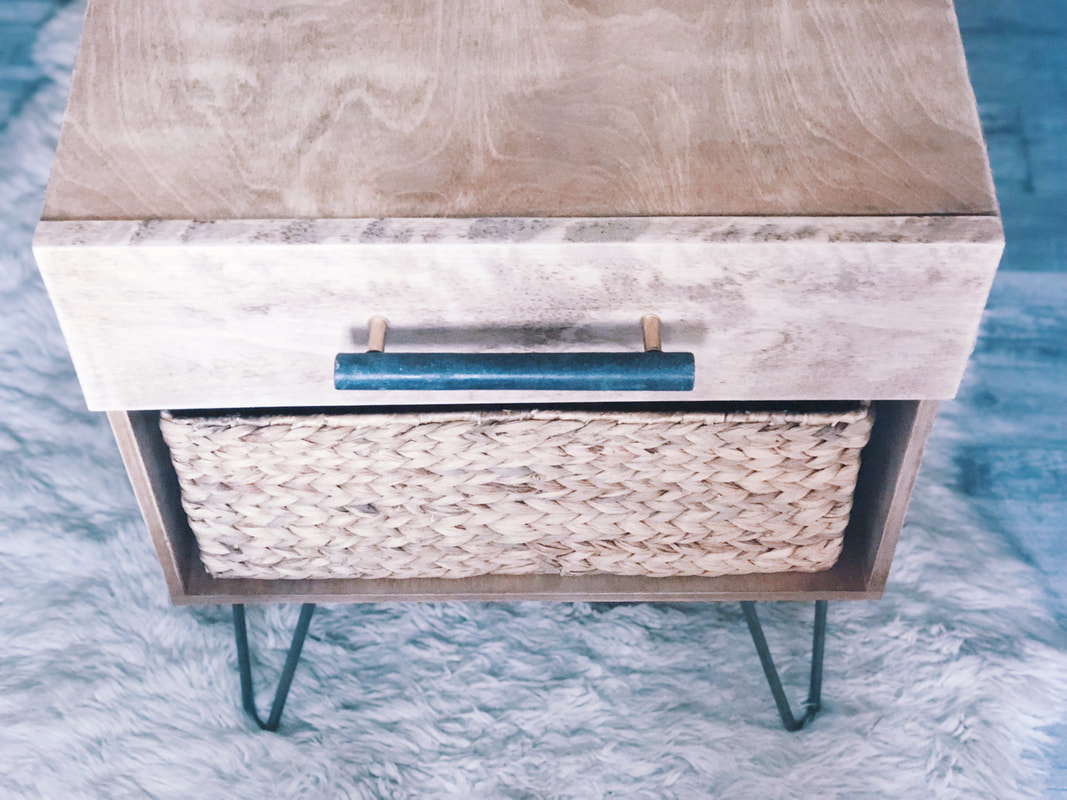
Attach the front face of the drawer to the drawer by screwing through the back side of the drawer. Screw as close to the edges as possible so you leave plenty of space to choose what ever handle in the center you would like.
Now, it's time to put it together. Use the drawer slides installation instructions to attache the slides both to the drawer and the cabinet. I placed mine about 2" down from the top of the cabinet to the center of the slide. Once the screws are in, you can just slide the drawer into place.
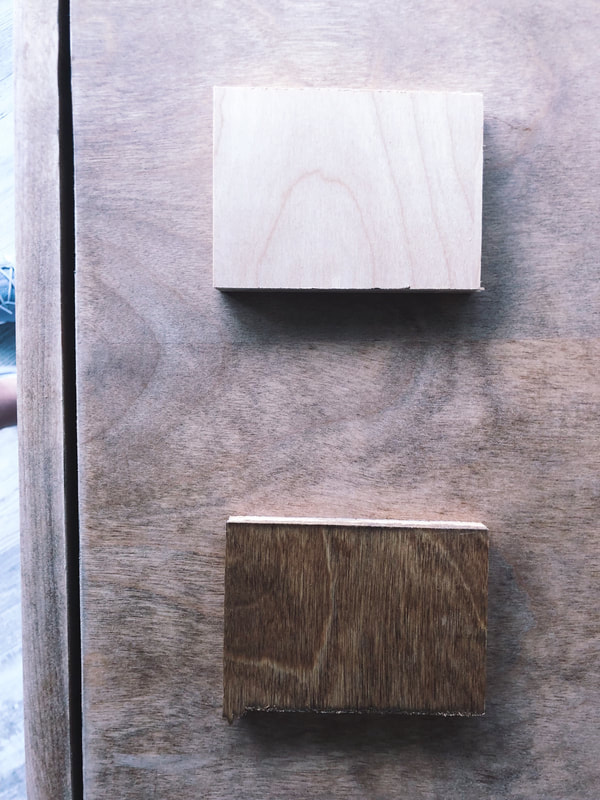
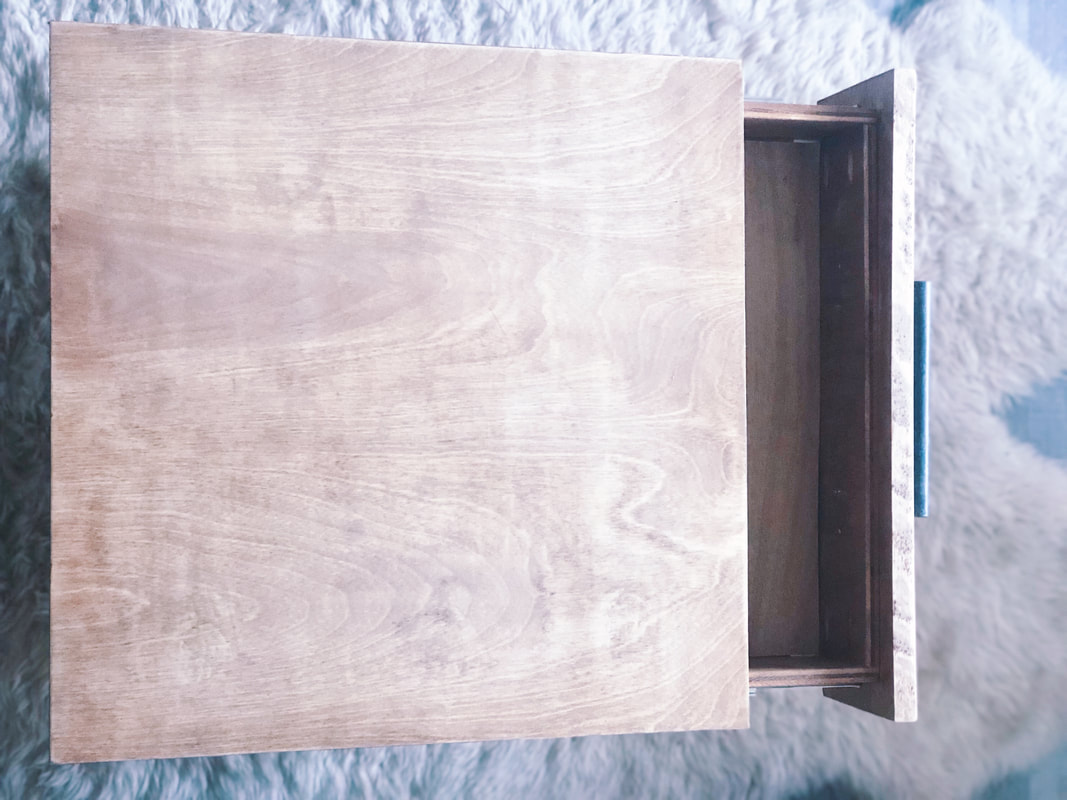
Once you have all the pieces in place you can add your finish. Use a stain or sealer to get your wood to the ideal color. I stained and sanded twice to get the color I wanted.
Then attach the legs of your choice with screws at the base and you are finished!
Then attach the legs of your choice with screws at the base and you are finished!
I would say this DIY is intermediate to advanced. I did it as a total beginner though and with some persistence, it came together and turned out fantastically. They are still standing strong in our room 1.5 years later!
I love building with all of you in this community and seeing you create things that make your home and work space feel fresh, fun, and YOU! Use the hashtag #beyondtheclock to share how you are making your home (and life) dreams happen today by taking action (no matter how small) and make sure to click here so you never miss a post or giveaway! (I promise, no spam and only the good stuff).
Thanks for being here and following along!
xoxo,
Jessica
Outdoor space and balcony refresh
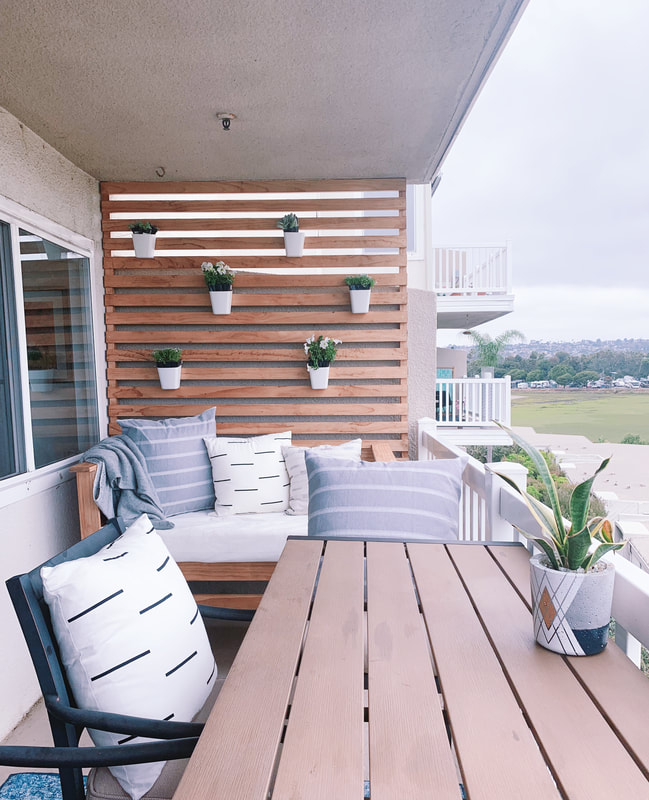
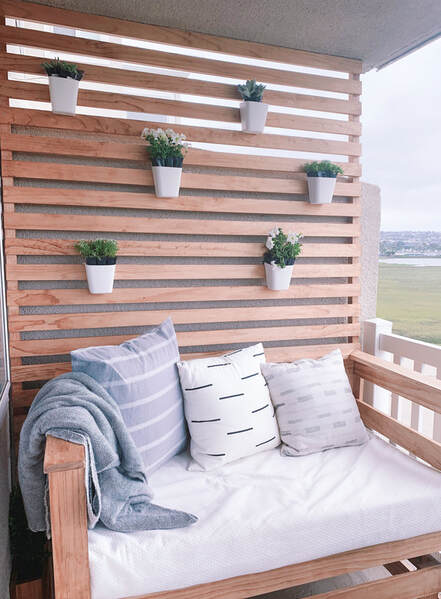
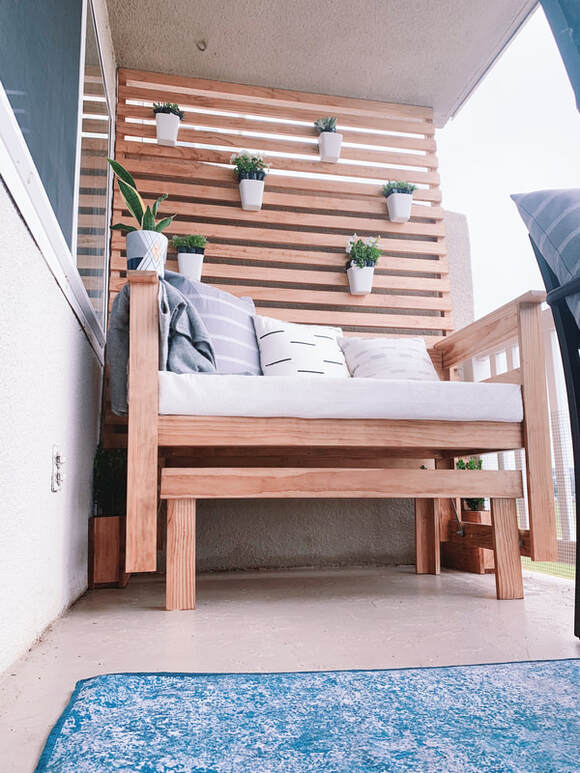
The balcony refresh is here! From planning to the glider swing to the now fully finished privacy wall/trellis, I'm beyond excited about how it turned out.
In the last couple weeks, I have spent more time on the balcony than ever before and love cherishing how all the elements came together. I still can't even pick my favorite part.
I knew that one of the things about the balcony that I wanted to change was the privacy wall from the building. It's made out of concrete and stucco so there really isn't anything you can add to it. I also really didn't like the slanted piece, #allaboutsymmetry. So I decided to take a stab at this DIY Free-standing wall/trellis in order to create the cozy space I was going for.
Honestly, the most difficult part of this was figuring out how to make the base strong enough to be freestanding and after about 2-3 tries, these planters were the perfect solution and I'm super excited about the boxwood I planted to grow and create an awesome framing around the glider chair.
Ok so here it is. the quick and easy DIY. (Ok quick is about 2 days quick and easy is easy to build but you will definitely more than one person to move it around to it's final destination, it gets a little heavy)
SUPPLIES:
- Circular or Miter Saw or Miter Box & Saw - For this project I use the saw and miter box.
- Tape Measurer
- Wood Glue
- #6 1 - 1/2 Wood Screws - ~72 needed
- Electric Sander
- 80 Grit Sandpaper, 120 Grit Sandpaper
- Power Drill
- Philips Head Screw Driver and Drill Kit
- Wood stain - You can use a deck stain that is waterproof, I decided to use a finishing stain (Golden Oak) followed by a clear sealant.
WOOD:
Quick note: Common terms for wood sizes is full inches, but the actual size is to the quarter or half inch so you'll see that in the images below, but stores will label it to the closes whole rounded number
- 2 pieces of 2″ x 2″ x 8′ clear pine
- 20 pieces of 1″ x 3″ x 6′ clear pine
- 2 pieces of 1″ x 4″ x 8′ clear pine
PLANS & INSTRUCTIONS:
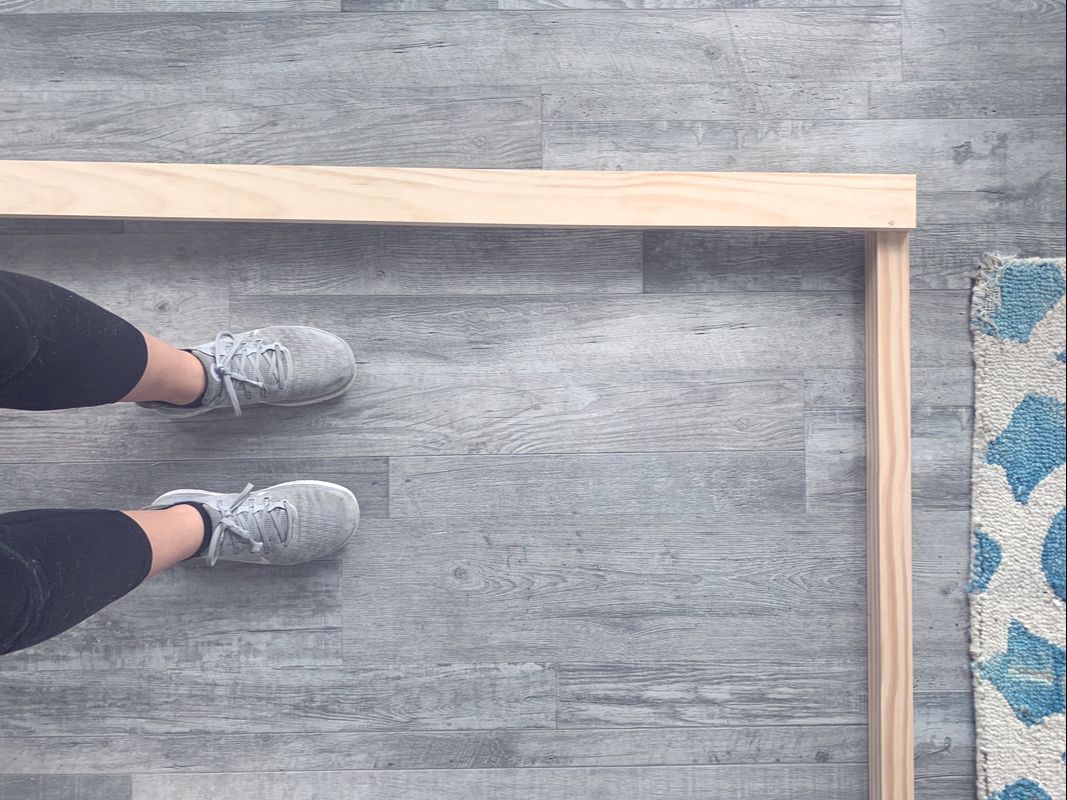
For this project you will need a bit of space (it is a wall after all ;-)) I was still able to do it in the living room of our apartment by clearing some space.
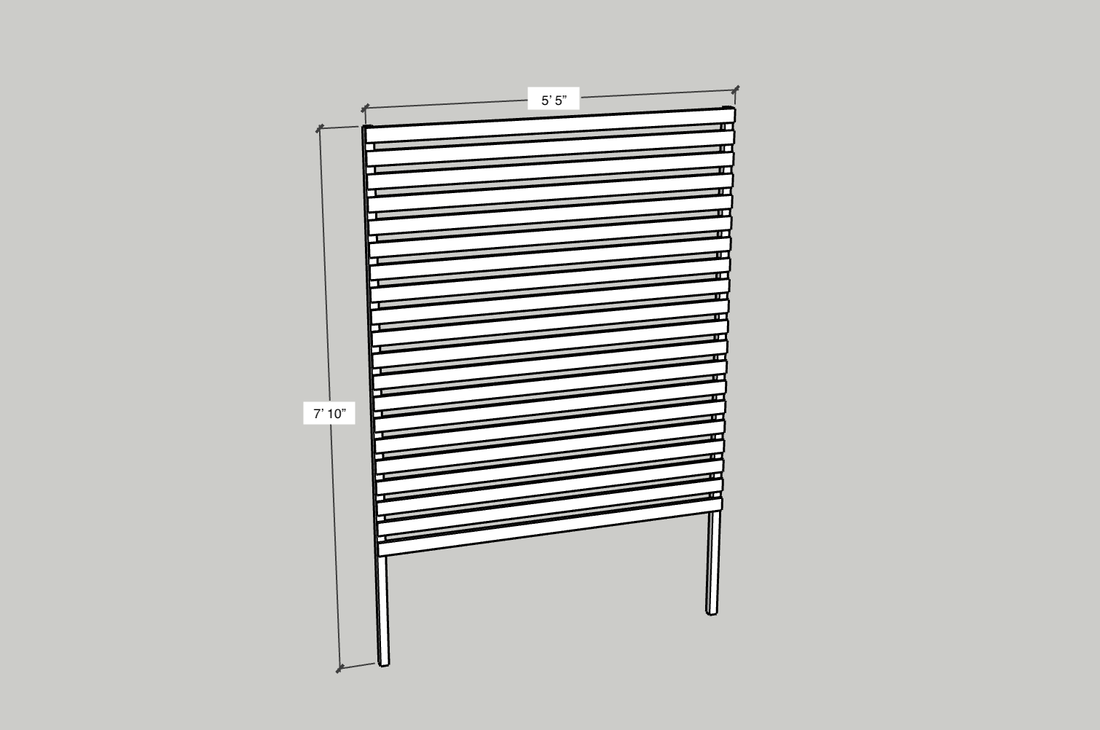
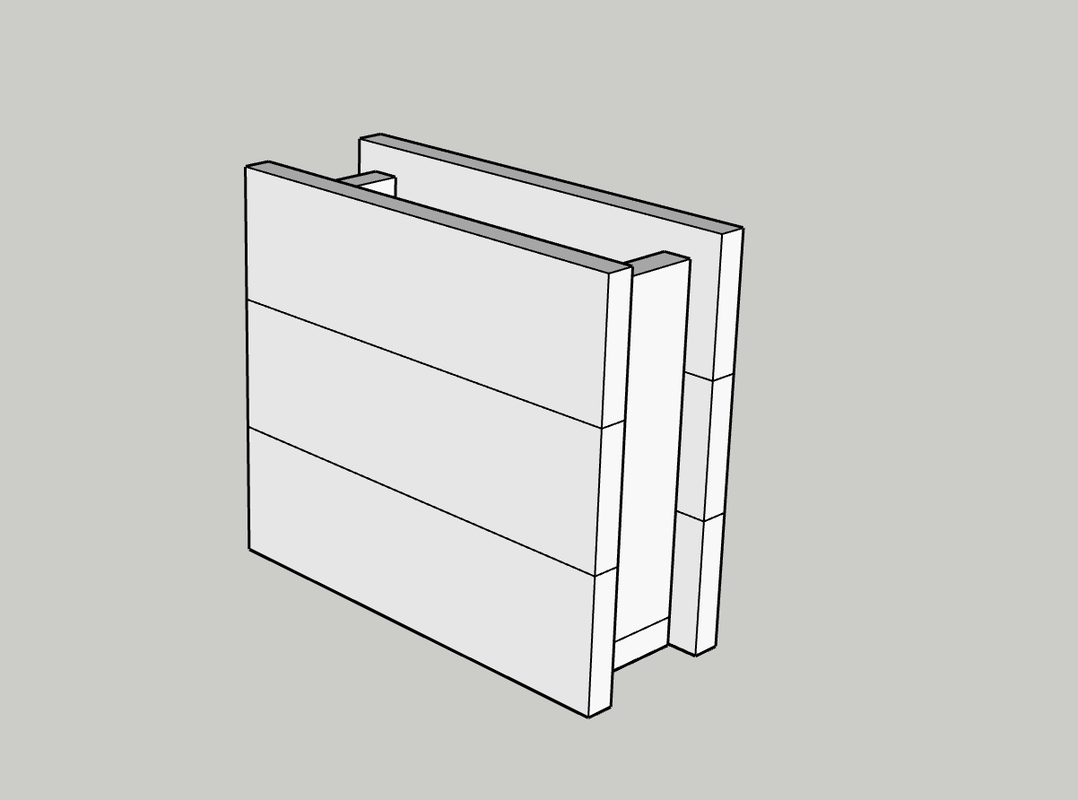
Then start by measuring and cutting your 2" x 2" pillars to the height of the space you will be building in. I had to trim mine just a couple of inches. Next, lay them out the distance of your wooden slats.
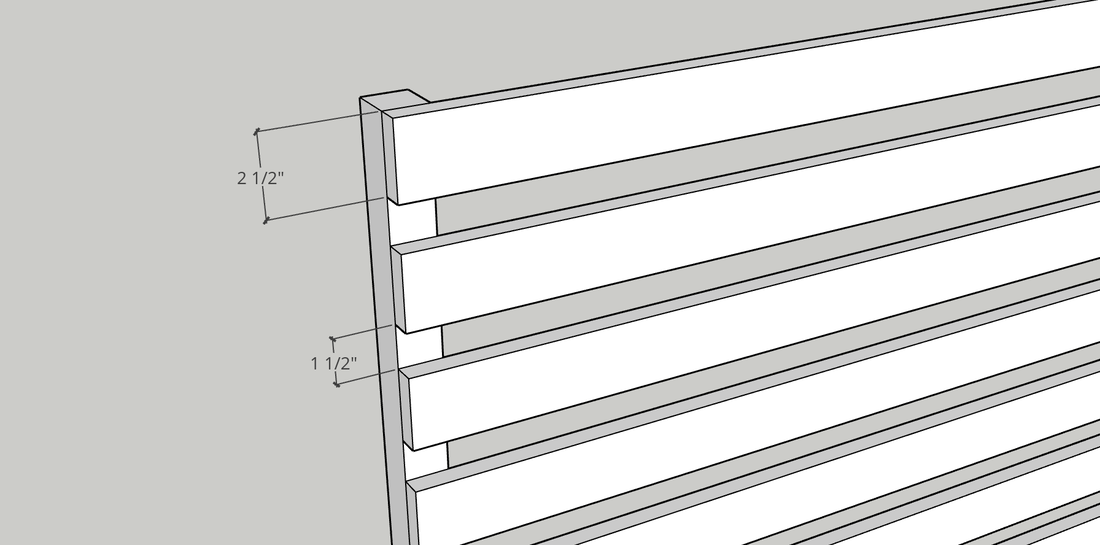
Next up, trim the 1" x 3" slats to the width of your space. I trimmed mine to 5 feet, 5 inches. Now it's time to put it together! Use the 1/8" drill bit to make holes in the center of the 1" x 3" slat lined up on the edges with the 2" x 2" pillars. Then use the #6 1-1/2" wood screws to tighten the wood into place. It's important to use the drill bit to create a hole for the screw to go in so that you don't split the wood when you drill down (I've done this plenty of times in the past trying to take the lazy route).
Then, continue this step with all 20 slats.
**Quick Tip**
In order to keep the spacing between the slats even, buy an extra 2" x 2" and use it as a spacer. Wedge it between the screwed in piece and the new piece, then screw the new piece down and then remove and move to the next slat. It takes out all the measuring and leveling and is a total time saver!
Next up is the planter base, you could totally make these without the wall and they are a great way to add wood texture to any outdoor space. There aren't normally a lot of wood planter options so I was so excited with how these turned out and because of the wood glue, they sealed really well!
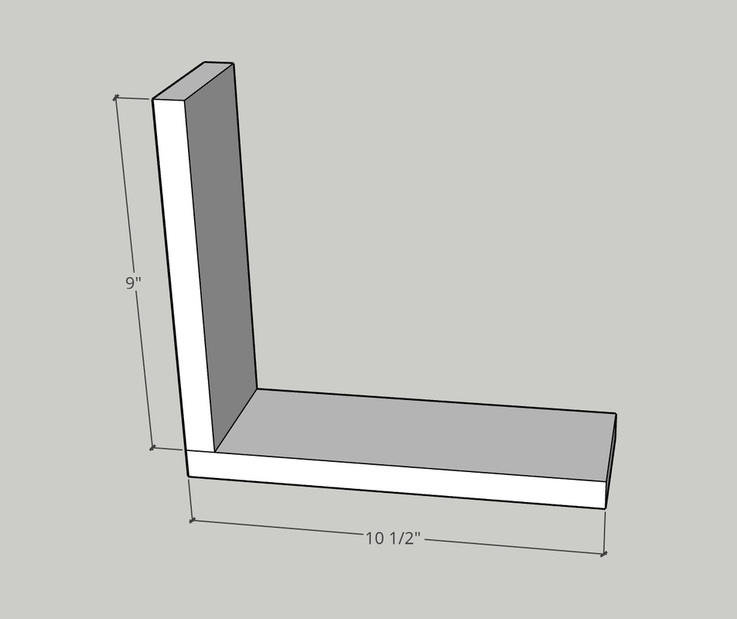
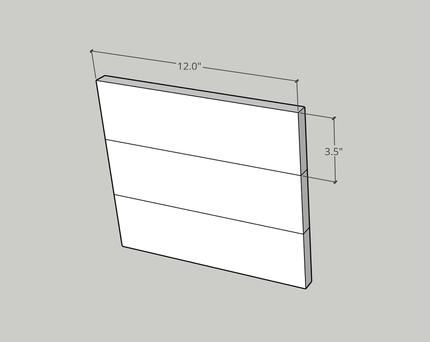
First cut the 1" x 4" pieces into the following:
12 x 12" pieces
2 x 10.5" pieces
4 x 9" pieces
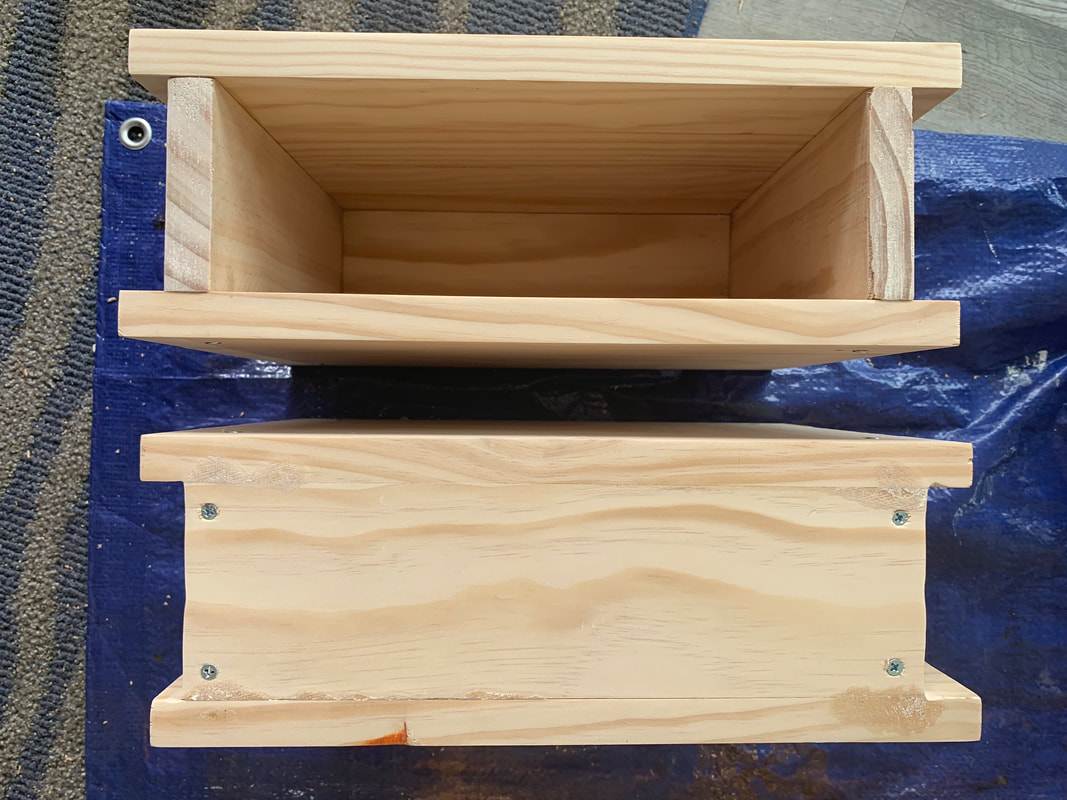
For each planter, take 2 of the 9" pieces and 1 x 10.5" piece to build the base and sides. Apply wood glue to the inside edge of the 12" piece.
First cut the 1" x 4" pieces into the following:
12 x 12" pieces
2 x 10.5" pieces
4 x 9" pieces
For each planter, take 2 of the 9" pieces and 1 x 10.5" piece to build the base and sides. Apply wood glue to the inside edge of the 12" piece.
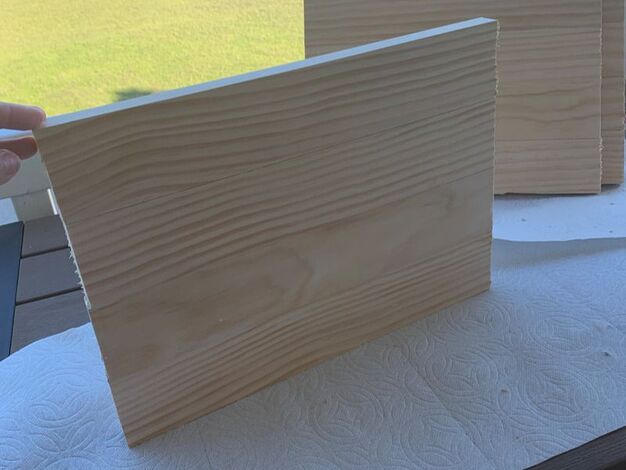
Next take 3 of the 12" pieces and use the wood glue to seal them edge to edge. Make sure to wipe up the excess glue right away so that it doesn't ruin your stain later.
Let the glue sit for 20-30 minutes before moving onto the next step. It takes a bit of time, but is so worth it so you don't nudge things around when joining them together.
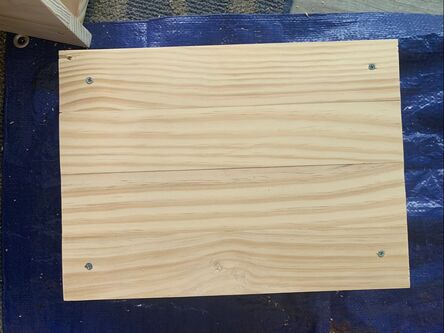
Once all the glue is dry, apply the face edge to the side edge with a 3/4" overlap on each side. Use the wood glue and let sit for 20 min and then come back and add 4 #6 1-1/3" screws to the corners for extra stability. (You probably don't need the screws, but I wanted to be sure they would stay together once I added the sand and soil.)
Once all the glue is dry, apply the face edge to the side edge with a 3/4" overlap on each side. Use the wood glue and let sit for 20 min and then come back and add 4 #6 1-1/3" screws to the corners for extra stability. (You probably don't need the screws, but I wanted to be sure they would stay together once I added the sand and soil.)
Lastly, use the sander to sand down and smooth off any of the places you want. I just sanded the planters and left the trellis wall, but you can do all of it or none and it should work well. Apply the wood stain wood stain - You can use a deck stain that is waterproof, I decided to use a finishing stain (Golden Oak) followed by a clear sealant so that it matched the glider bench I had built a couple weeks before.
Once that all dries, it's time for the finishing touches. First, I had my husband help me move the all into place and we put it in the planters while they were empty so they could be as deep in them as possible. Then, I used sand as a weight to fill the planters about halfway. Lastly, I added the soil and plants to bring it to life.
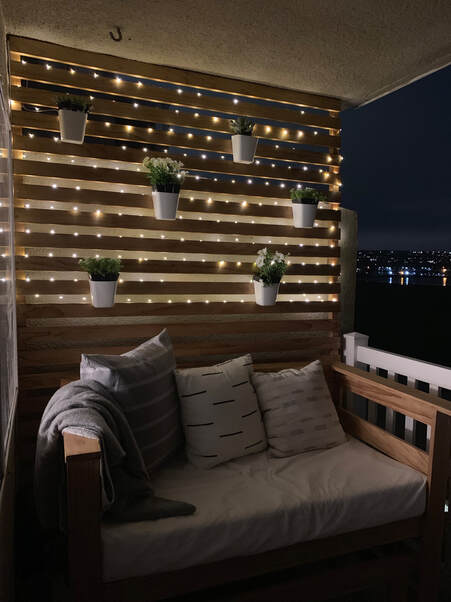
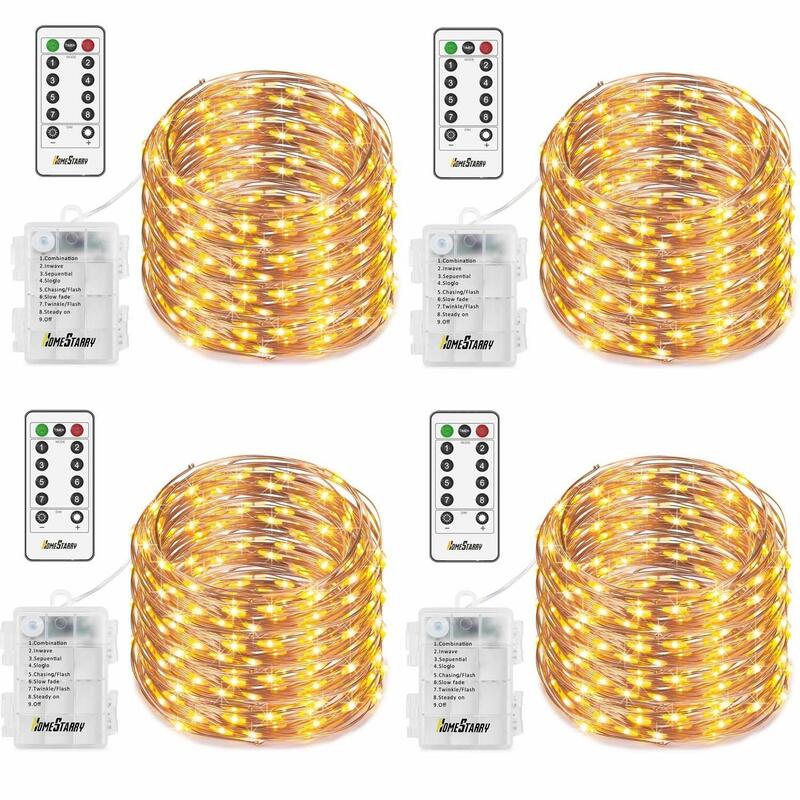
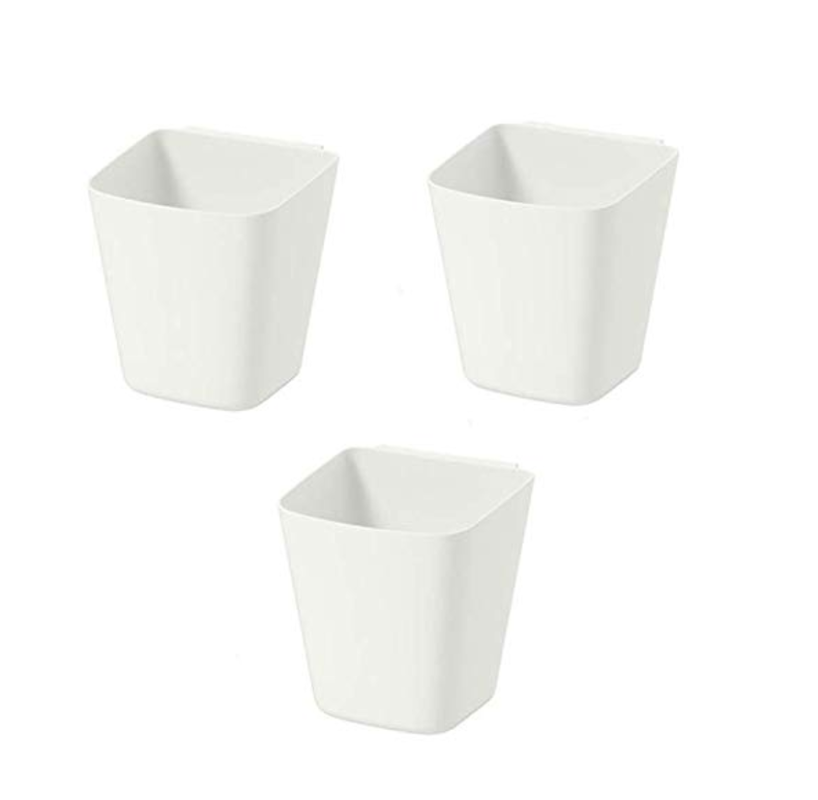
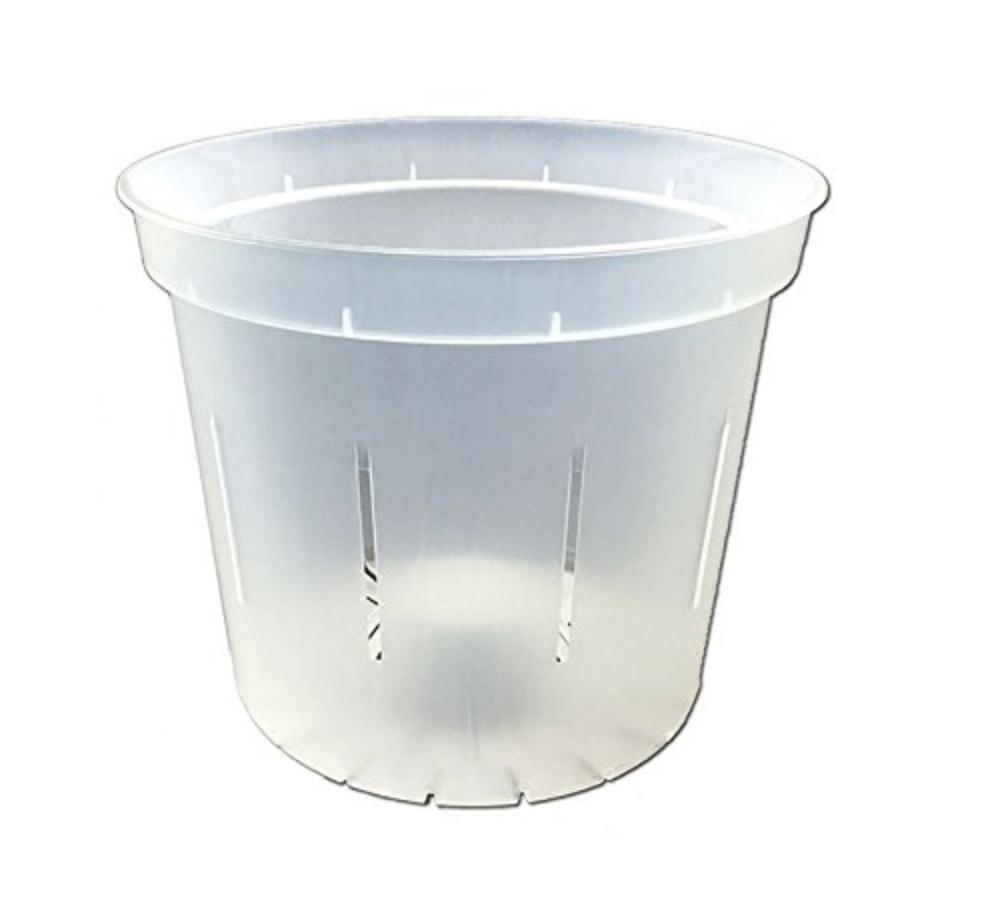
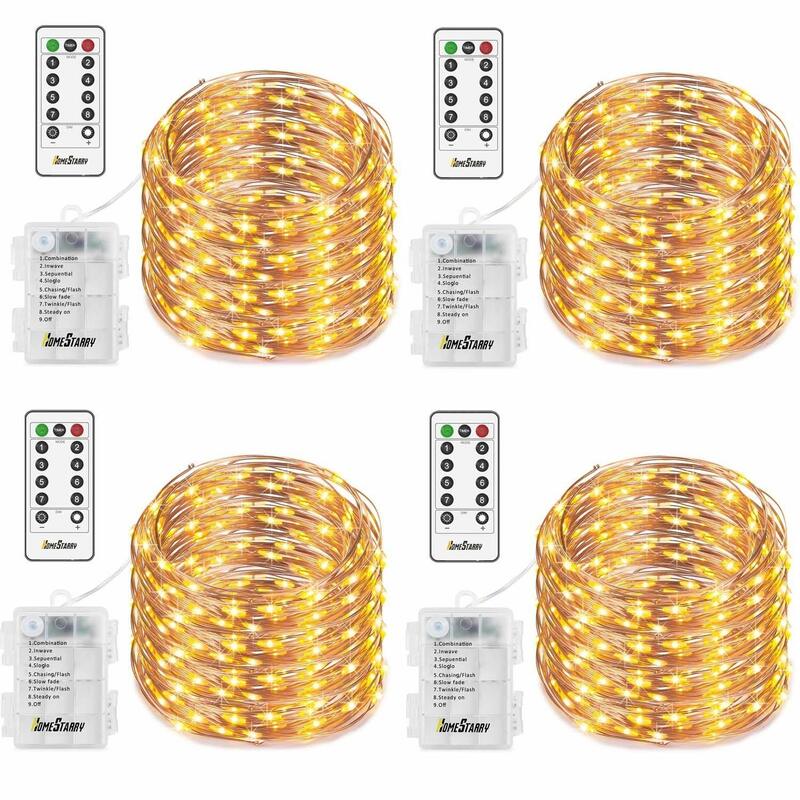
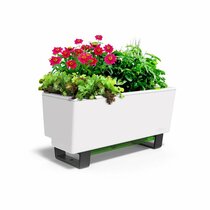
The final pieces on the slats were these amazing remote controlled fairly lights and these planters from ikea. They are actually for office organization, but I added these planter liners to it so that the flowers had a place to drain the water. I put the battery packs for the lights in ziplock backs and then hid them at the bottom of the planter while using tape to hold the lights in place.
Here is the final transformation:
Shop the Post
Thank you guys so much for following along and being a part of these DIY projects. I love sharing with you and getting your feedback along the way. Make sure to click here so you never miss a post or giveaway! (I promise, no spam and only the good stuff) and be sure to tag @beyondtheclock_ on instagram when you complete yours. I can't wait to see it!
xoxo,
Jessica
6/9/2019 0 Comments
4 DIY Step Stool Ideas
Modern Step Stool
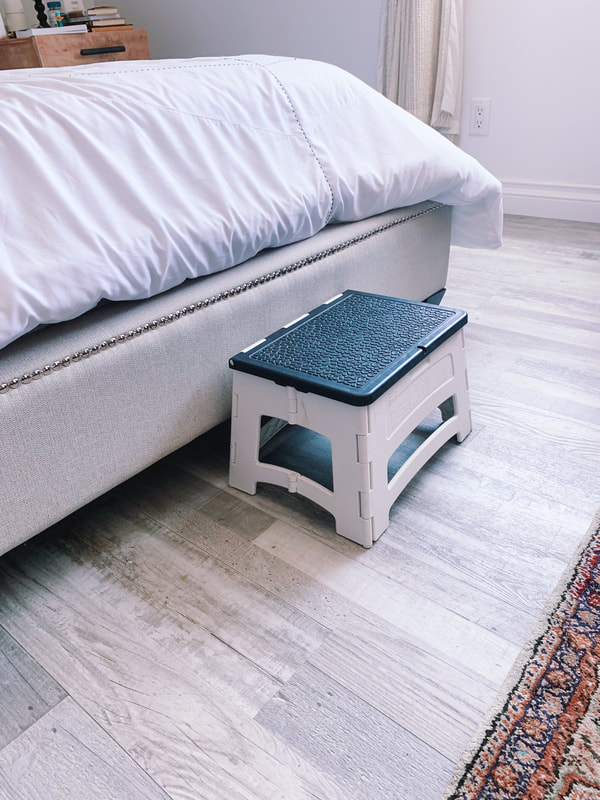
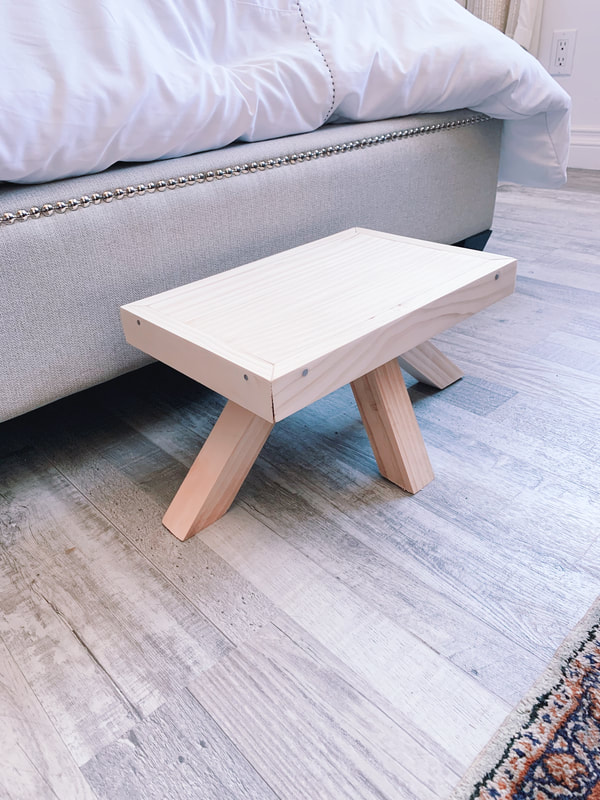
I had some leftover wood from the glider bench project and wanted to use it to modernize a few small pieces around the house. First up, the step stool that my dog, Stella, uses to hop on and off our bed. Our bed isn't even that high but she is so small and at first she was jumping on and off just fine, but then one day, she winced as she landed and I realized it was a bit too high of a jump for her joints for how frequently she hops up and down. At first, I just used an extra plastic stool, but that quickly starting annoying me since it didn't tie in with the rest of the room.
So I was excited to take on this stool project. Here is the best part. All the wood I used was less than $10 and the whole project took just a couple hours!
Once I was all done, I loved the design, but realized that it does have a little tendency to tip if you put too much weight on one corner without a balance on the other side.. Luckily, Stella always steps right in the middle so it was fine for her (and she only weighs 13 lbs), but I came up with a few other options for you guys that have a more stable design and are still super cute and modern.
Here's what you will need:
SUPPLIES:
WOOD:
PLANS & INSTRUCTIONS:
So I was excited to take on this stool project. Here is the best part. All the wood I used was less than $10 and the whole project took just a couple hours!
Once I was all done, I loved the design, but realized that it does have a little tendency to tip if you put too much weight on one corner without a balance on the other side.. Luckily, Stella always steps right in the middle so it was fine for her (and she only weighs 13 lbs), but I came up with a few other options for you guys that have a more stable design and are still super cute and modern.
Here's what you will need:
SUPPLIES:
- Circular or Miter Saw or Miter Box & Saw - For this project I use the saw and miter box but it would have been even faster with an electric saw (wish I owned one, one day ::-))
- Tape Measurer
- Wood Glue
- #6 1 - 1/2 Wood Screws - ~8 needed
- 1 - 1/4 Inch Nails - ~8 needed (I used the ones linked but here is a great resource from Home Depot on choosing the right nail for your project)
- Electric Sander
- 80 Grit Sandpaper, 120 Grit Sandpaper
- Power Drill - you can rent this at Home Depot too
- Philips Head Screw Driver and Drill Kit
WOOD:
- 1 pieces of 1″ x 3″ x 8′ clear pine
- 1 pieces of 1″ x 2″ x 8′ clear pine
- 1 pieces of 2″ x 2″ x 8′ clear pine
PLANS & INSTRUCTIONS:
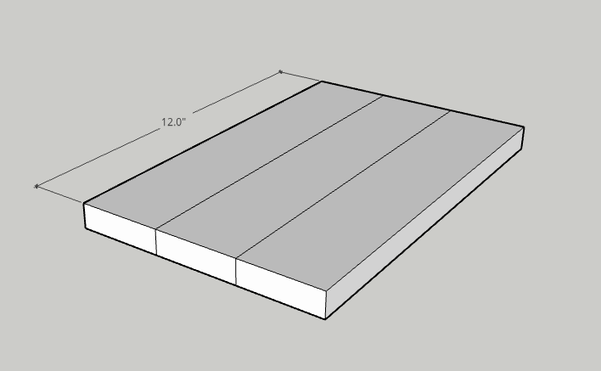
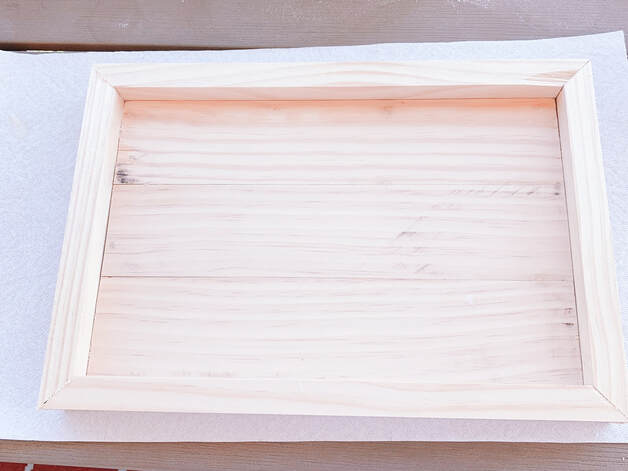
Start with the stool top. I used 1 x 3's and cut 3 x 12" segments (straight angle).. Use wood glue to join them on the "skinny side" and let dry 20-30 min.
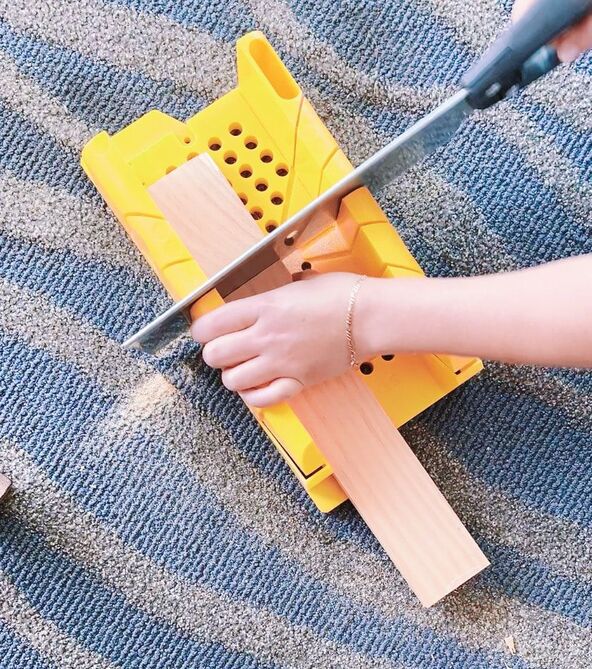
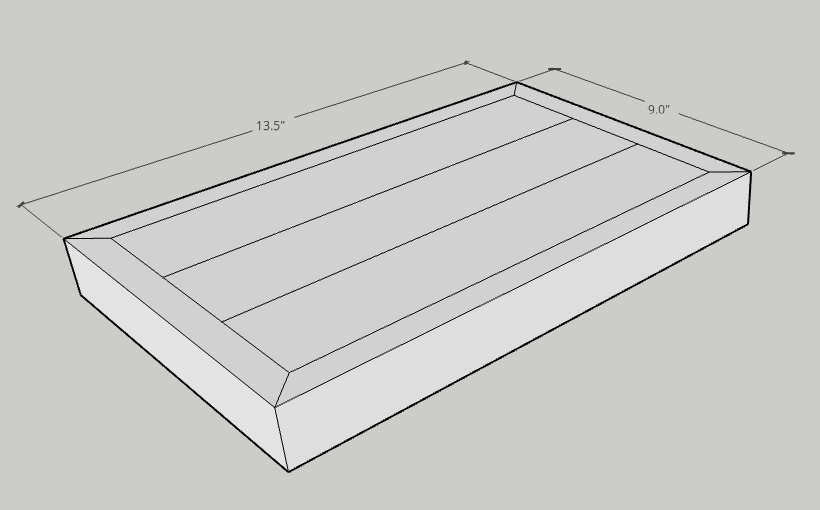
While the wood dries, I cute the angled pieces needed for the border. Use the 1x2's and cut 2 x 13.5" pieces and 2 x 9" pieces using the 45 degree angle on the miter box. You can modify the length of these and the base depending on how big you want your stool to be.
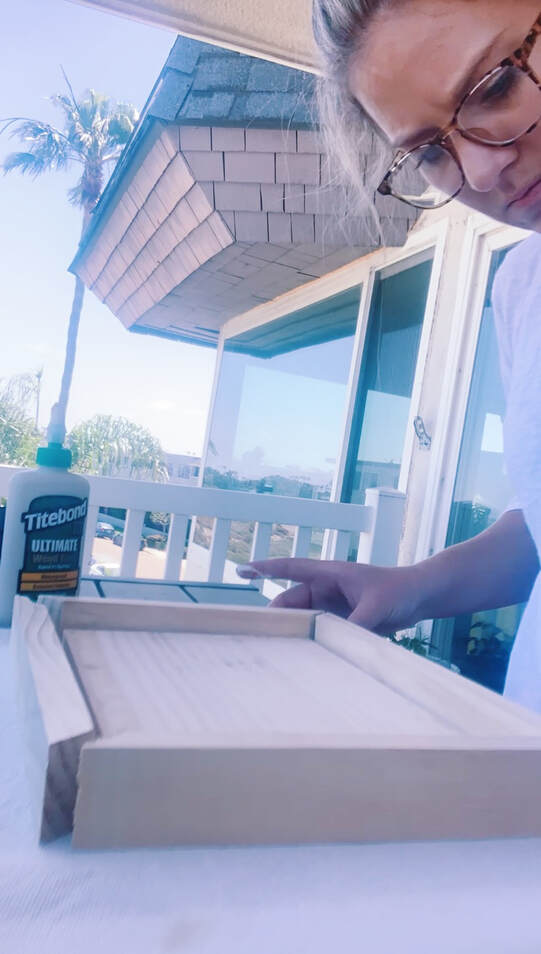
Once the glue has dried, nail the ends of the border into the main step.
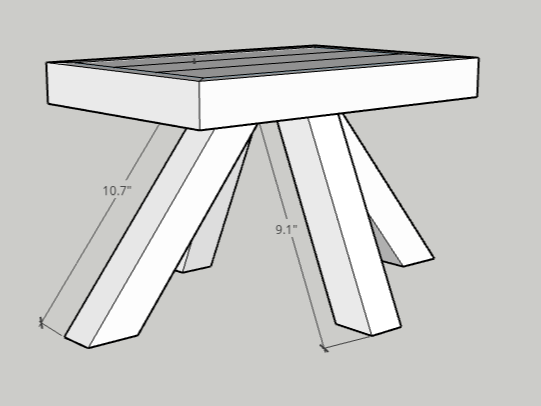
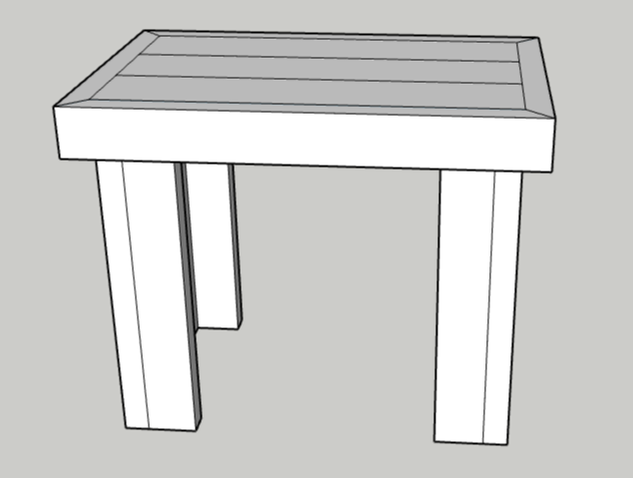
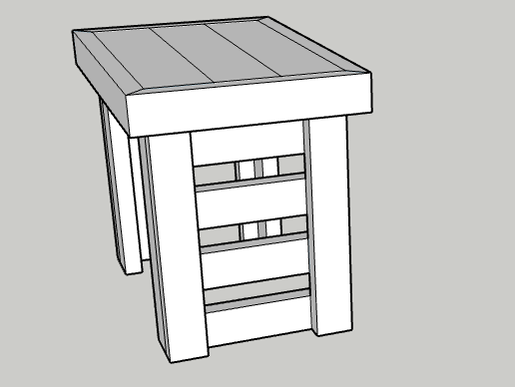
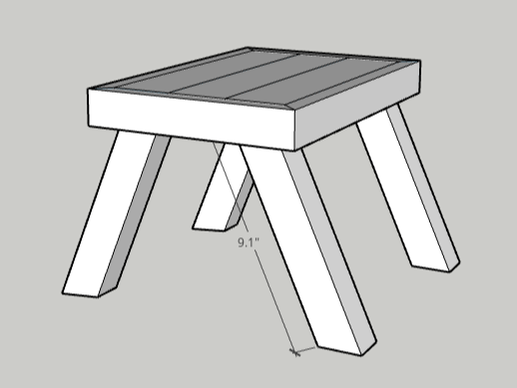
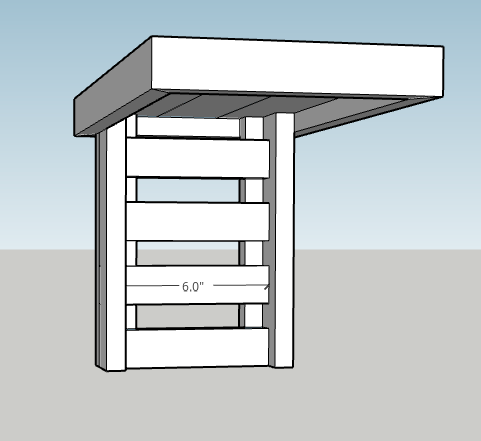
Here's the part where you can totally make it your own. I wanted a super modern look so went with the angled legs stemming from the center (P.S. This stool holds my full weight jumping up and down on it so it is very sturdy.), but like I mentioned, if you don't step relatively center on this stool, it does topple, so I have a few other ideas for the legs. See all 4 options and dimensions below.
For option 2, and 3, I would use wood glue to make the L-shape legs , similar to the glider bench, and then used the 1x2's to make the lattices in option 2.
That's it! A simple DIY that I would recommend for beginners. It takes less than 2 hours and under $10 dollars to personalize a little piece of your home. Let me know which one of the leg options you come do, or even better, a new style that you come up with!
xoxo,
Jessica
P.S. Since I know everyone loves a good before and after, here it is:
I've always wanted a day bed porch swing. Ever since I was a little kid, I would swing from a hammock and dream of the day it would be a comfy bed, filled with giant pillows and the breeze coming through. As much as I have wanted one, there a few things that have hindered it. 1) My balcony is relatively small and a twin size mattress could quite possible take up the whole space, and 2) there are no hooks on the ceiling of the balcony and HOA doesn't allow any alterations to the physical structure.
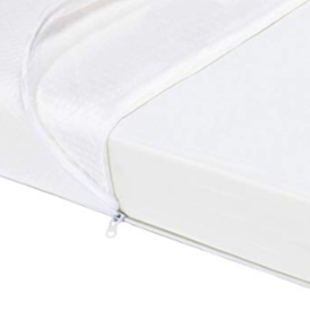
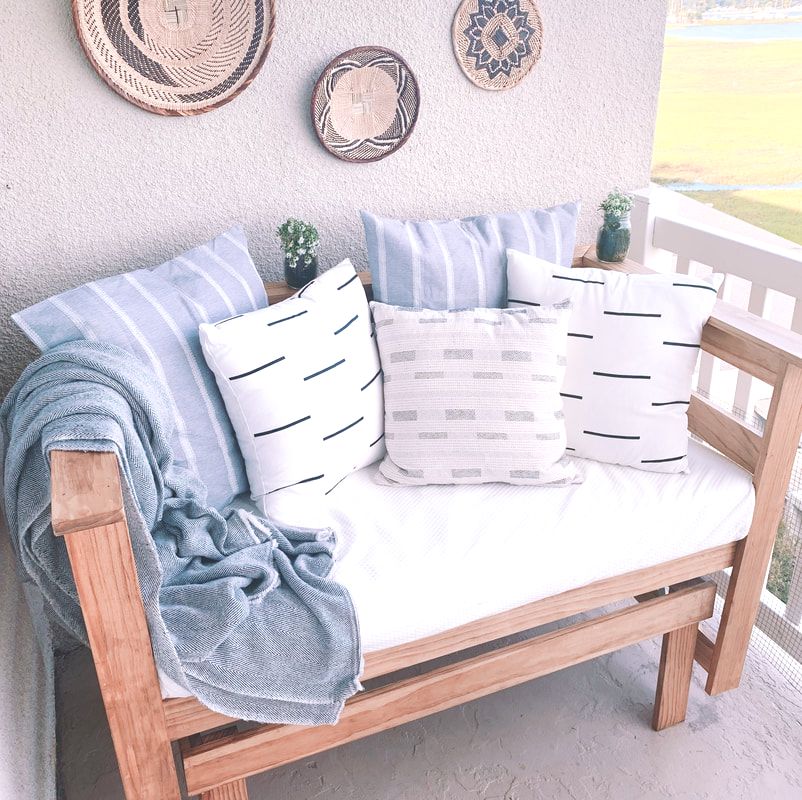
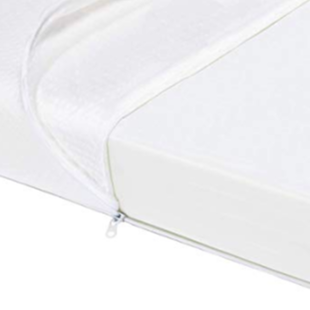
So for years, I just pinned my dream day beds for the one day I had a big enough yard and house. Then recently, my friend was giving away some old baby items, and I realized that a crib mattress would be the perfect size, mini day bed to fit the side of the balcony. Problem 1 solved. Then I researched potentially building a pergola on the balcony to hang it from, but that quickly became too big as well. Finally I thought of how much I liked rocking chairs and that would create the similar motion to the swing. I googled homemade rocking chairs and found that glider brackets work just as well.
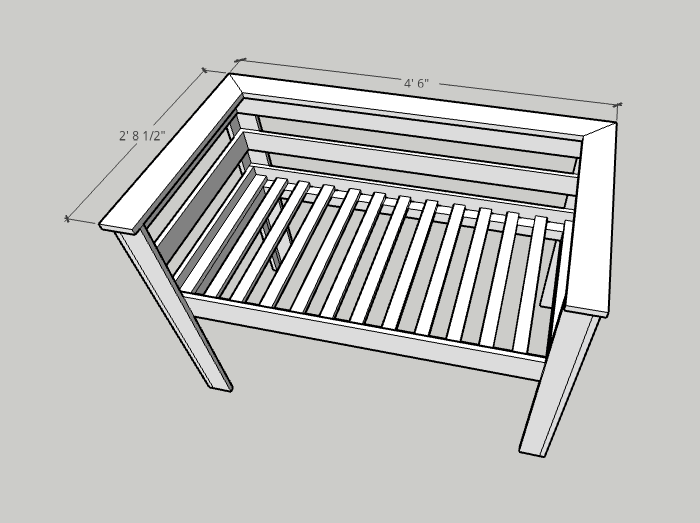
I'm super excited about how it turned out, it is the perfect seating area on our balcony and I've put together a complete guide so you can make one too! Note: I made mine slightly higher so that we can see over the balcony railing, but you can adjust the leg sizes to fit your space.
Here's what you will need:
SUPPLIES:
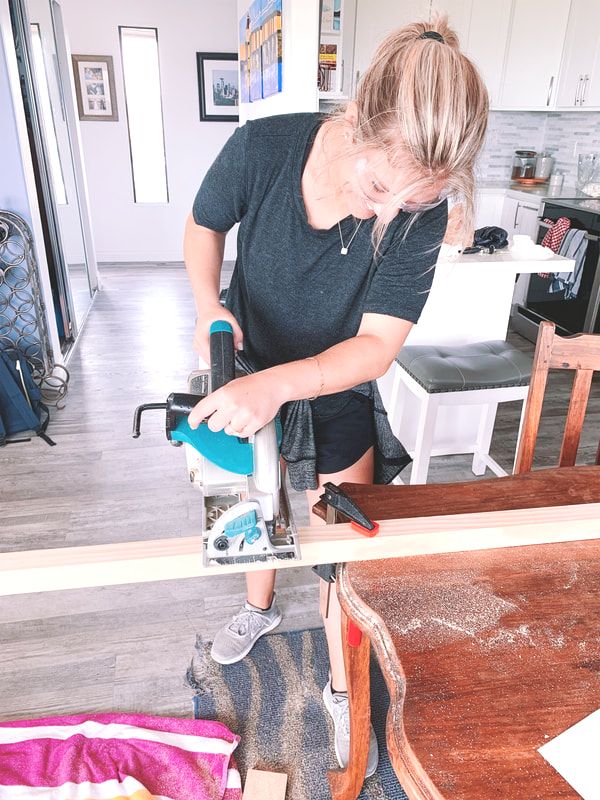
- Circular or Miter Saw - I rented a circular saw from Home Depot. I was able to finish the project in 1.5 days so it was only $50. I think it could be finished in 1 day as well, I just started late in the afternoon on Day 1 so it rolled over.
- Tape Measurer
- Wood Glue
- Glider Hardware
- #8 1 - 1/4 Wood Screws - ~60 needed (You can use nails instead, but I wanted it to be extra sturdy so I used wood screws throughout)
- #6 1 - 1/4 Wood Screws - ~30 needed
- #8 2 - 1/2 Wood Screws - ~10 needed
- 1/4 inch 2" Nut and Bolt Set - 8 needed
- Wood stain - You can use a deck stain that is waterproof, I decided to use a finishing stain (Golden Oak) followed by a clear sealant.
- Kreg Jig - See pocket hole post for details
- Power Drill - you can rent this at Home Depot too
- Philips Head Screw Driver and Drill Kit
WOOD:
- 8 pieces of 1″ x 4″ x 8′ clear pine
- 7 pieces of 1″ x 3″ x 8′ clear pine
- 3 pieces of 1″ x 2″ x 8′ clear pine
- 2 pieces of 2″ x 2″ x 8′ clear pine
PLANS & INSTRUCTIONS:
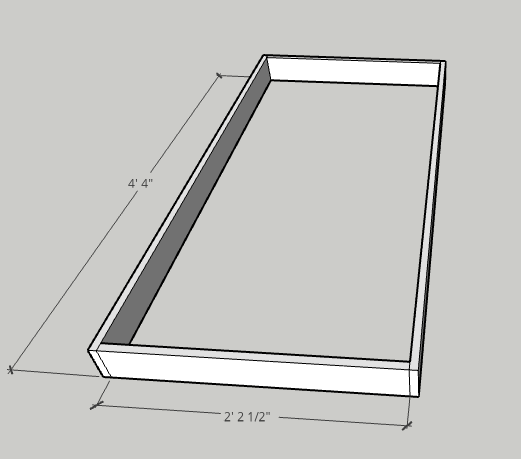
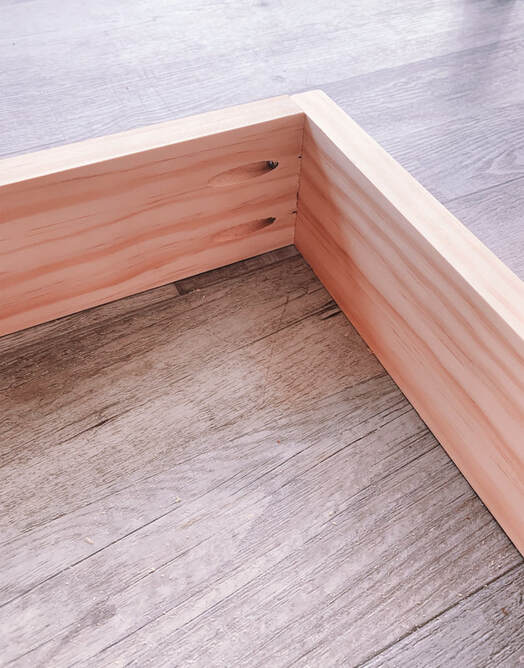
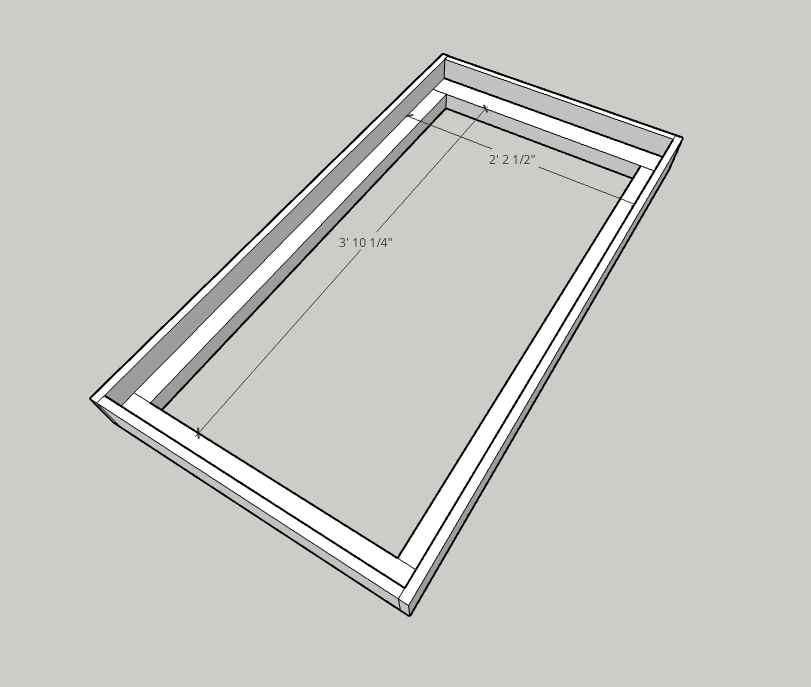
Start with the frame. I used 1 x 4's and pocket joineries with #8 1 - 1/4" wood screws.
Next, I added 2 pieces of the 2×2 to the inside of the frame. I placed these flush with the bottom edge and used the #8 2-1/2 inch screws to secure them. 2 on the shorter sides (about .5 inch from the edge) and 3 on the longer sides, evenly spaced.
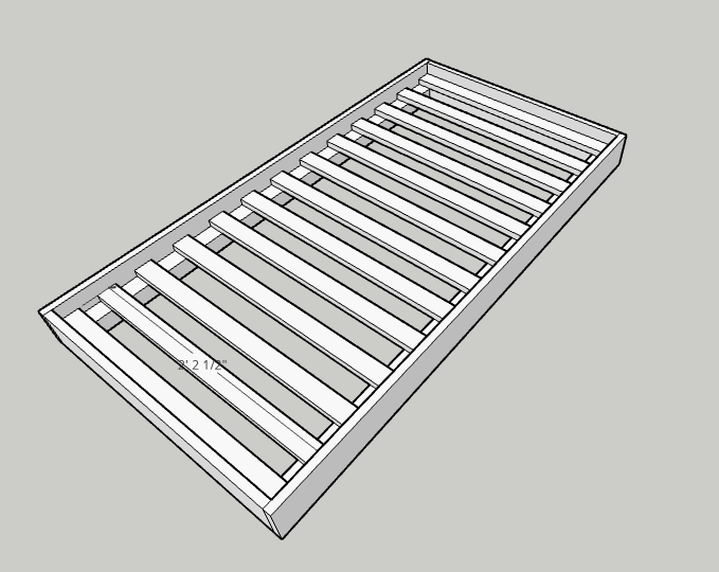
Then I added the 1×2's in the middle (13 pieces, each 26.5 inches long). These pieces will support the seating underneath the mattress. I attached these using the #8 1-1/4" screws on each end.
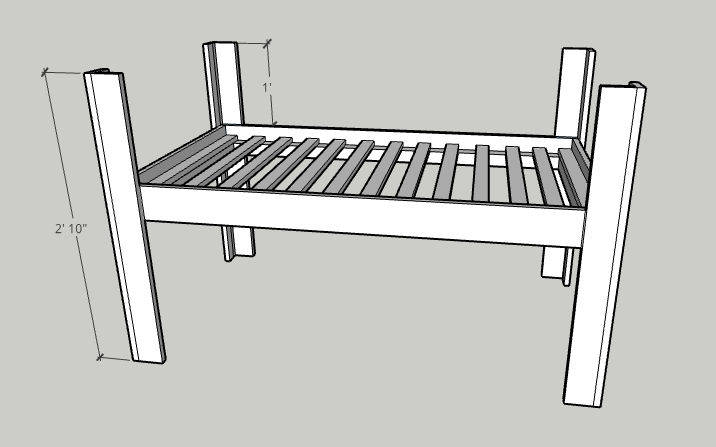
I cut 8 pieces of the 1×3" to 34" in length to make the posts for each corner of the frame.
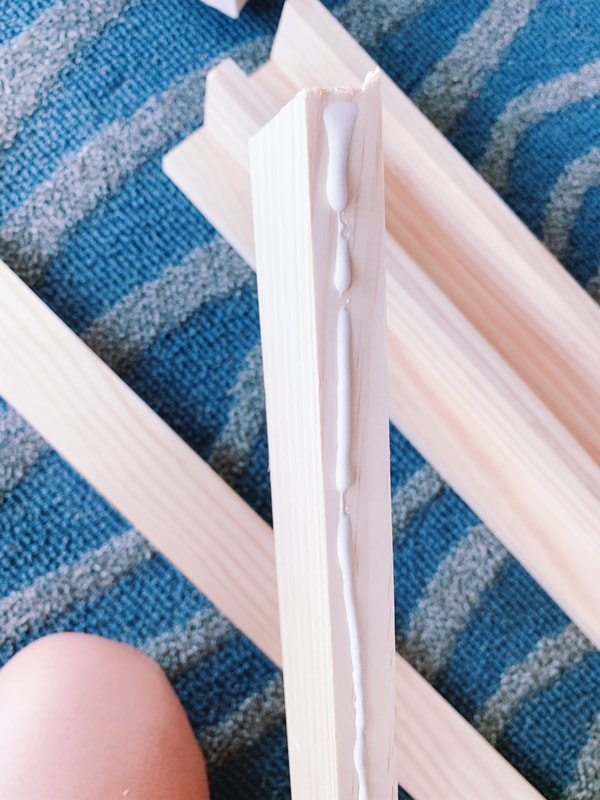
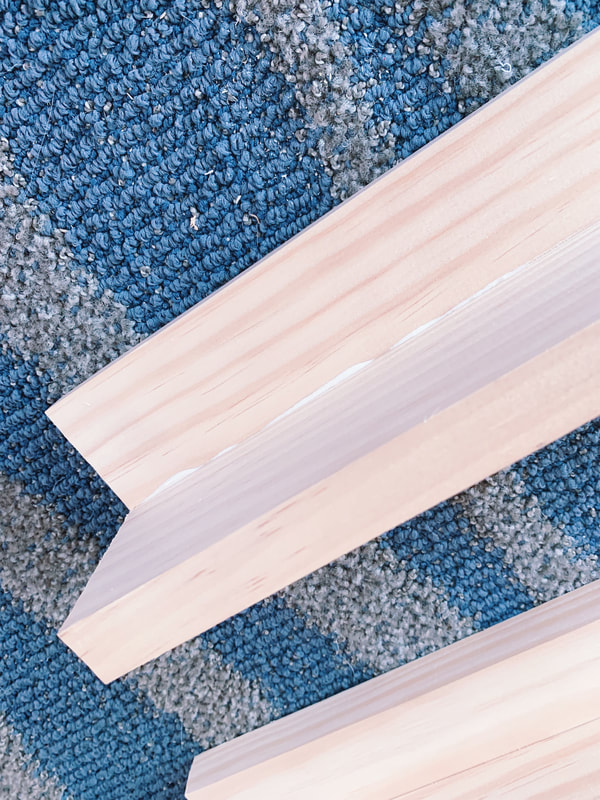
Two pieces make up one post in an L-shape. I applied a bead of glue down one edge and added 3 screws evenly placed with the #6 1 - 1/4" wood screws.
Two pieces make up one post in an L-shape. I applied a bead of glue down one edge and added 3 screws evenly placed with the #6 1 - 1/4" wood screws.
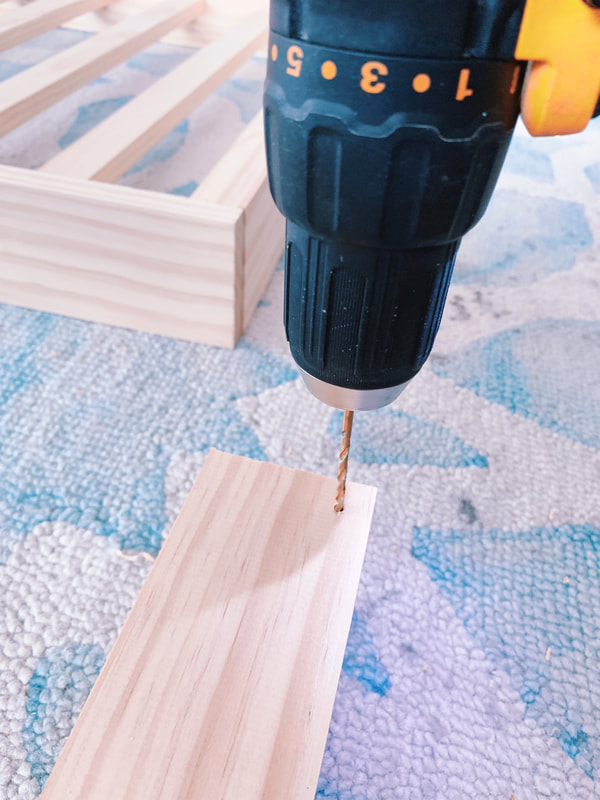
Tip: To avoid cracking your wood, whenever you join 2 pieces of wood with a screw, always pre-drill your hole with a drill bit that is just slightly smaller or about the same size as your screw.
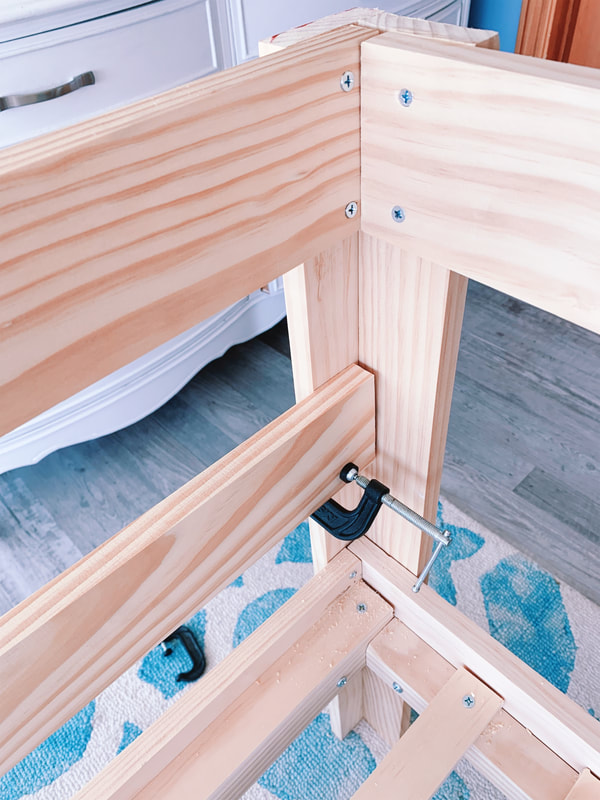
Next, I attached the legs to the seating base with wood glue and #8 1-1/4" screws on the outside right and left of the legs.
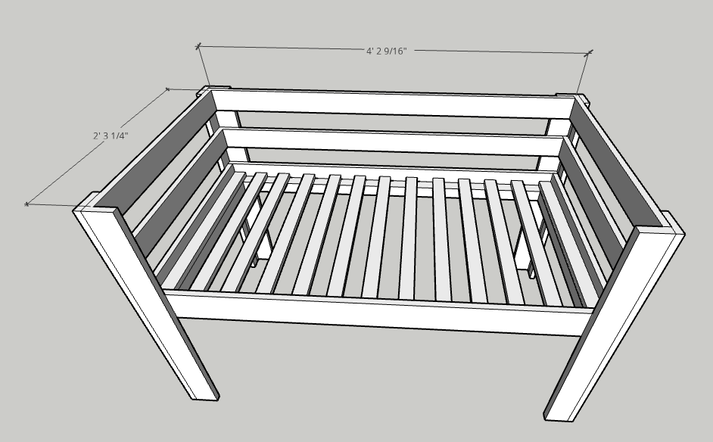
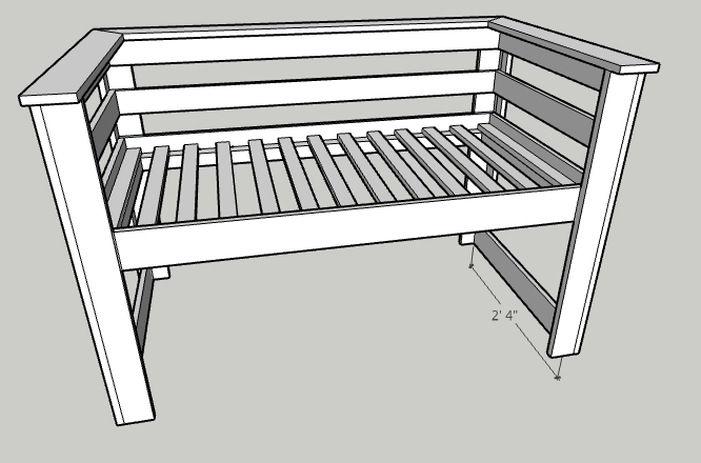
After all four posts were in place, I added the top and mid rails. These are cut from the 1×3’s. See the image below for placement and lengths. I used glue and the #8 1-1/4" screws to secure the position (2 screws on each end).
I then cut all three pieces for the top caps of the sides and back of the swing. For this I used 1×3’s. I cut the ends where they meet at a 45 degree angle. See measurements and placement below. I had a few finish nails around the house so I used these to secure the caps to the rails, but you could also use the #6 1-1/4" screws.
The last part of the upper bench is the lower rail. This will be used to attach to the glider base. I used glue and the #8 1-1/4" screws, 2 on each end to secure it.
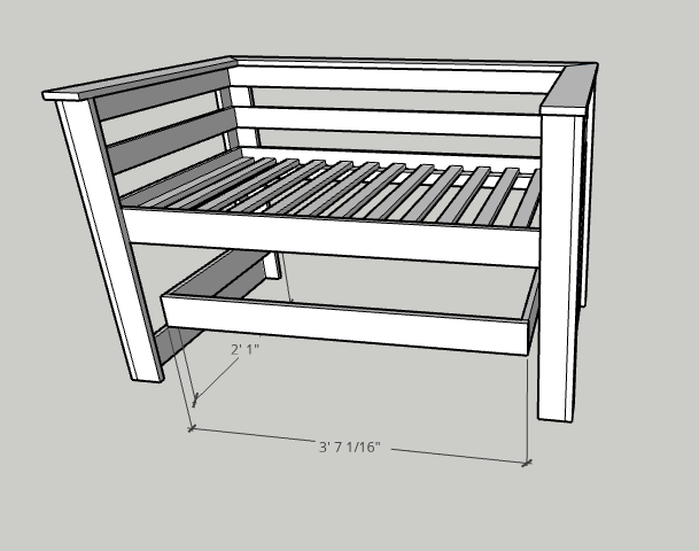
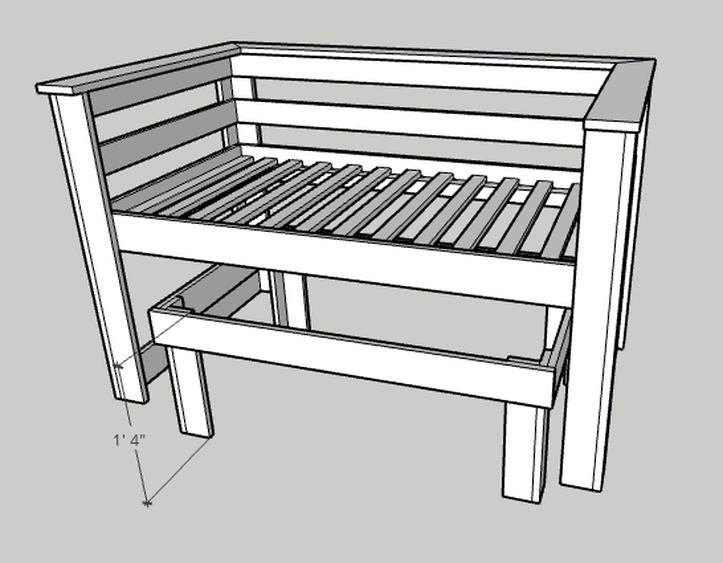
Next up, I started on the frame for the seat base. You can do this outside of the bench frame and attach them later, I just showed placement for reference in the images below.
Just as we did or the upper seat frame, I used the pocket joineries to make the base with slightly shorter pieces. See dimensions below.
Just as we did or the upper seat frame, I used the pocket joineries to make the base with slightly shorter pieces. See dimensions below.
In order to allow the upper bench to have enough clearance to swing from the lower base, I placed the post legs on the inside of the frame. I cut these to 16" and used the same L-shape formation with glue and screws to secure it.
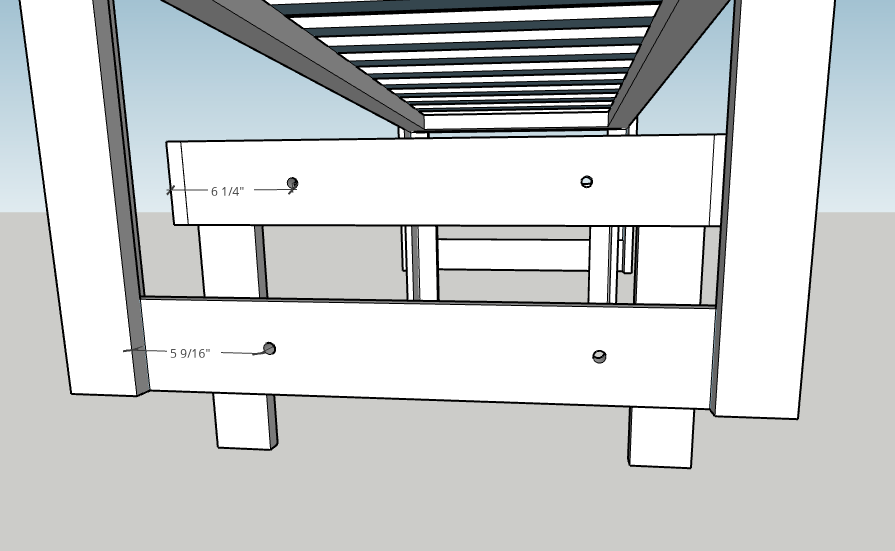
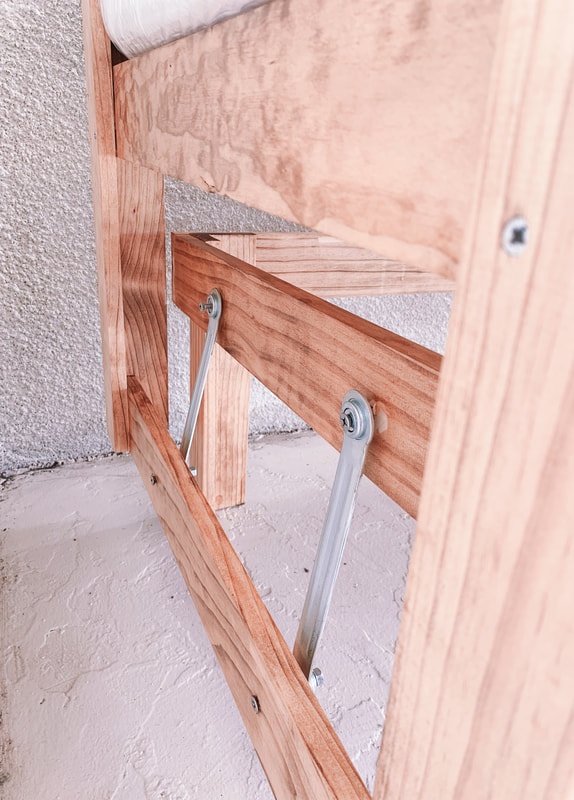
The last piece requires a 1/4" drill. This part is prepping the connection point for the glider hardware to be installed. Use the dimensions below to place your holes.
Again, I wanted my bench to be fairly high in order to see over the balcony rails. You can adjust the legs of your upper seating and lower base in order to find your ideal height. As long as you ensure the bottom of your base piece and the top of our outside edge seating is 3" apart, you should be able to connect your 7" gliders.
Again, I wanted my bench to be fairly high in order to see over the balcony rails. You can adjust the legs of your upper seating and lower base in order to find your ideal height. As long as you ensure the bottom of your base piece and the top of our outside edge seating is 3" apart, you should be able to connect your 7" gliders.
Last, install the nut and bolts to lock in the hardware and get ready to enjoy! I didn't put the bolts in all the way to leave the offset between the base and bench a little bigger.
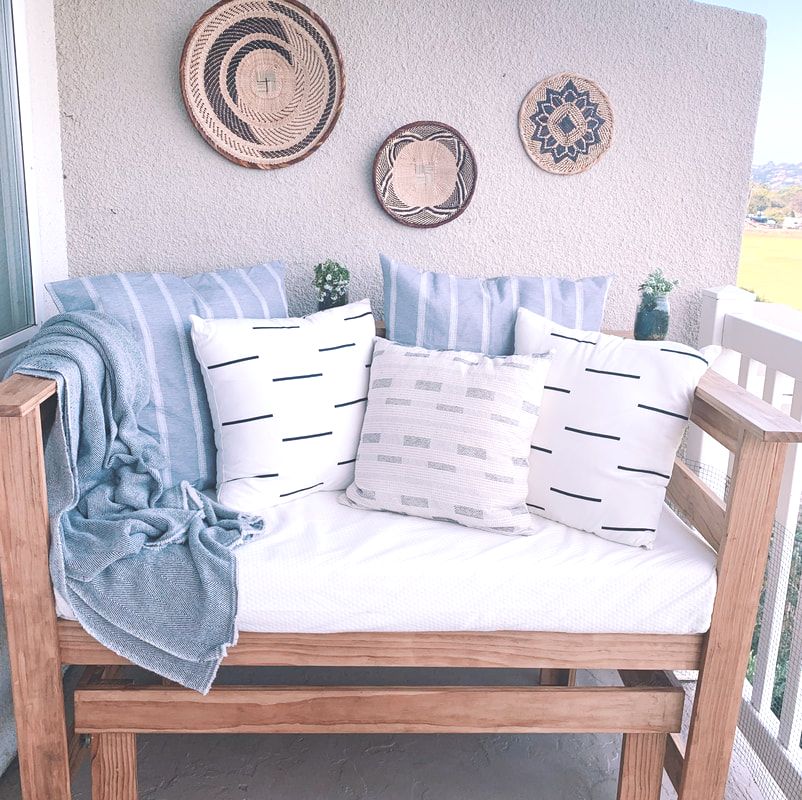
There you have it! In the picture below, not all the final decor pieces are put together but at least gives you a sense of how it looks complete. After I get all the final pieces in, I'll add a full tutorial for styling your crib day bed. Hope you enjoy and be sure to tag @beyondtheclock on instagram when you complete yours. I can't wait to see it!
xoxo,
Jessica
Shop the Post
4/23/2019 0 Comments
Summer Balcony Refresh Design
A couple weeks ago on instagram, I mentioned the fun new project that I have planned with a BTC version of a porch swing.
I have quite literally been dreaming of a porch swing/balcony sofa for at least 2 years now. We don’t exactly have the biggest balcony and it doesn’t have any hooks nor can we drill into the ceiling because that is technically owned by the unit above ours. So after many hours of googling a solution that may be on the market, I have decided to instead build a custom seat just for us. Here are my requirements:
I drew up the plans for the glider bench and I’m pretty excited for how it will turn out. I’m still debating on whether or not to make it a glider chair. I like the idea of it rocking but the foundation will take up space that we could use for storage instead. I’d love to hear what you guys think. Glider or no glider?
As I got into the design of the chair, I realized lots of other ways I could refresh the balcony at the same time.
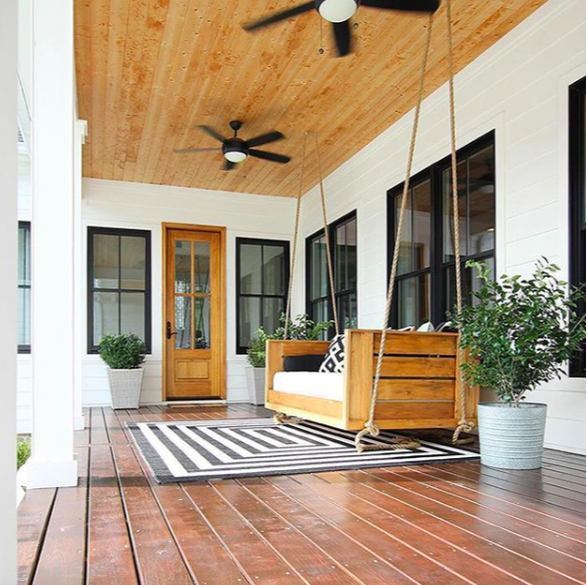
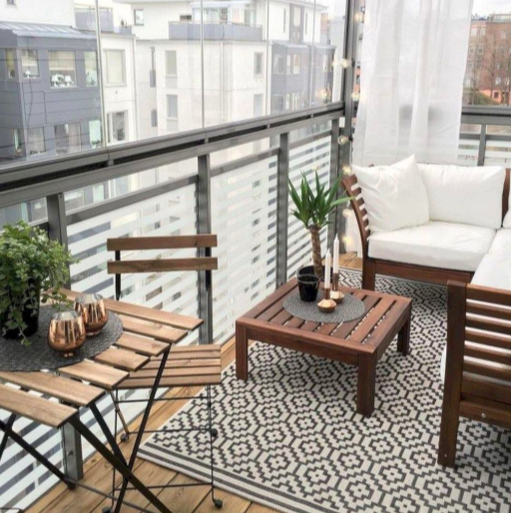
Here are a few places I’ve been getting inspiration from.
I have quite literally been dreaming of a porch swing/balcony sofa for at least 2 years now. We don’t exactly have the biggest balcony and it doesn’t have any hooks nor can we drill into the ceiling because that is technically owned by the unit above ours. So after many hours of googling a solution that may be on the market, I have decided to instead build a custom seat just for us. Here are my requirements:
- Comfortable
- Tall enough to see over the railing when sitting (but still safe height)
- Cute and modern look
- Relatively easy to build
- Still able to fit the rest of the balcony furniture on the deck (this part may prove to be the trickiest)
I drew up the plans for the glider bench and I’m pretty excited for how it will turn out. I’m still debating on whether or not to make it a glider chair. I like the idea of it rocking but the foundation will take up space that we could use for storage instead. I’d love to hear what you guys think. Glider or no glider?
As I got into the design of the chair, I realized lots of other ways I could refresh the balcony at the same time.
Here are a few places I’ve been getting inspiration from.
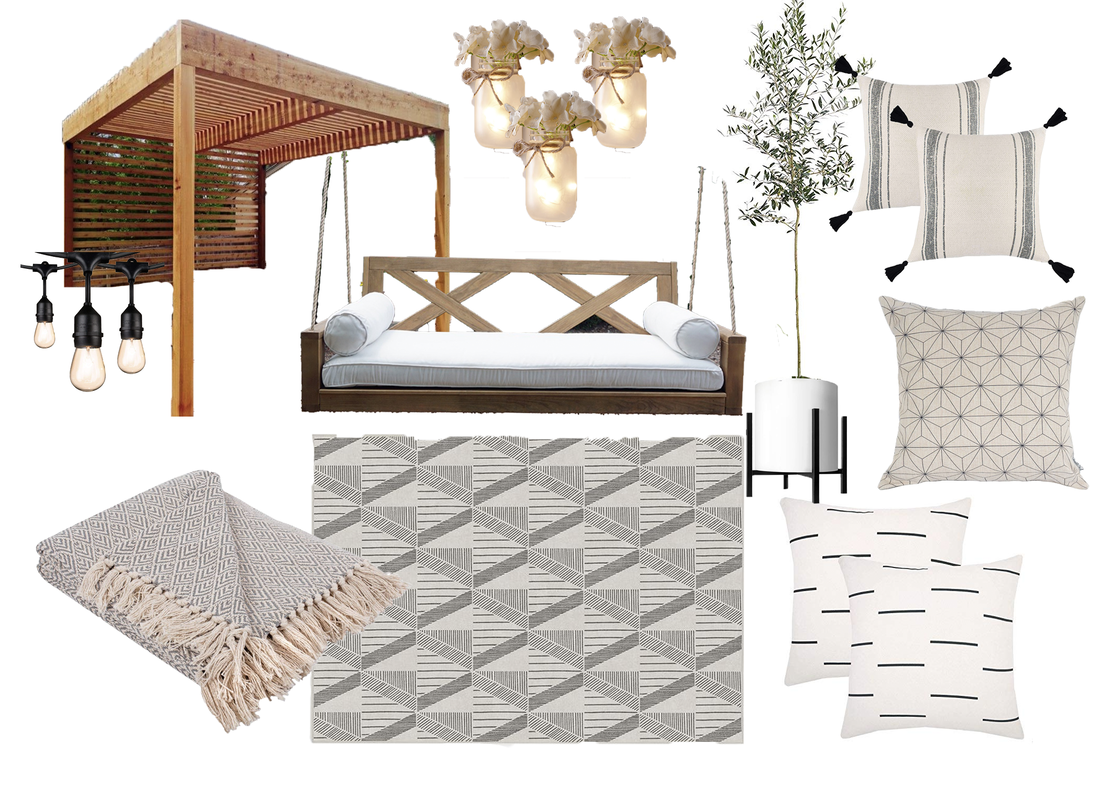
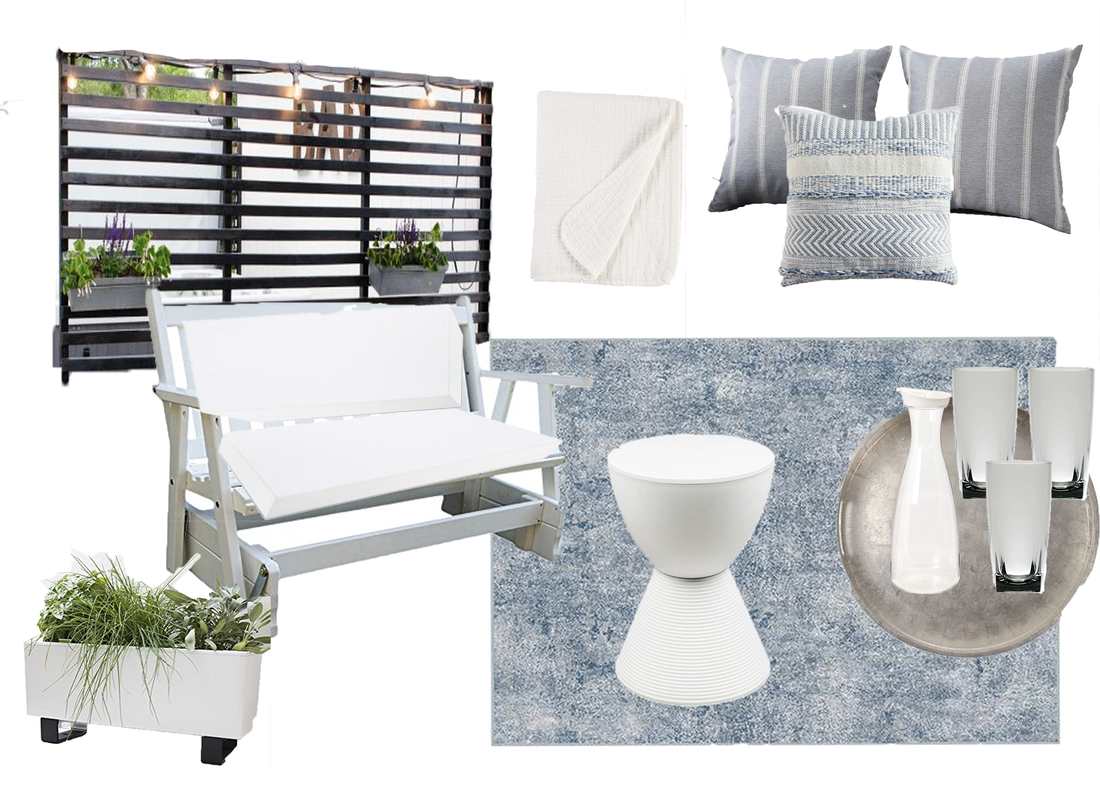
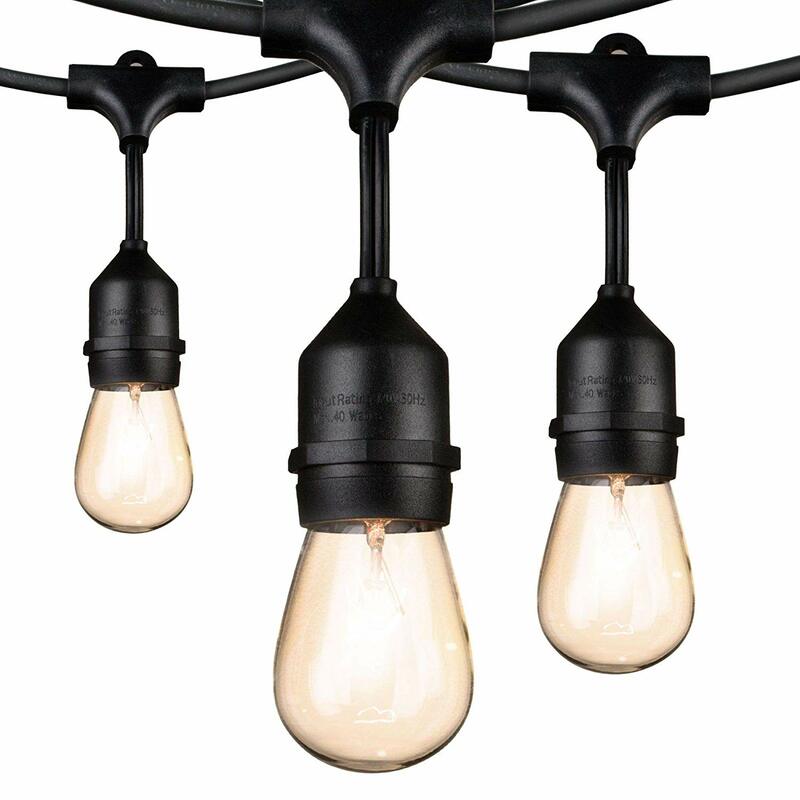
Although, I won’t be able to start work on this one for a while, I’m excited to keep finalizing plans and get your feedback along the way. Here are the two concept designs I've come up with so far. Which one is your favorite?
DESIGN #1
DESIGN #2
shop the post
DESIGN #1
DESIGN #2
Sooo which one do you like better? Comment below or click here and come weigh in on instagram . Can't wait to see what you think and thanks for following along! I'm so glad you are here. Make sure to subscribe so you never miss a post or giveaway!
xoxo,
Jessica
Favorite purchases to date:
I've shared these all on Insta stories over the last year!
It was about a year ago, Brad and I were on a walk around the neighborhood talking about our hopes and dreams.
I was sharing with him how much I was really enjoying blogging and design and that one day I would love to have my own shop filled with all my favorite things like blankets, baskets, pillows, and lots and lots of candles. Each and every item I would pick out to bring a little bit of joy to someone's home. The chance to make a little piece of their life an oasis that they can cuddle up and just enjoy.
The vision unfolded with every detail and category of the store put into place. I told Brad that the store would be a place for treasures both locally and from my travels across the world and that it would be published in magazines (still dreaming for this part but hey you have to start somewhere). I put all of it on a reminders list on my phone. The same way I make my hot lists, I made a "Future Vision" list that very night and put all the things that I wanted in the store.
the original list
So when Amazon approached me about opening up one of their influencer stores, I literally had to pinch myself. Did I think I would have the opportunity to partner with one of the biggest retailers in the world to make my vision come to life? No. Is it even better than I expected? YES!
There is probably no way I could have given all of you the benefits of Amazon if I had done it myself. Free and fast shipping, online access and even more options to browse and search. It's the perfect combination! I can still do all the curating that I love and leave the logistics to the pros!
For those of you that have been following along for a while, you know that I go to Amazon all the time for decor pieces, DIY supplies, and gifts. The BTC store is now filled with all of my favorite purchases (if you hover over the comments button, you can see my feedback on each item). It also has items from my wishlist. Right now, the Summer Fun section is my wishlist for summer and I cannot wait to start purchasing those and letting you know what I think.
Summer Fun
Make sure to follow along on Instagram for all the fun and thank you for being a part of this journey. Feel free to shop the store, I will be refreshing things all the time and a small portion of all the sales helps support this blog and all the DIY projects which I am extremely grateful for.
So head over now, follow the store, and let me know what you think of the finds in the comments below!
So head over now, follow the store, and let me know what you think of the finds in the comments below!
xoxo,
Jessica
3/17/2019 0 Comments
Style With Time: Bedroom
How to renovate a room on a budget, including best time of year to buy key furniture and decor pieces
First of all, I just have to say thank you for all the love and kind words about the master bedroom refresh reveal. It feels amazing to know that all the patience and decisions that went into it was worthwhile. (In case you missed it, here is the full reveal.)
I also got a lot of questions about the process of refreshing a room overtime instead of all at once. A few of you asked:
- Why did it take you 3 years?
- Didn’t the feeling of not being complete drive you nuts?
- How did you keep it top of mind without forgetting what pieces you wanted to add?
- What if something you wanted went out of stock?
I wanted to spend some time sharing why the room took time and also how to help you do the same!
The reason it took so long is really financial. It’s definitely not inexpensive to buy new furniture and buying it all at once makes it even harder.
Now that being said, what I learned from the process is that the slow transformation made it so much more practical for us. Instead of getting all new furniture, there were pieces that happened to cross our paths over the course of time that were perfect fits for the space but nothing we would have considered previously.
Some were reorganized from other spaces in our house, some were new vendors we discovered and loved, and some were family heirlooms that we blew the dust off of and gave new life. In this way we were able to save money and adjust the design to fit where we were and are in life.
I remember when I originally did my office makeover a few years ago, I bought a bunch of pieces all at once and then a couple months later I realized it wasn’t exactly what I had wanted.
With my bedroom it has been a slow but deeply personal evolution ensuring that the space transforms with us rather than a splash in the pan makeover.
Not only is the function of the space something that has been a great realization but also the deals you find by timing things up. There are times of the year where you can find retailers giving huge discounts on pricey purchases that can keep your budget on track and give you more bang for your buck in the long run.
So to help you guys style your next room overtime, I’ve put together my list of where and when to get some of the best deals for a bedroom (CLICK HERE to download).. It includes the template I like to use to track my wish list items (of course, I use Pinterest for that too). Last year I did similar blog posts and checklists for the living room and outdoor patio.
Now this year I’m starting on another room in the house to style with time. The living room! I’m excited about this transformation and although it will be slow and steady just like the master, I’ll be sharing my design inspiration for the space in a few weeks so stay tuned!
What’s a room in your house that has been needing some love and attention? Join me on the style with time makeover. As you do your room, I’ll work on mine and we can enjoy the fun and frustration together!
Xoxo,
Jessica
xoxo,
Jessica
P.S. Don't miss out on bonus tips and content by subscribing to the newsletter. CLICK HERE to learn more.
Archives
October 2019
September 2019
August 2019
July 2019
June 2019
May 2019
April 2019
March 2019
January 2019
December 2018
October 2018
September 2018
July 2018
June 2018
May 2018
April 2018
March 2018
February 2018
January 2018
December 2017
Categories
All Accent Pieces Action Planner Basket Baskets Bathroom Bedroom Branch Floral Arrangements Bud Vase Candles Cherry Blossoms Curtains Cylinder Vase Decor Accents DIY Door Mat Family Flare Vase Floral Notebook Floral Water Bottle Flowers Flower Wreath Flower Wreaths Furniture Gifts Greenery Guest Room Home Home Decor Indoor Plants Jeans Living Room Mirrors Narrow Neck Vase Nightstand Outdoor Living Pastels Personal Development Productiity Rugs Seat Cushions Shelf Decor Shower Sneakers Spring Spring Decor Spring Ideas Storage Ideas Style With Time Styling Tips Sunglasses Table Lamp Throw Blanket Vase Vases


































 RSS Feed
