|
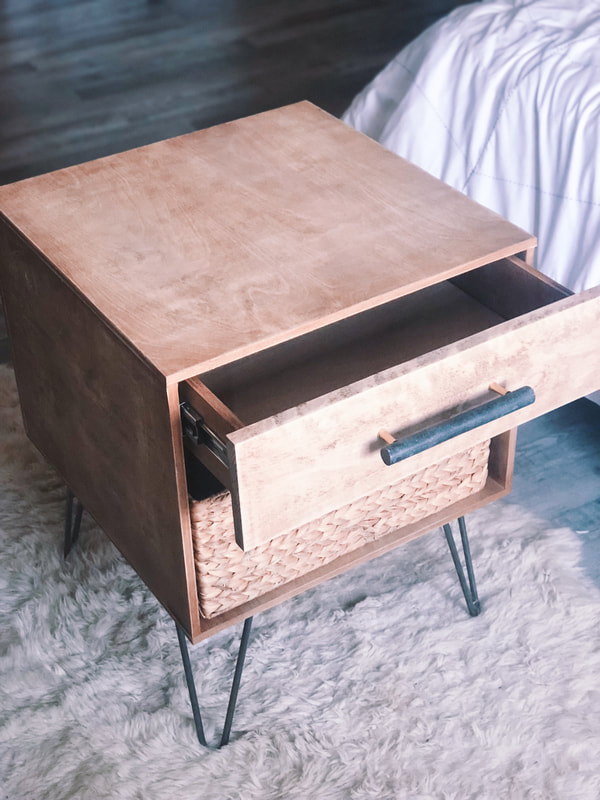
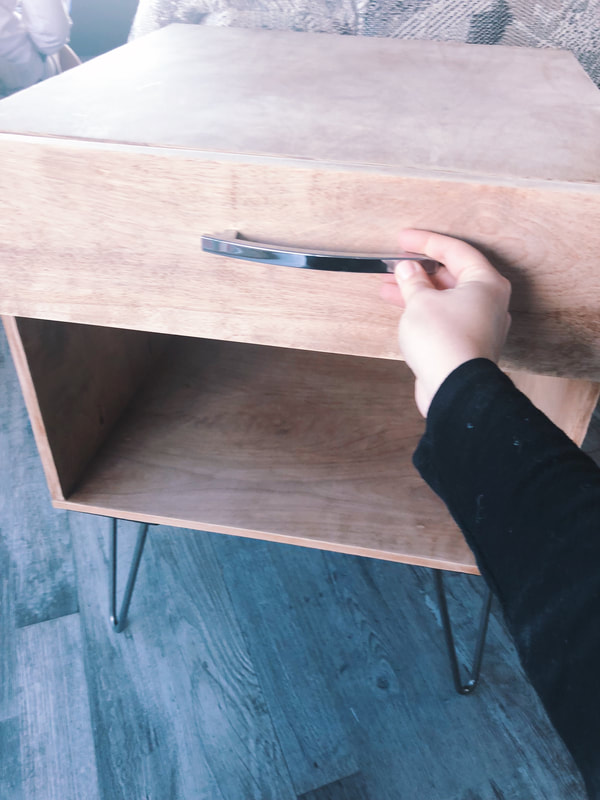
4/26/2018 4 Comments Mid-Century Modern DIY Nightstand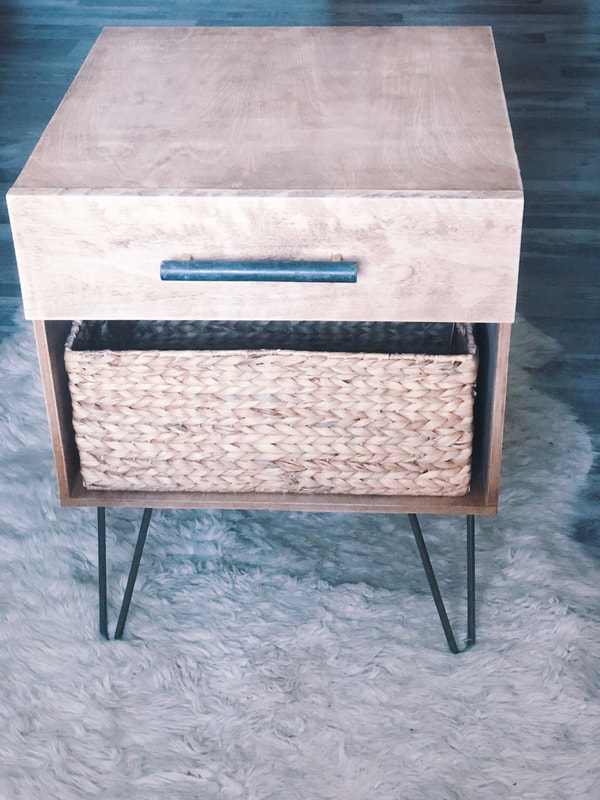
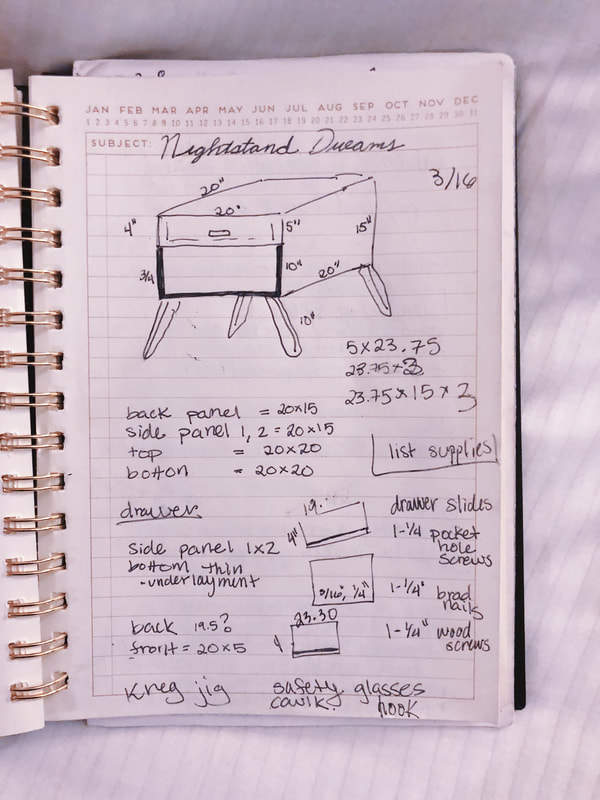
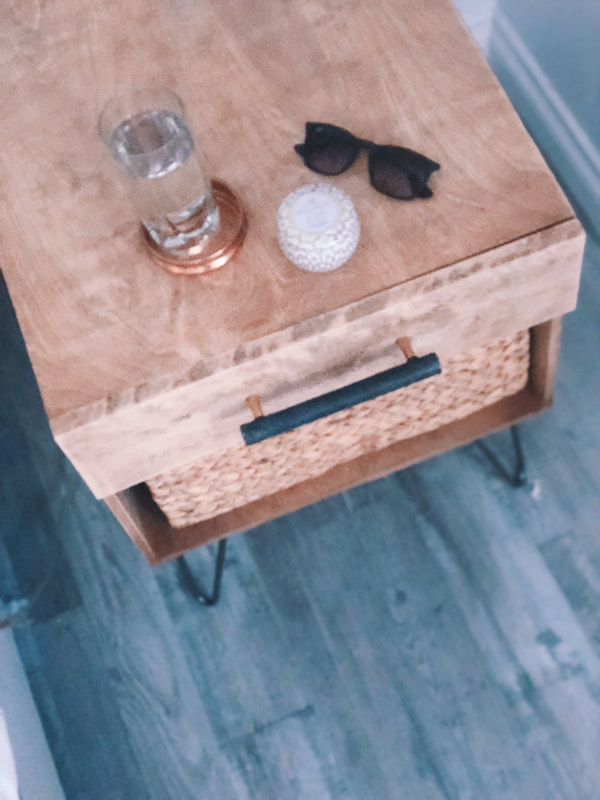
 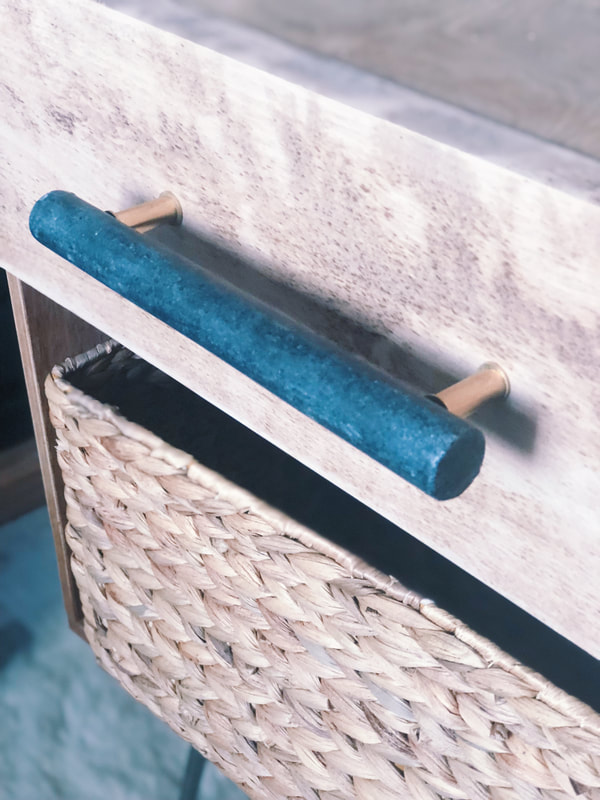  DIY Bedside TablesIf you have been following along on my instagram stories, you know that I've been working on some nightstands for our bedroom. I'm excited to share with you the complete how to guide for creating one of your own with the good, the bad and they why the heck I did this in the first place. I've been looking for nightstands for about 6 months. I know that sounds crazy, like why can't I make a freaking decision, but the battle between what I wanted and what I could afford were REAL. At one point, I had found what I thought were the perfect ones on wayfair.com but they were on backorder with no date of when they would be back in stock and I was wanting to transform our $6 straight out of college nightstands STAT! So one day, I started sketching in my notebook what I thought I would want. It took a few sketches and the design evolved but I eventually ended up with a design, the optimal dimensions for our new bed frame (plus all the stuff I like to keep on my nightstand) and voila! I then decided to google supplies on Home Depot and Amazon and I priced out a rough order of magnitude of what it would cost to build (including purchasing tools that I didn't have at home) and I was super excited to find out that I could build 2 nightstands just the way I wanted them for the price of 1 that I'd picked out on wayfair. Score! And so, the DIYing began. Supplies
Tools
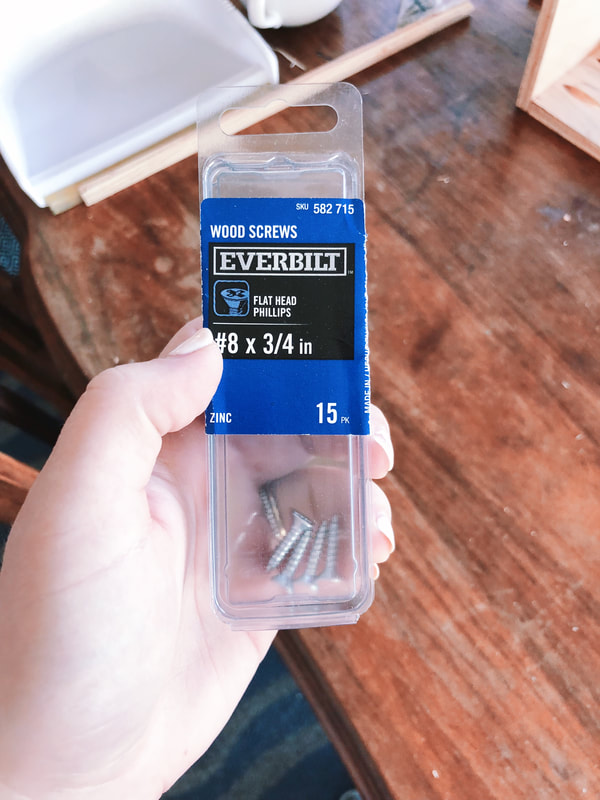
Hardware

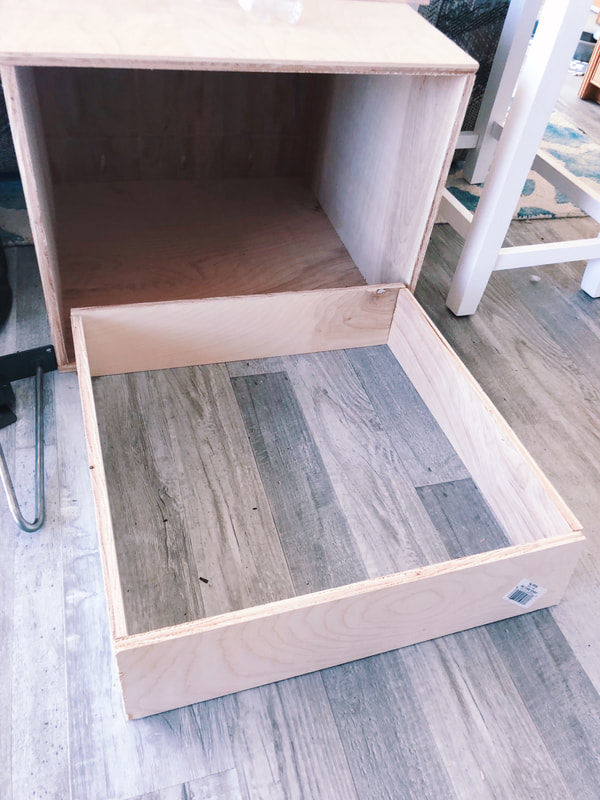
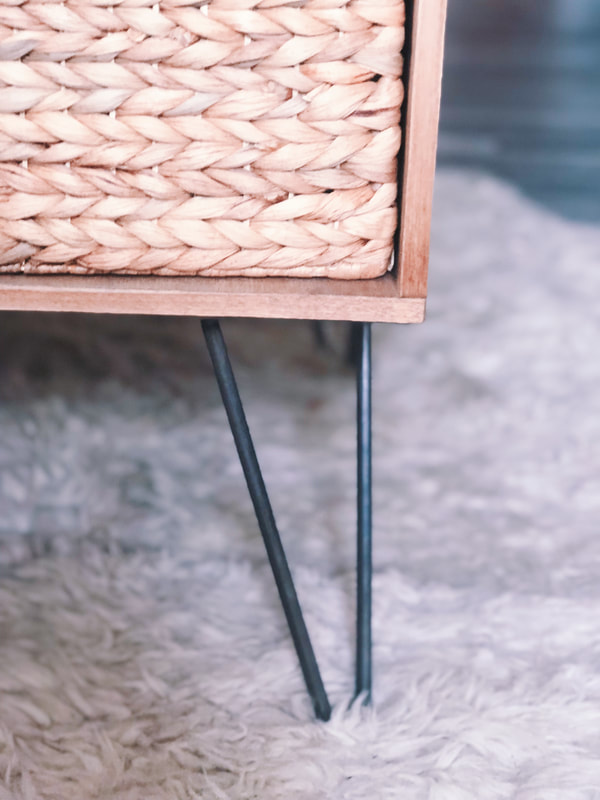
Start the BuildThe Main Compartment
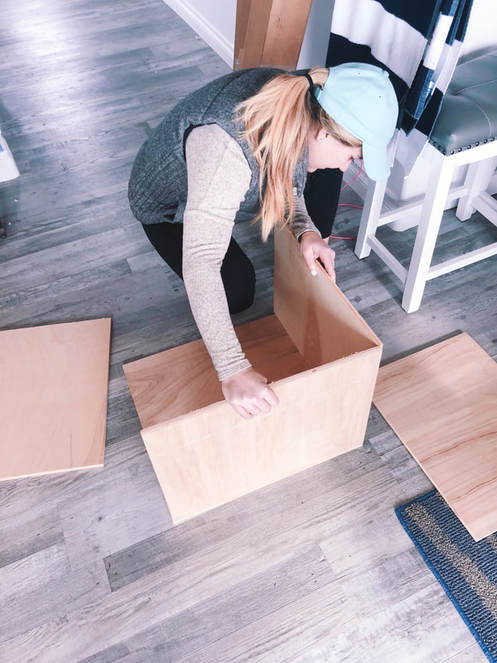  The Drawer
 The Finish
This project wasn't easy since it was my first time doing anything like this. I learned A LOT along the way but I am so excited with how it turned out. My rustic mid-century modern look is perfect next to the new bed frame. Stay tuned for the complete bedroom remodel, I'm excited to share it with you soon. Just a few more finishing touches left. Thanks so much for being a part of this fun journey. xoxo, |

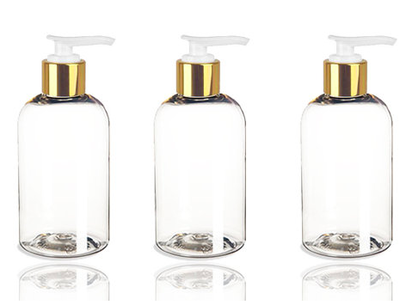
 Kerastase (I love using this 2-3 times a week to revitalize my hair and keep the dead ends away) 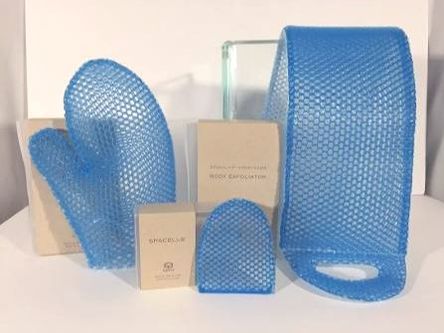 Supracor Body Scrubbers (These are great for acne, there are two sides for finer and more coarse exfoliation) | 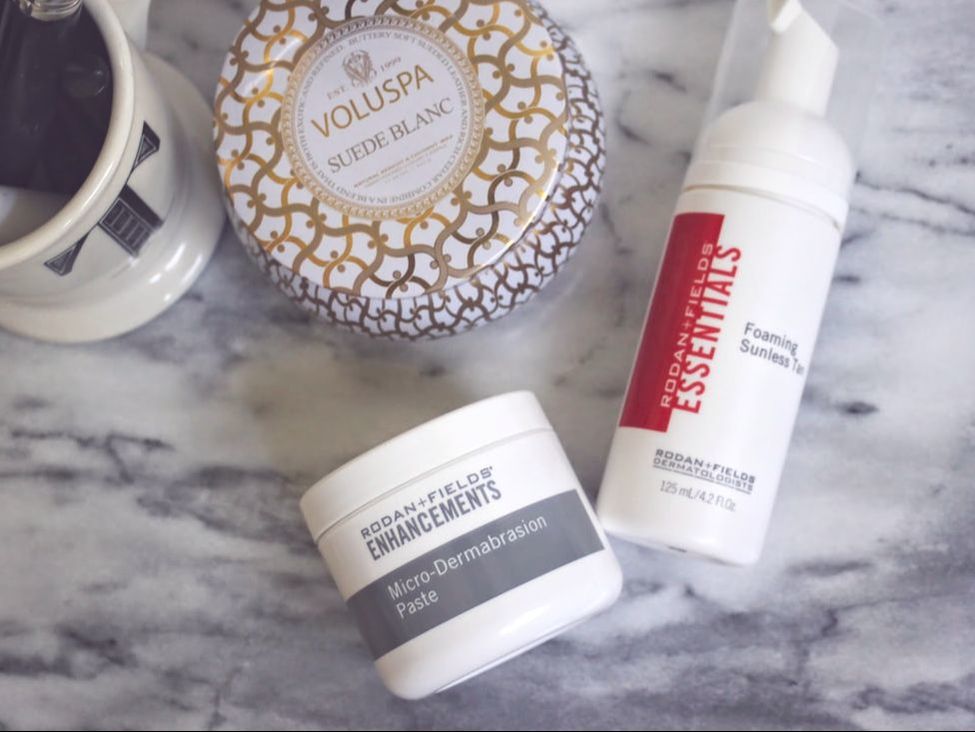 Rodan + Fields (The master exfoliator, makes your skin feel like butter after a single use)  Gillette Venus Razors (I have these in my Amazon subscription cart so that I always have fresh razors on the way) |
4. Favorite Products
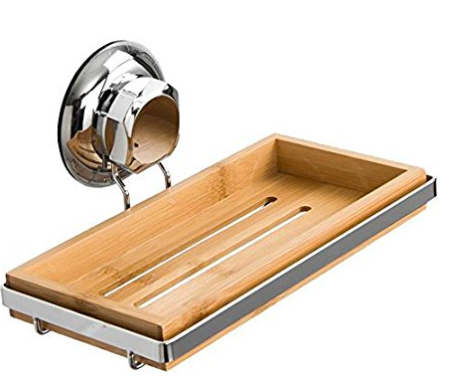
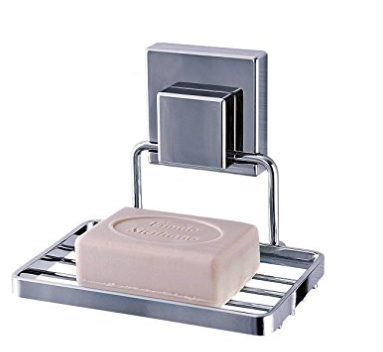
I not only keep my favorite products in the shower, but also a back-up of any of them under the sink so that I never run out. Above are some I can't live without..
I not only keep my favorite products in the shower, but also a back-up of any of them under the sink so that I never run out. Above are some I can't live without..
 |   |
Nordstrom
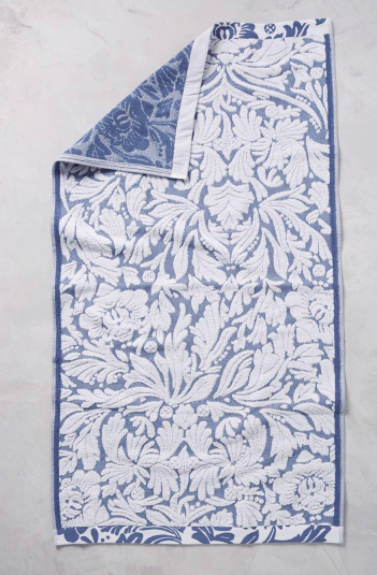
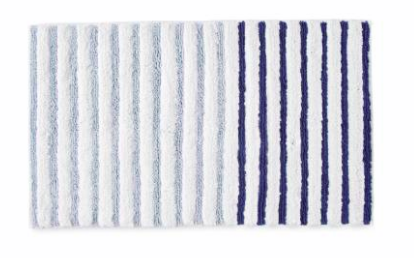
These are all on my wish list love the details in the towel and robe and the bath rug looks so clean and modern.
These are all on my wish list love the details in the towel and robe and the bath rug looks so clean and modern.
5. Post Shower Necessities
Stepping out of the shower and being covered in plush from your head to your toes is a must. The perfect towel seals in the experience. It's like putting a bow on a present... and you'll need to know the perfect bow for your robe as you relish the final moments of your shower spa escape at home.
Stepping out of the shower and being covered in plush from your head to your toes is a must. The perfect towel seals in the experience. It's like putting a bow on a present... and you'll need to know the perfect bow for your robe as you relish the final moments of your shower spa escape at home.
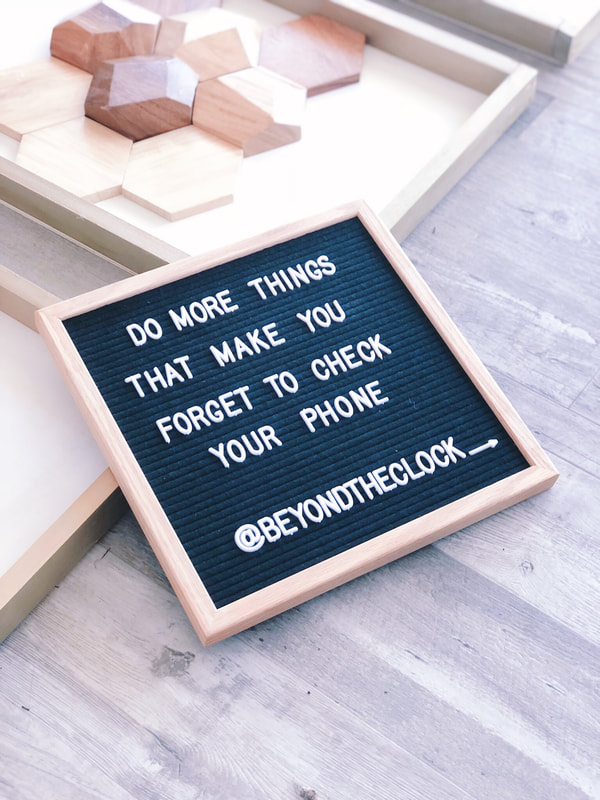
Hope you got some good ideas to make your own personal spa getaway at home. It's hard to always make time for ourselves, but making the everyday tasks just a little bit better can bring a whole lot more brightness to your day. It's a domino effect, with each thing that brings you a smile, more are sure to follow.
xoxo,
Jessica
4/16/2018 0 Comments
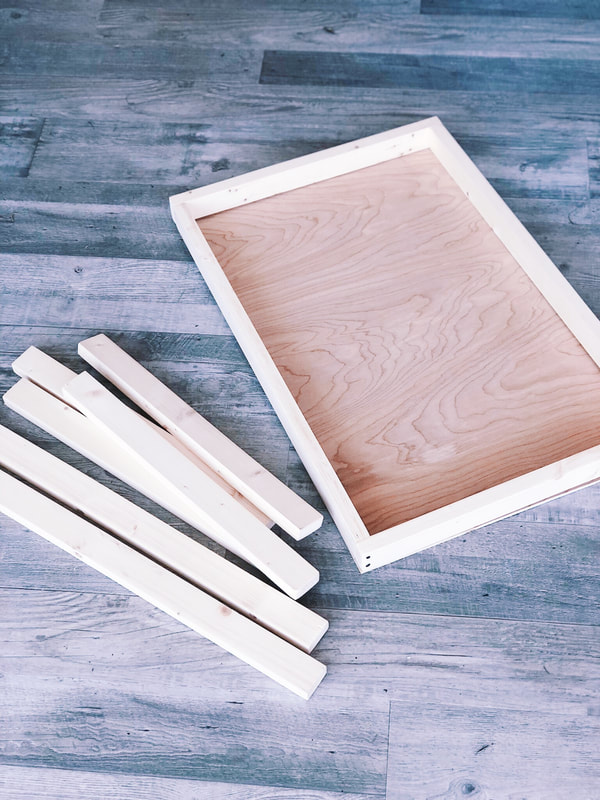
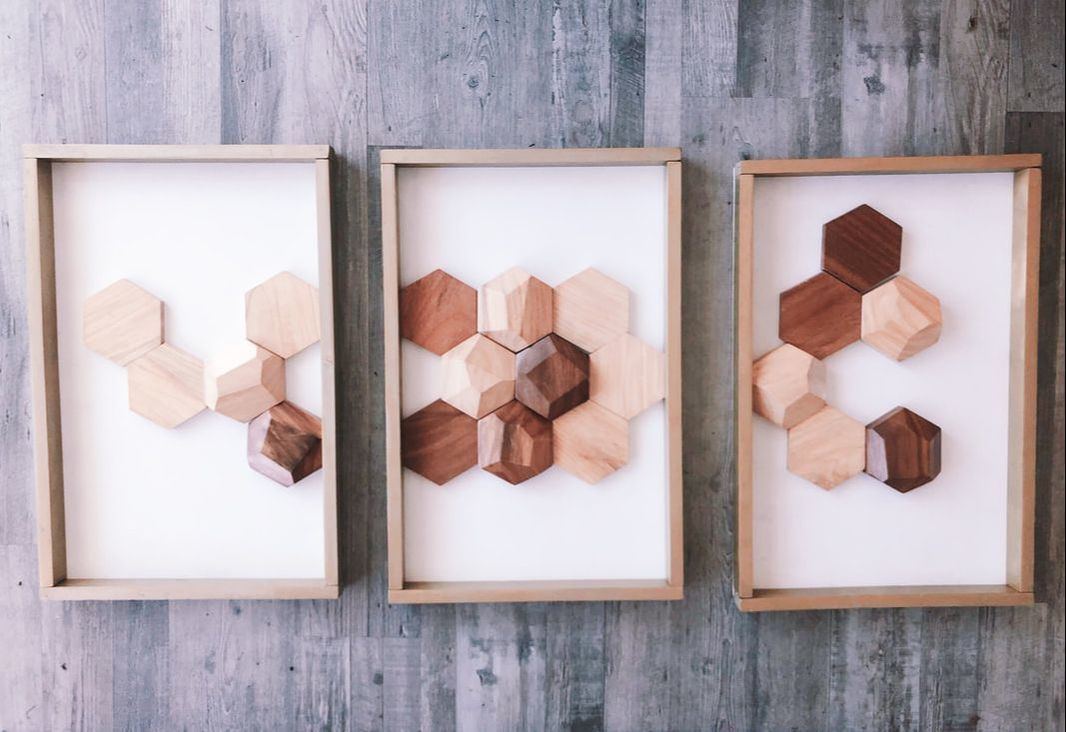
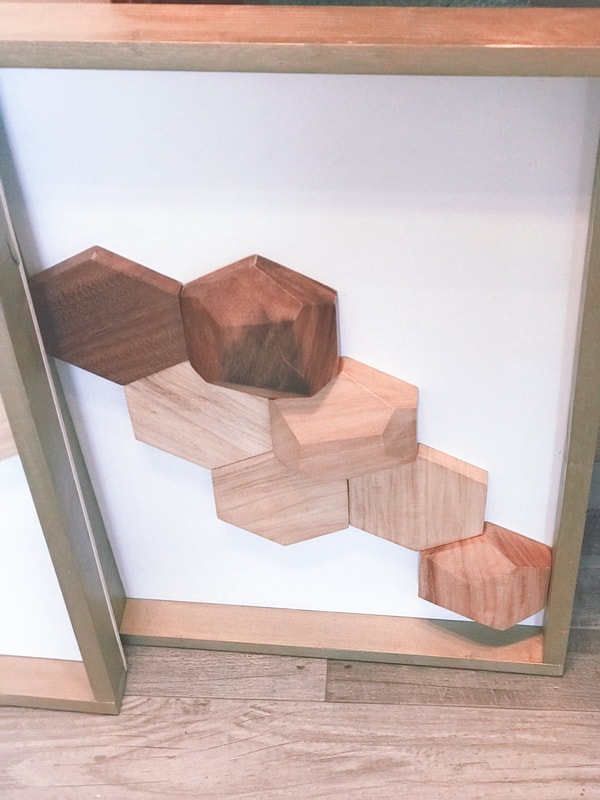
DIY Shadow Box and Trip Tych
How to make wall art that stands out in any room.
 |  |
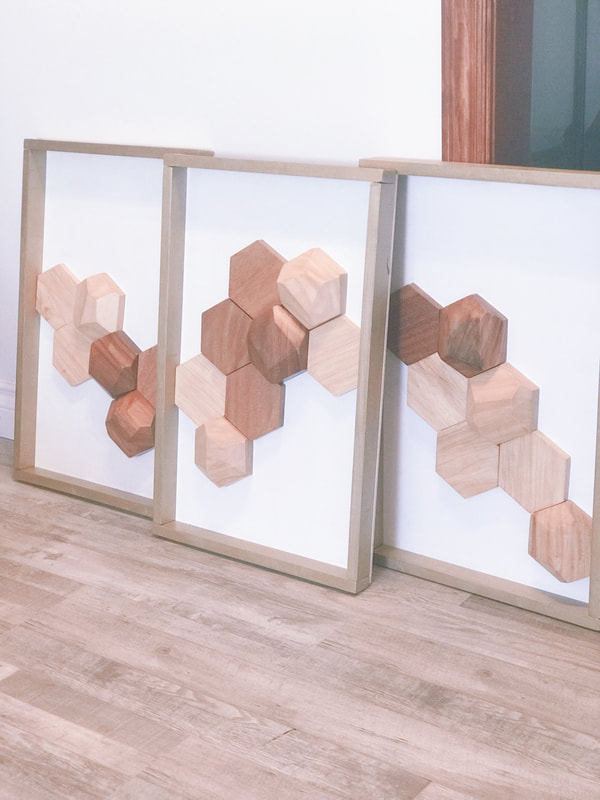 |  |
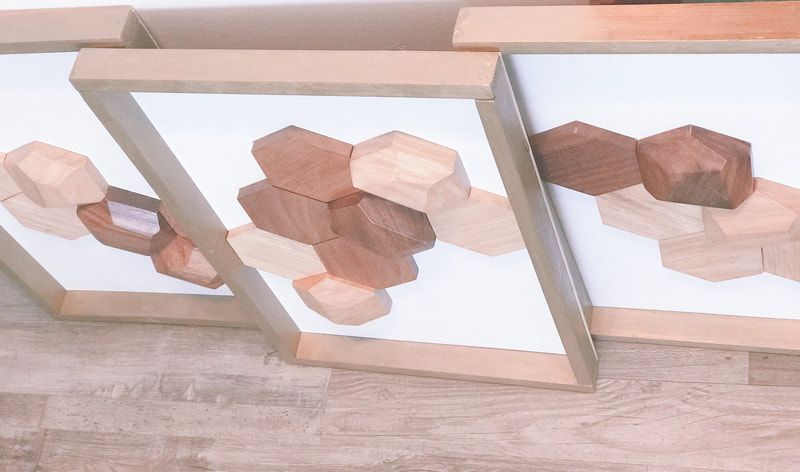
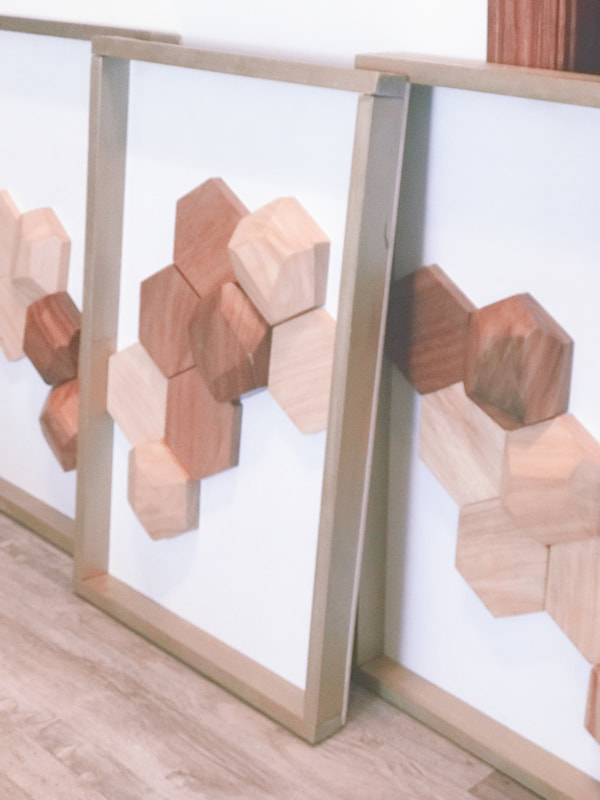
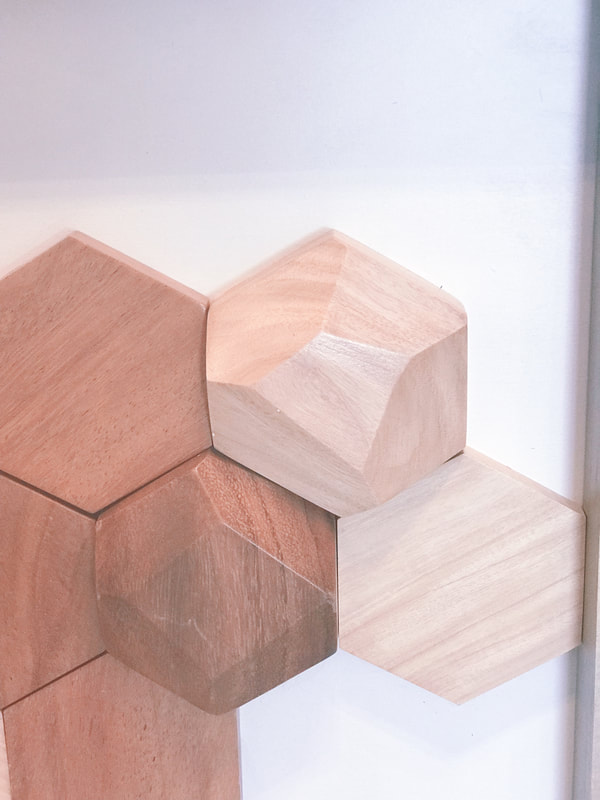
I've been looking for the perfect piece of art to go above my headboard. Something that is unique, gives flow to the room and has a sense of timelessness. After coming across these hexagon tiles for another project, I knew that I wanted to incorporate them with the subtle geometric patterned theme I had started in my bedroom.
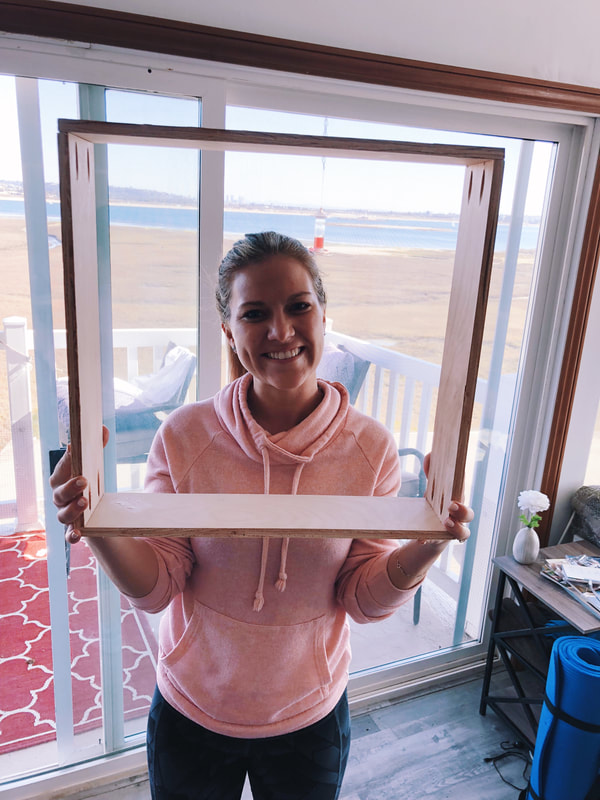
My idea to create a trip tych with shadow boxes was quickly deterred when a trip to Michael's had me squirming for $60-$100 a frame for the size range I was looking at. I quickly realized that I could build a glassless shadow box that would not only make it a lighter art piece for the wall, but also much lighter on my wallet :-). Plus, I got to customize the frames with my own paint choices. So whether you are going to paint a mural or add some unique 3D objects, give this framing technique a try.
My idea to create a trip tych with shadow boxes was quickly deterred when a trip to Michael's had me squirming for $60-$100 a frame for the size range I was looking at. I quickly realized that I could build a glassless shadow box that would not only make it a lighter art piece for the wall, but also much lighter on my wallet :-). Plus, I got to customize the frames with my own paint choices. So whether you are going to paint a mural or add some unique 3D objects, give this framing technique a try.
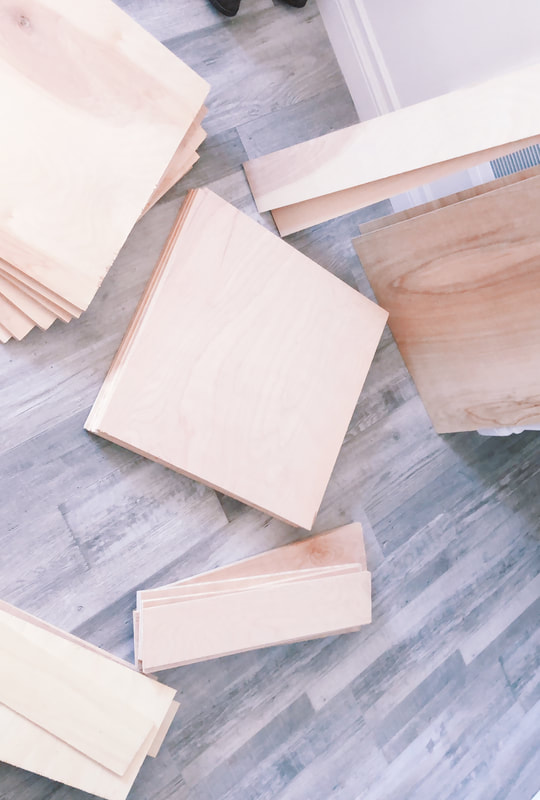
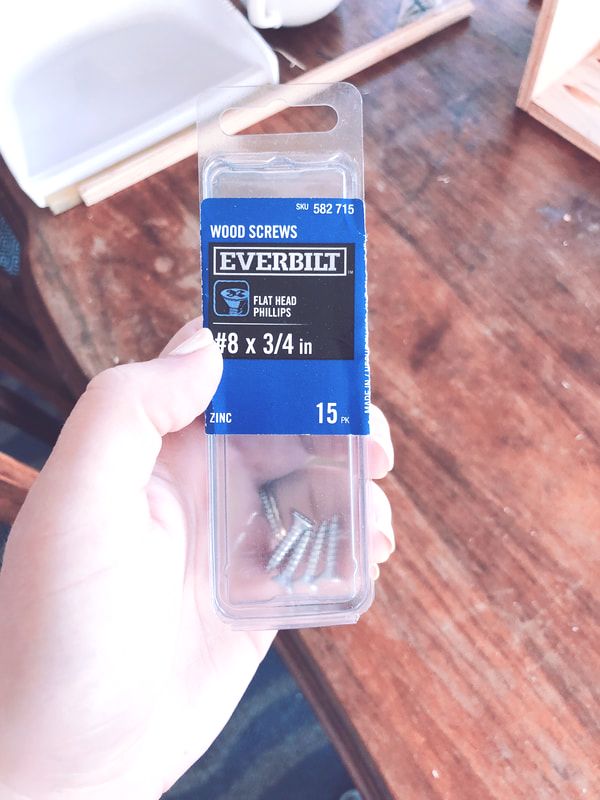
Supplies:
Steps:
1. Draw Your Plan
Thinking through your plan before heading to the hardware store saves you many trips back and forth. I suggest thinking through the dimensions and make sure you take into account overlapping measurements and joining points.
2. Let Home Depot Do the Hard Part
You can absolutely always measure and saw your pieces yourself, however, if you already have the measurements, I've found that Home Depot is always super helpful and will cut the various pieces I need.
3. Sand the pieces
To help with a smooth finish on the paint, give each piece a light sanding so that it is smooth to the touch. I just did a couple seconds per side at 80 grit paper/
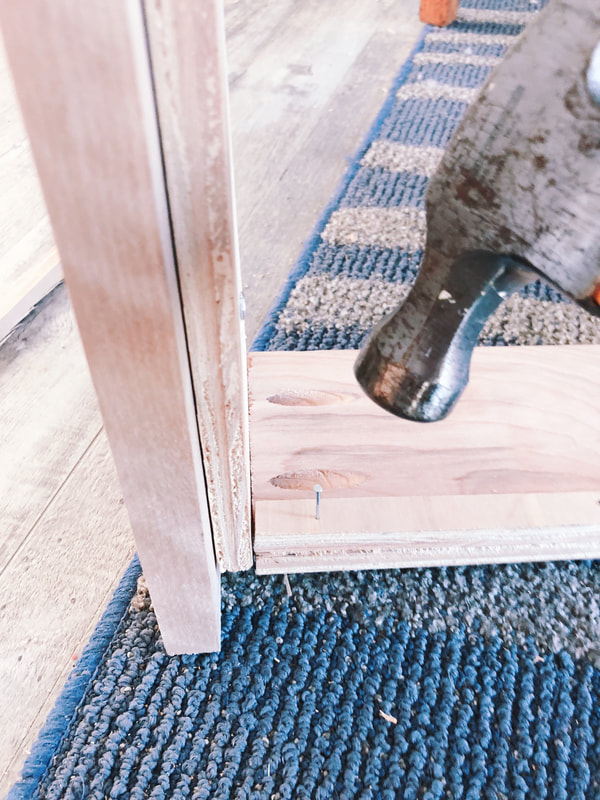
4. Hammer the frame
For this one, it is MUCH easier if you can get a partner to help hold the boards in place as you hammer. This will create a cleaner join as well as keep things in line. If you want to switch this up and do a more traditional 45 degree joiner, you can saw the pieces at 45 degrees instead and skip this part, going straight to the next step.
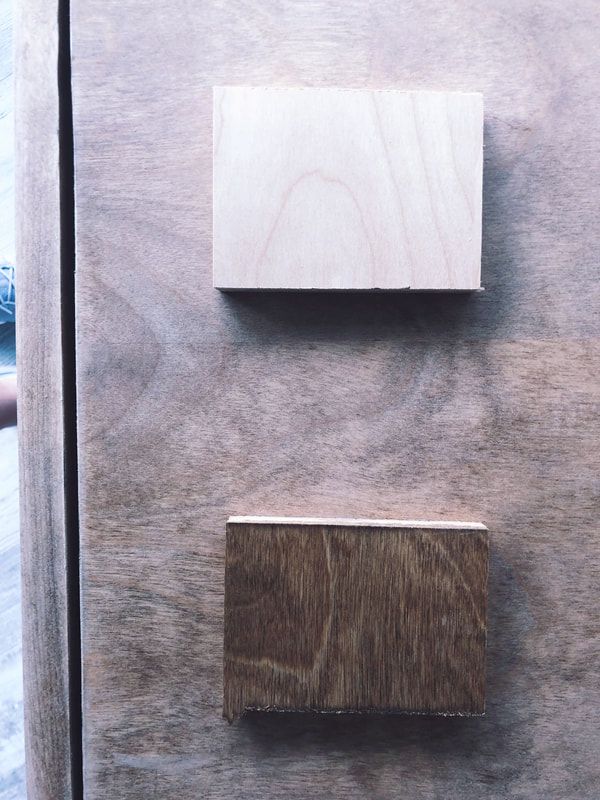
5. Paint
You can use spray paint or hand paint, just pick your favorite colors and let it roll. I did 3 coats to get the finish I was looking for.
6. Attach the backboard
I used underlayment for this step, but you could just as easily use a cork or canvas backing depending on your project. Just line up your frame pieces with the backboard and then hammer around the edges. I used just 2-3 nails per edge and it had .a really sturdy hold.
7. Glue your dimensional pieces
Using some clear gorilla glue, I glued the pieces and let dry for just .a few hours.
That's it! Just six super easy steps and Home Depot even did one for you! I loved how simple this project was but how much of a "wow factor" impact it leaves in the room.
Can't wait to see what your canvases get filled with! Feel free to share in the comments below.
Thinking through your plan before heading to the hardware store saves you many trips back and forth. I suggest thinking through the dimensions and make sure you take into account overlapping measurements and joining points.
2. Let Home Depot Do the Hard Part
You can absolutely always measure and saw your pieces yourself, however, if you already have the measurements, I've found that Home Depot is always super helpful and will cut the various pieces I need.
3. Sand the pieces
To help with a smooth finish on the paint, give each piece a light sanding so that it is smooth to the touch. I just did a couple seconds per side at 80 grit paper/
4. Hammer the frame
For this one, it is MUCH easier if you can get a partner to help hold the boards in place as you hammer. This will create a cleaner join as well as keep things in line. If you want to switch this up and do a more traditional 45 degree joiner, you can saw the pieces at 45 degrees instead and skip this part, going straight to the next step.
5. Paint
You can use spray paint or hand paint, just pick your favorite colors and let it roll. I did 3 coats to get the finish I was looking for.
6. Attach the backboard
I used underlayment for this step, but you could just as easily use a cork or canvas backing depending on your project. Just line up your frame pieces with the backboard and then hammer around the edges. I used just 2-3 nails per edge and it had .a really sturdy hold.
7. Glue your dimensional pieces
Using some clear gorilla glue, I glued the pieces and let dry for just .a few hours.
That's it! Just six super easy steps and Home Depot even did one for you! I loved how simple this project was but how much of a "wow factor" impact it leaves in the room.
Can't wait to see what your canvases get filled with! Feel free to share in the comments below.
xoxo,
Jessica
P.S. Don't miss out on bonus tips and content by subscribing to the newsletter. CLICK HERE to learn more.
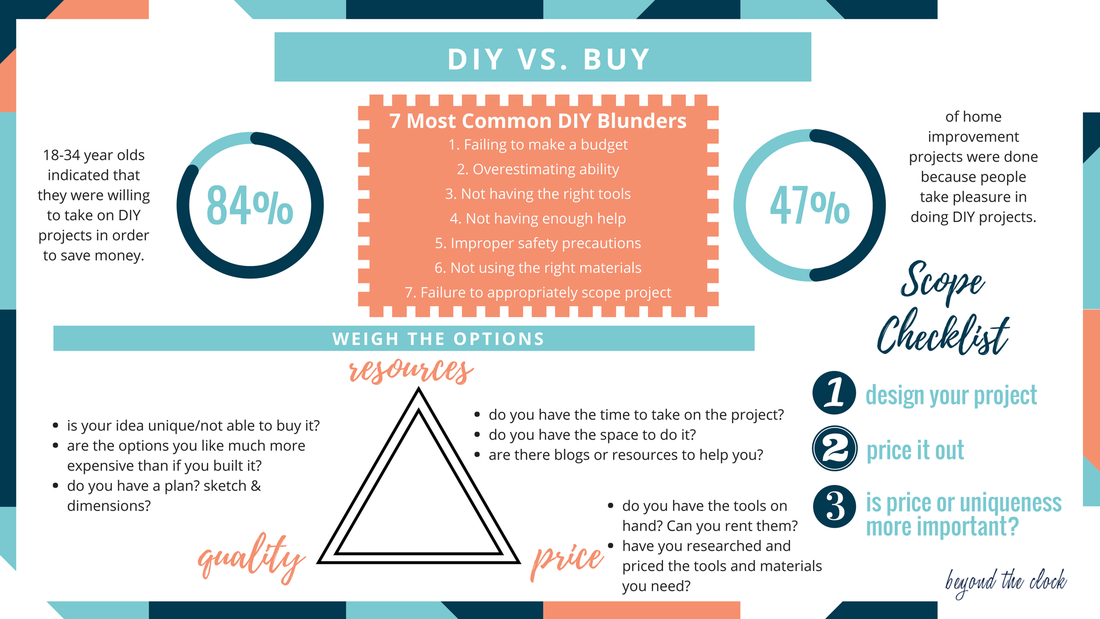
How to know if your DIY project is worth your time?

 |  |
In honor of #DIYday, I'm diving into the pros and cons of DIYing vs. buying right out of the box.
Clearly, I'm a huge fan of DIY projects. I love to be able to dream something unique in my head, combining inspirations and then digging in with my hands to make something I'm truly proud of.
However, I have also learned, that without the right planning, these projects can sometimes end up costing more than if I'd just gone and bought the darn thing.
So in order to avoid a few headaches, I now assess each idea, with a little planning (I must get this from my daytime gig - project manager :-P) It ends up being a fine balance between how much I value the custom aspect of the project over the price and time constraints to do it.
Ok so here is my method to know when to build or buy for your next project, hope it helps!
4/3/2018 0 Comments
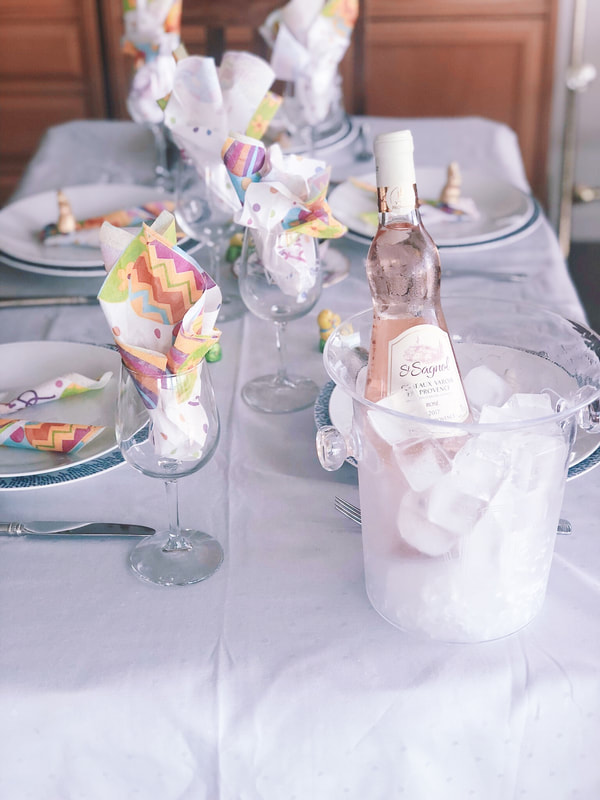
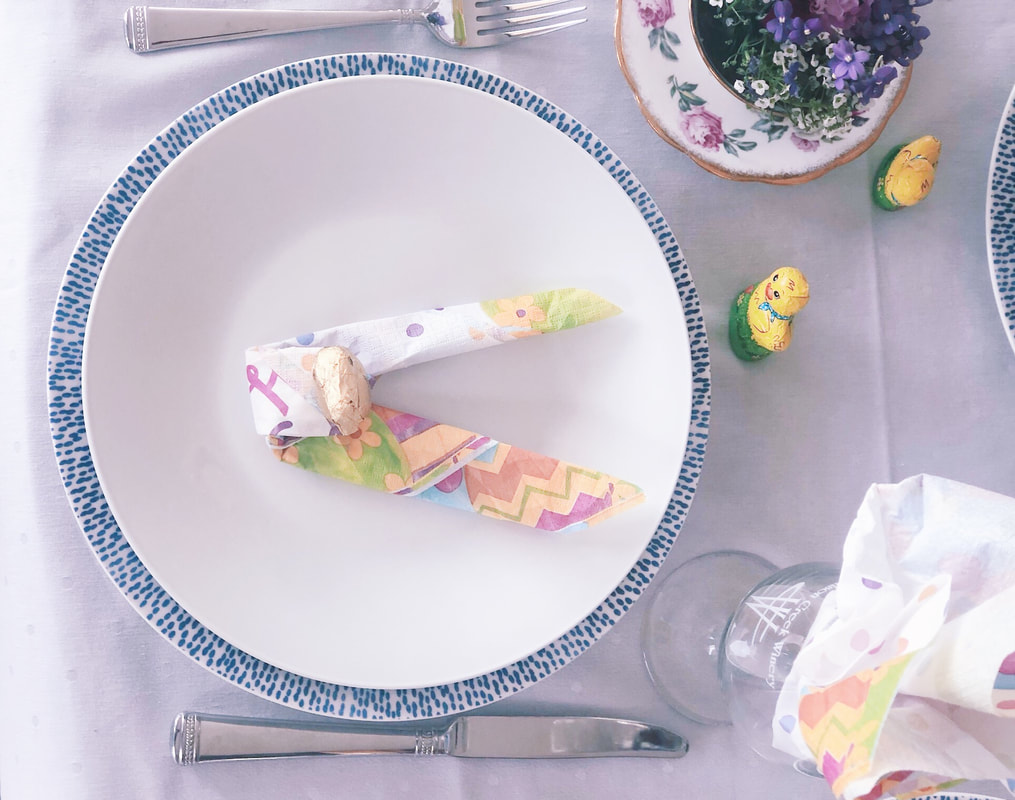
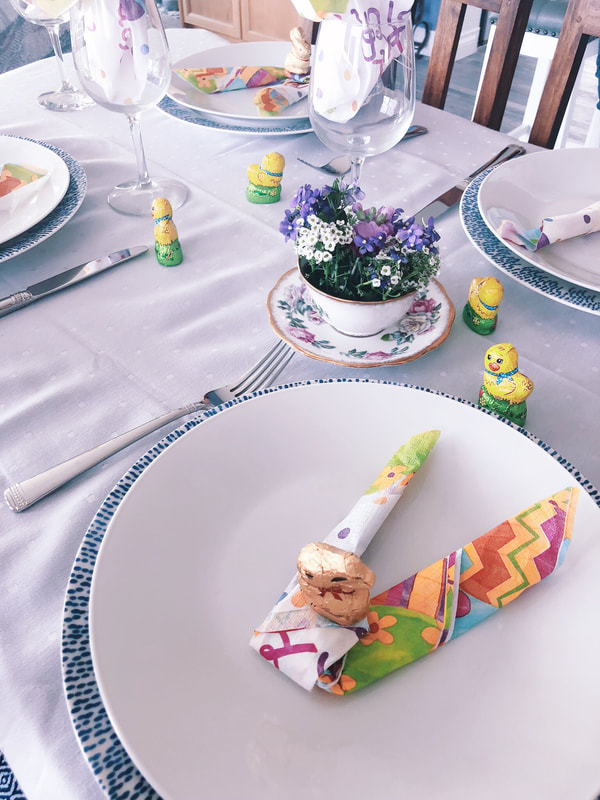
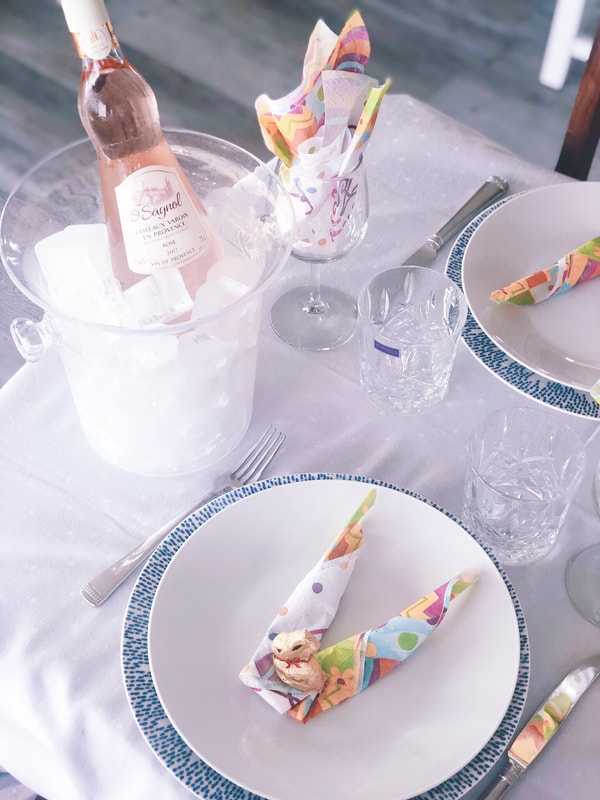
Elegant Tablescape Check-List
The ultimate table decor and setting checklist for the hostess with the mostest!
 |  |

 | 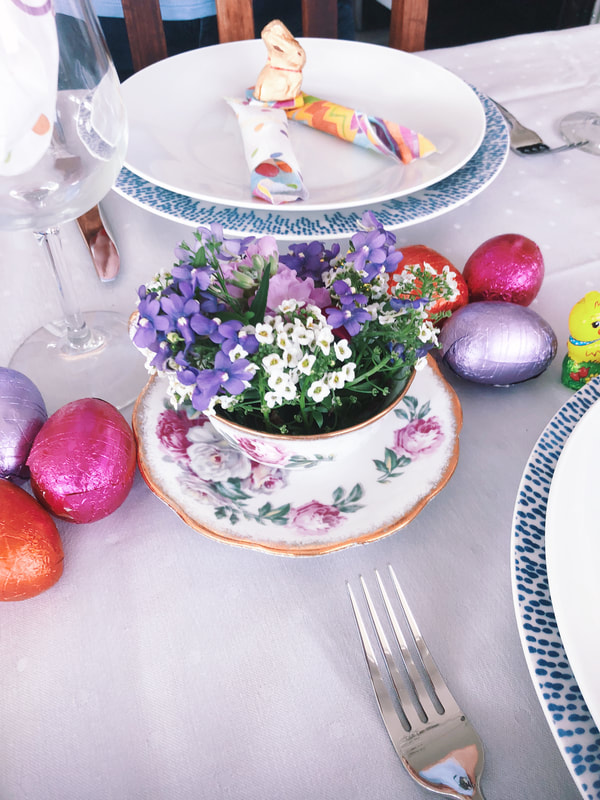 |
I had so many people asking about the Easter tablescape that I posted on my insta stories that I wanted to put together a check-list for you. This list will hopefully help you easily create a tablescape that your guests will be talking about for days and totally insta worthy.
My parents have always been big entertainers and with a mindset of the more the merrier! Whenever they had company, each of my sisters and I had a "job" to help in the preparations and I often got the job to set the table and have always LOVED it. So here is my super easy checklist to make your table stands out with unique touches.
Although, I didn't use the below in this tablsescape, they are great adds, especially for evening events.
Hope your next event is a knock-out one with a tablescape to your remember! Share it with us by posting and tagging #beyondtheclock! I can't wait to see what you come up with!
My parents have always been big entertainers and with a mindset of the more the merrier! Whenever they had company, each of my sisters and I had a "job" to help in the preparations and I often got the job to set the table and have always LOVED it. So here is my super easy checklist to make your table stands out with unique touches.
- Tablecloth
- Chargers
- Drinking Glasses - Water and Wine/Champagne
- Centerpiece
- Napkins
- Utensils
- Takeaway
Although, I didn't use the below in this tablsescape, they are great adds, especially for evening events.
- Chair Finish
- Water Pitcher
- Salt & Pepper shakers
- Candles
Hope your next event is a knock-out one with a tablescape to your remember! Share it with us by posting and tagging #beyondtheclock! I can't wait to see what you come up with!
Archives
October 2019
September 2019
August 2019
July 2019
June 2019
May 2019
April 2019
March 2019
January 2019
December 2018
October 2018
September 2018
July 2018
June 2018
May 2018
April 2018
March 2018
February 2018
January 2018
December 2017
Categories
All Accent Pieces Action Planner Basket Baskets Bathroom Bedroom Branch Floral Arrangements Bud Vase Candles Cherry Blossoms Curtains Cylinder Vase Decor Accents DIY Door Mat Family Flare Vase Floral Notebook Floral Water Bottle Flowers Flower Wreath Flower Wreaths Furniture Gifts Greenery Guest Room Home Home Decor Indoor Plants Jeans Living Room Mirrors Narrow Neck Vase Nightstand Outdoor Living Pastels Personal Development Productiity Rugs Seat Cushions Shelf Decor Shower Sneakers Spring Spring Decor Spring Ideas Storage Ideas Style With Time Styling Tips Sunglasses Table Lamp Throw Blanket Vase Vases
 RSS Feed
