|
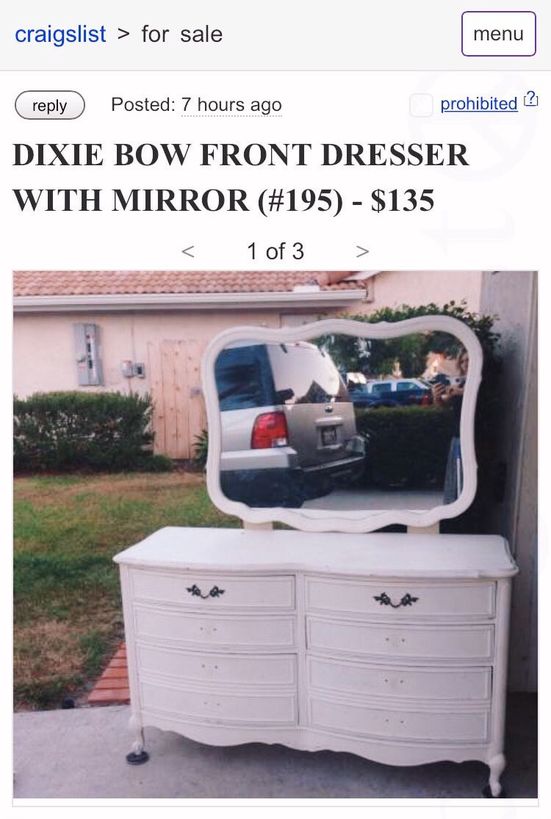
12/28/2017 0 Comments Say Yes to the Dress(er)!One of my favorite things is finding the perfect piece to update and add character to a space. I like taking older pieces that are a bit roughed up and putting a modern flair on it to integrate it seamlessly into the rest of the space. I've always loved the shabby chic look, I like to call it french country mixed with modern clean lines. In other words, less shabby, more chic, maybe it would be called modern rustic. Whatever the name, when I was looking for a dresser for our bedroom, I wanted something that had great details but was nice and bright. With most dressers ranging in the $500 - $700, I was looking for a budget friendly option, so I took to craigslist. I found this amazing Dixie Bow dresser AND it came with a mirror which was on my list for the room. So for $135 I thought let's see what we can do. What I used:Home Depot is always my best friend for these projects. I knew that I needed to refinish it with some sanding and fresh paint and then looked at what could make it more useful. The antique handles were just wide enough for about one finger to pull it out (not user friendly at all) so I went seeking fresh knobs. Online is always great for this as well with Hobby Lobby and Anthropology, but since I was going for a simple look, Home Depot had everything I needed in a one stop shop. This is what I picked up:
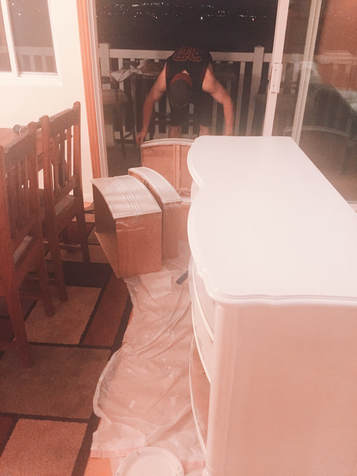
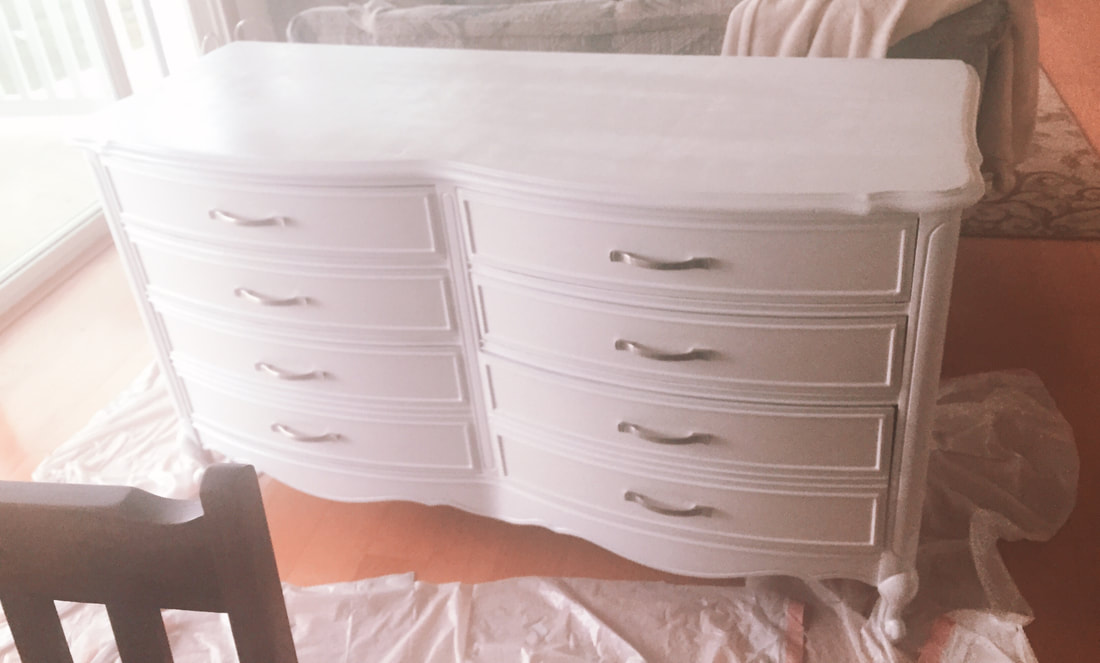
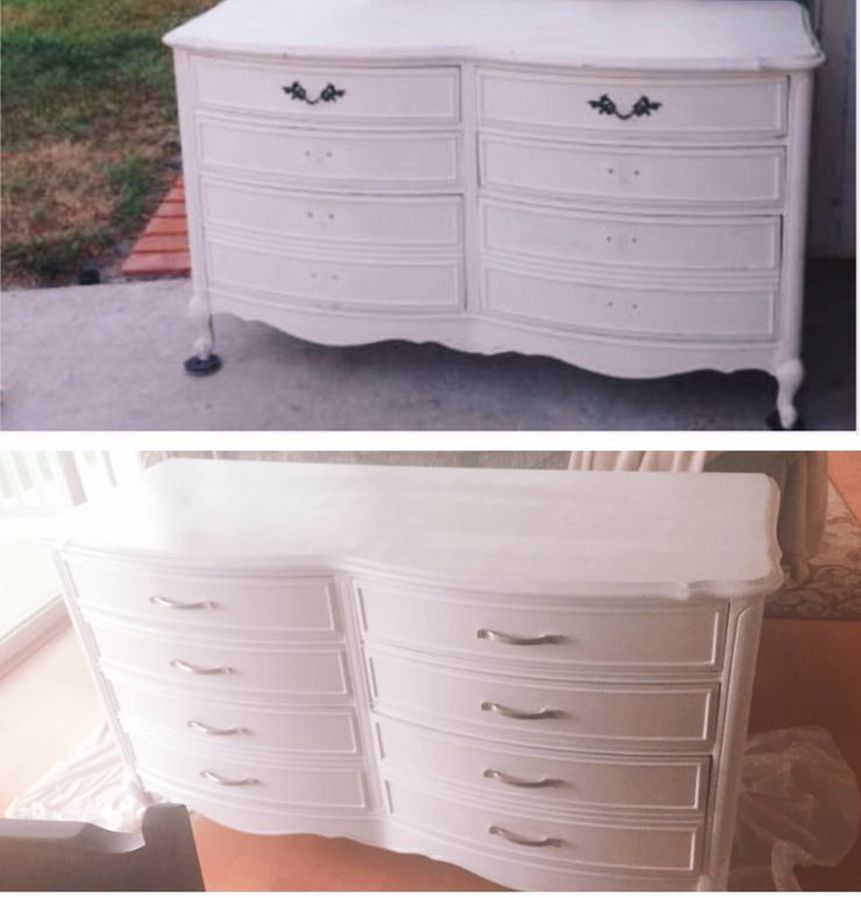
Prepping the Piece Since we don't have a yard where we could tarp and spray paint, we opted for paint brush and the General Purpose Paint. We painted and sanded on our small balcony and in the space between our living room and dining room, just goes to show you can DIY anywhere, anytime. HAULT FOR HANDLES: Make sure you choose your handles early in the project. The handles that I chose were 4 inch handles and the ones that I was replacing were 2 inch handles. That meant that I had to fill the holes and let the wood filler set before beginning sanding. Again, I knew I was going to repaint the piece white, so I got the White Latex Carpenter's wood Filler, but there are so many options for consistency and color that you can choose from to best suit your project. Just fill the holes, let dry for a couple hours, and then sand away. READY, AIM, SAND: I already had an electric sander, I highly recommend getting one or renting one for a project like this. Although I still needed to hand sand around some of the more detailed edges, The majority was done by the braun of a sander. You always want to start with a rougher sand paper like an 80-Grit to get all the previous paint and stains off. Then go over it with a 120-Grit to smooth it over. You can always keep going to a 180-Grit or higher to maker it smoother and smoother, but I felt that the 120 got me to a good place to start painting. QUICK NOTE: Always take a couple damp rags and wipe down the entire surface getting rid of all the excess saw dust. Then let dry for a couple hours before adding your primer. This will prep your wood to hold the paint and keep it smooth rather than getting little saw dust grains in your finish. Time for PaintI LOVE to paint and I especially love to paint furniture or signs because they are much more forgiving than a canvas. It is also extremely easy and rather therapeutic. For this piece I used a 4 inch mini foam roller for large pieces like the top, sides and drawers and then used a narrow paint brush that I actually got from Michael's (their brush pack is super inexpensive and has tons of options to use.) rather than home depot. This allowed me to be meticulous when it came to all the routing work on the edges. I did 4 layers of paint, 2 primer layers (waiting 4 hours between each layer) and 2 white layers (waiting 6 hours in between the layers). I woke up at 6am to start painting on a Saturday and as you can see from the picture above, finished the second layer of white paint around 10pm (and roped my husband into helping -thanks!). There was lots of dry time in between to get other things done around the house like laundry and football watching, however, I think next time I may break it up into two days so that there is plenty of light. The final touches (handles) Since we already covered up the old holes on the exterior of the drawers during the prep and painting steps, my husband and I used a measuring tape to measure the center point of the drawers and mark where the holes should be placed. We then used our DeWalt drill (we had a roommate who worked for DeWalt so we are super fans of all their stuff) and made the holes. We used a drill bit just slightly smaller than the screws that came with the handles so that when we assembled it was perfectly snug. Ta-da!And that's it, in about two and a half days and a total cost of $250 we had a unique piece of furniture that had the charm of an older piece with a fresh look to tie into the rest of the bedroom. We love to hear your thoughts, do you have a favorite piece that you have redone to modernize the look and incorporate into your home? xoxo, |
Archives
October 2019
CategoriesAll Accent Pieces Action Planner Basket Baskets Bathroom Bedroom Branch Floral Arrangements Bud Vase Candles Cherry Blossoms Curtains Cylinder Vase Decor Accents DIY Door Mat Family Flare Vase Floral Notebook Floral Water Bottle Flowers Flower Wreath Flower Wreaths Furniture Gifts Greenery Guest Room Home Home Decor Indoor Plants Jeans Living Room Mirrors Narrow Neck Vase Nightstand Outdoor Living Pastels Personal Development Productiity Rugs Seat Cushions Shelf Decor Shower Sneakers Spring Spring Decor Spring Ideas Storage Ideas Style With Time Styling Tips Sunglasses Table Lamp Throw Blanket Vase Vases |


 RSS Feed
