  This post may be a bit more technical, but with each DIY project I learn nuances that can make or break a project. These #DIYTip posts are aimed to help with the "behind the scenes" of the DIY projects you see online so you don't end up with one of these Pinterest/craft fails
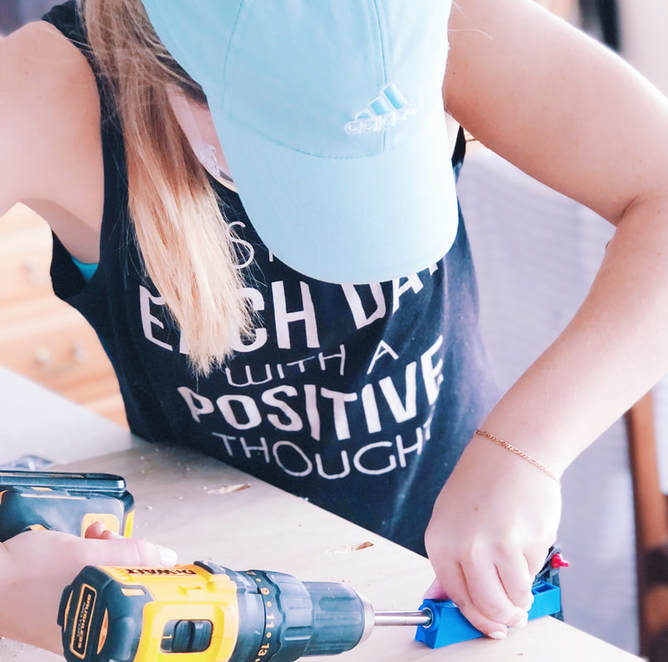
Let's start out with what the heck is a pocket hole. Before taking on the project for our nightstands, I had no idea what they were.
Basically, it's used when joining two pieces of material - usually wood, at a perpendicular angle. To make a pocket hole, you will need a Kreg Jig, this mini one was great from Amazon. To make your life easier, you will also want to get a clamp or two to help hold your pieces in place. The best I've used so far here. The other key piece you will want to take into account before starting your pocket hole is knowing what width of material you are using. I was following a DIY guide and missed the width specifications, opting instead for the wood I preferred at Home Depot (it was 1/2 inc width instead of 3/4 inch). I never thought a quarter inch would be such a big deal, but when it comes to pocket holes it is. Here is a quick cheat sheet for how to use your Kreg Jig and combination for screw type and wood width. 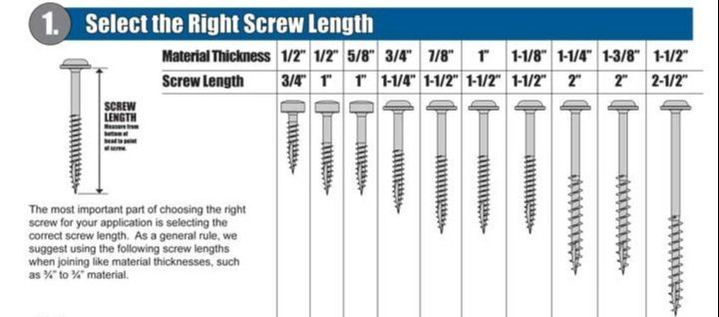 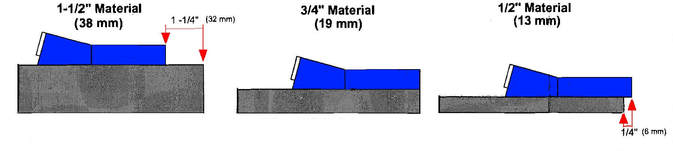 Since I had combined 1/2 inch material with 1-1/4" screw, each time I tried to join the two pieces together, the screw would pop out on the other end. Before doing this research, I adjusted the Kreg Jig placement to accommodate the length of the screw, and then instead of going too far down, it went at two steep of an angle and tore through the side. Hope this cheat sheet helps you and saves you a few screws and wood pieces in your next project and if you have any questions feel free to comment below, or DM on instagram. Happy DIYing.
0 Comments
Leave a Reply. |
Archives
October 2019
CategoriesAll Accent Pieces Action Planner Basket Baskets Bathroom Bedroom Branch Floral Arrangements Bud Vase Candles Cherry Blossoms Curtains Cylinder Vase Decor Accents DIY Door Mat Family Flare Vase Floral Notebook Floral Water Bottle Flowers Flower Wreath Flower Wreaths Furniture Gifts Greenery Guest Room Home Home Decor Indoor Plants Jeans Living Room Mirrors Narrow Neck Vase Nightstand Outdoor Living Pastels Personal Development Productiity Rugs Seat Cushions Shelf Decor Shower Sneakers Spring Spring Decor Spring Ideas Storage Ideas Style With Time Styling Tips Sunglasses Table Lamp Throw Blanket Vase Vases |
 RSS Feed
