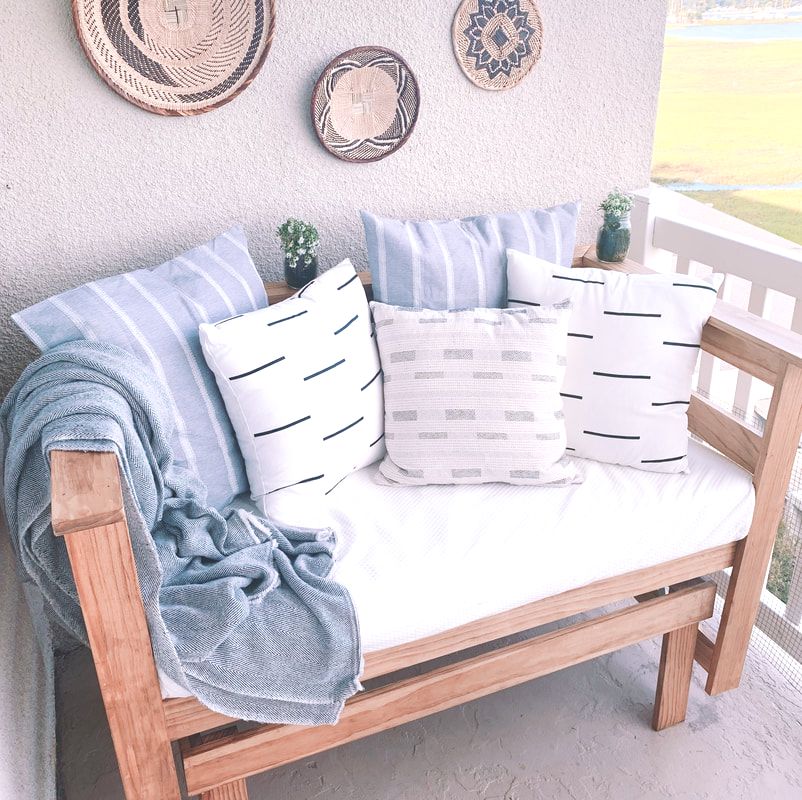
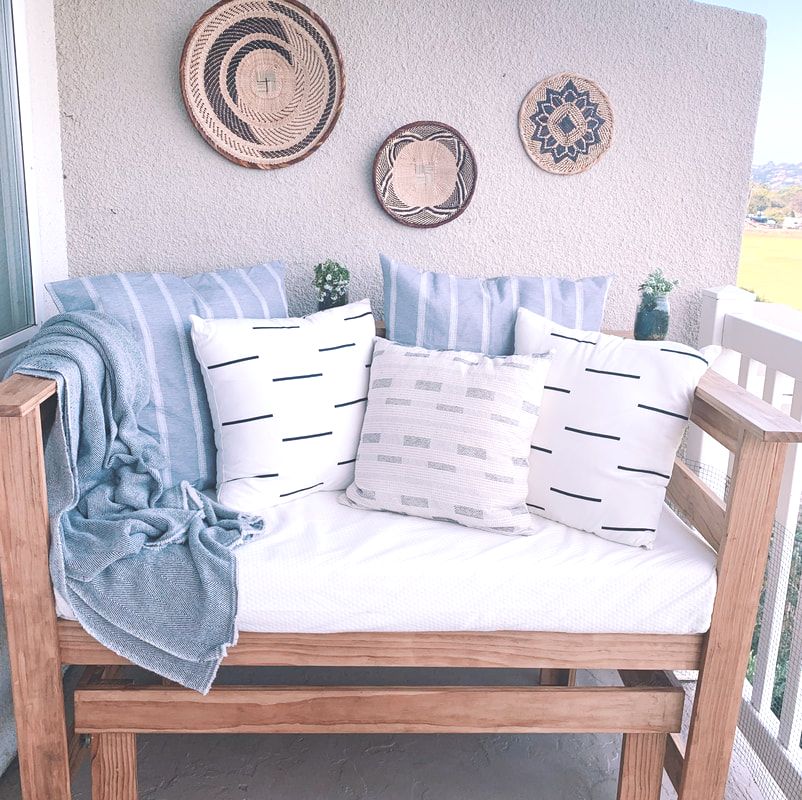
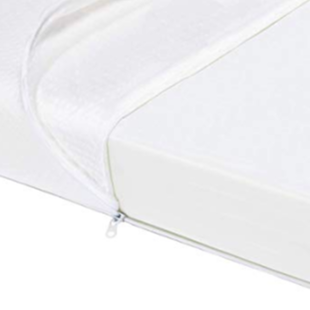
  I've always wanted a day bed porch swing. Ever since I was a little kid, I would swing from a hammock and dream of the day it would be a comfy bed, filled with giant pillows and the breeze coming through. As much as I have wanted one, there a few things that have hindered it. 1) My balcony is relatively small and a twin size mattress could quite possible take up the whole space, and 2) there are no hooks on the ceiling of the balcony and HOA doesn't allow any alterations to the physical structure. So for years, I just pinned my dream day beds for the one day I had a big enough yard and house. Then recently, my friend was giving away some old baby items, and I realized that a crib mattress would be the perfect size, mini day bed to fit the side of the balcony. Problem 1 solved. Then I researched potentially building a pergola on the balcony to hang it from, but that quickly became too big as well. Finally I thought of how much I liked rocking chairs and that would create the similar motion to the swing. I googled homemade rocking chairs and found that glider brackets work just as well. I'm super excited about how it turned out, it is the perfect seating area on our balcony and I've put together a complete guide so you can make one too! Note: I made mine slightly higher so that we can see over the balcony railing, but you can adjust the leg sizes to fit your space. Here's what you will need: SUPPLIES:
WOOD:
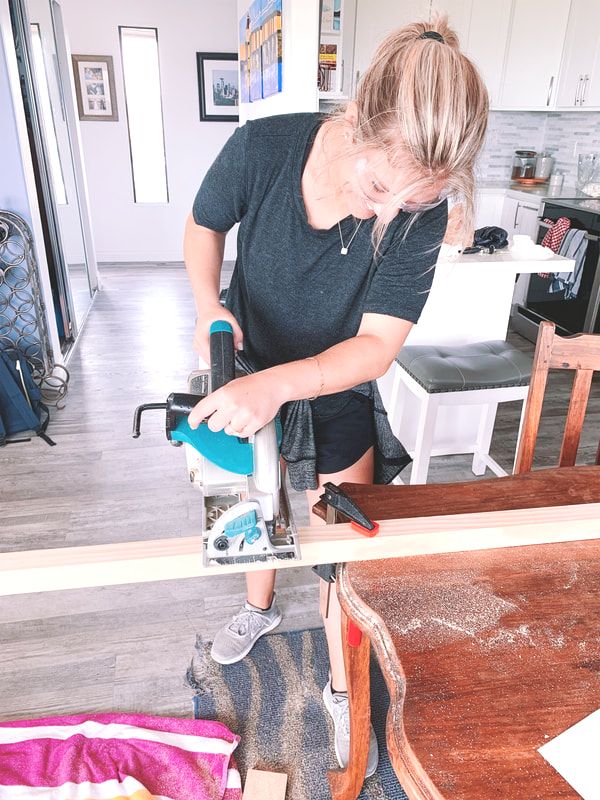
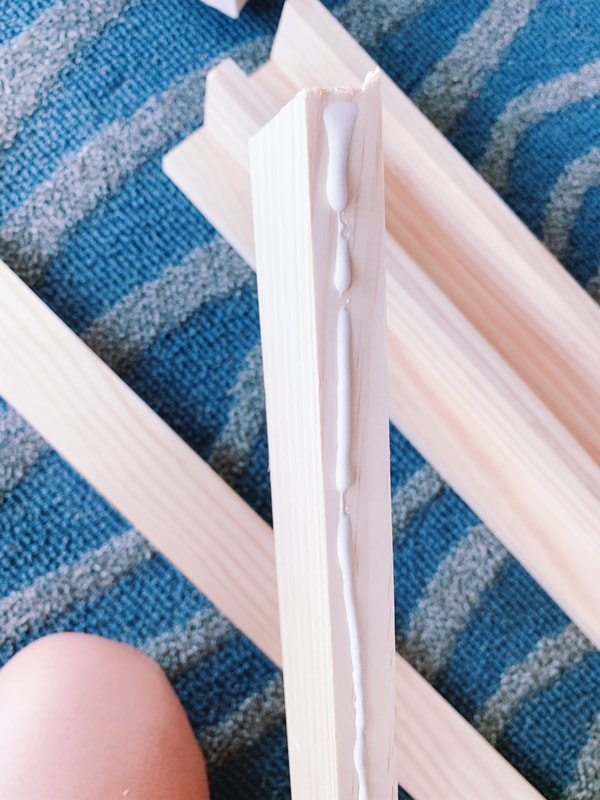
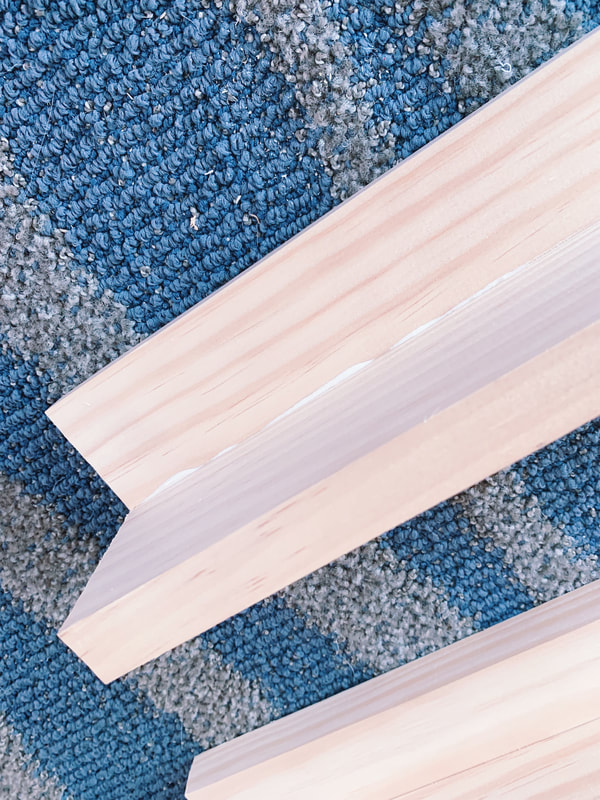
PLANS & INSTRUCTIONS: Start with the frame. I used 1 x 4's and pocket joineries with #8 1 - 1/4" wood screws. 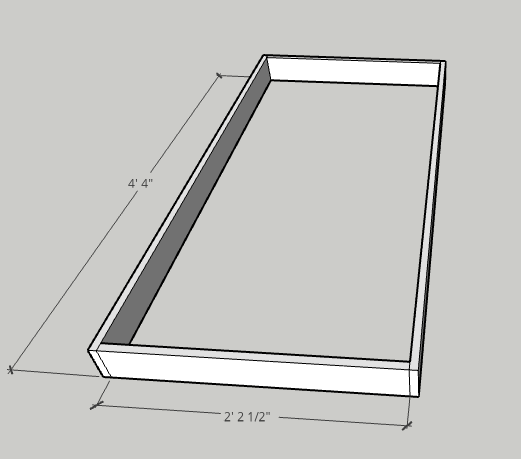 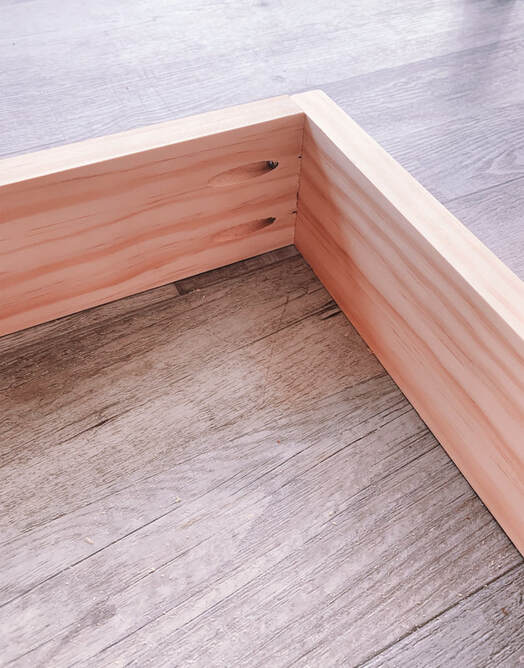 Next, I added 2 pieces of the 2×2 to the inside of the frame. I placed these flush with the bottom edge and used the #8 2-1/2 inch screws to secure them. 2 on the shorter sides (about .5 inch from the edge) and 3 on the longer sides, evenly spaced. 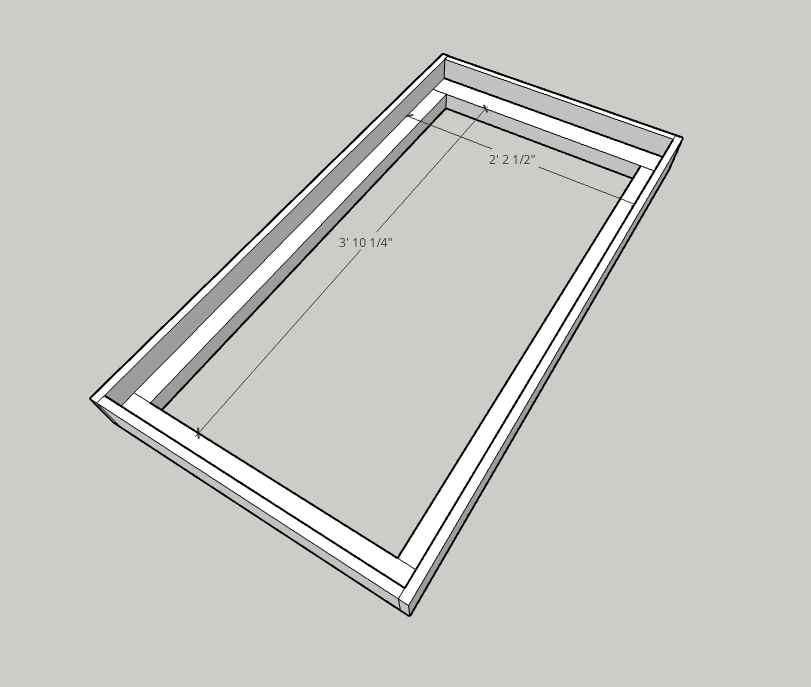 Then I added the 1×2's in the middle (13 pieces, each 26.5 inches long). These pieces will support the seating underneath the mattress. I attached these using the #8 1-1/4" screws on each end. 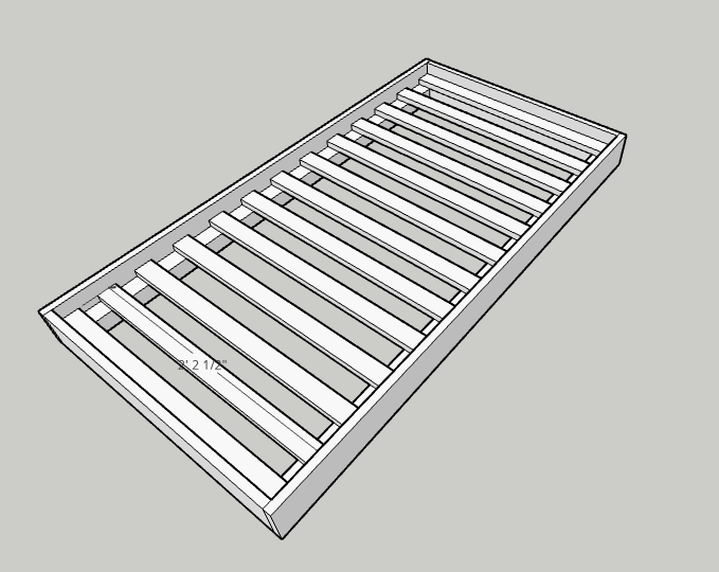 I cut 8 pieces of the 1×3" to 34" in length to make the posts for each corner of the frame. Two pieces make up one post in an L-shape. I applied a bead of glue down one edge and added 3 screws evenly placed with the #6 1 - 1/4" wood screws.
Tip: To avoid cracking your wood, whenever you join 2 pieces of wood with a screw, always pre-drill your hole with a drill bit that is just slightly smaller or about the same size as your screw. 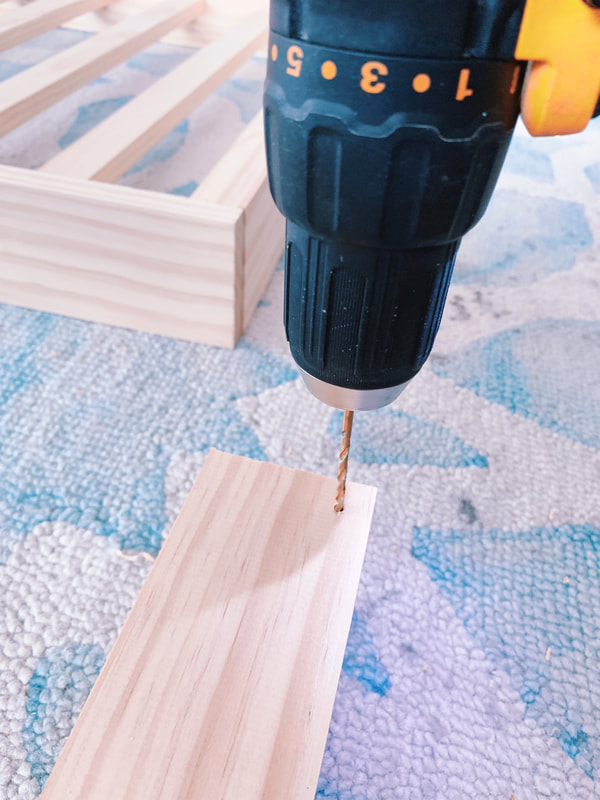 Next, I attached the legs to the seating base with wood glue and #8 1-1/4" screws on the outside right and left of the legs. 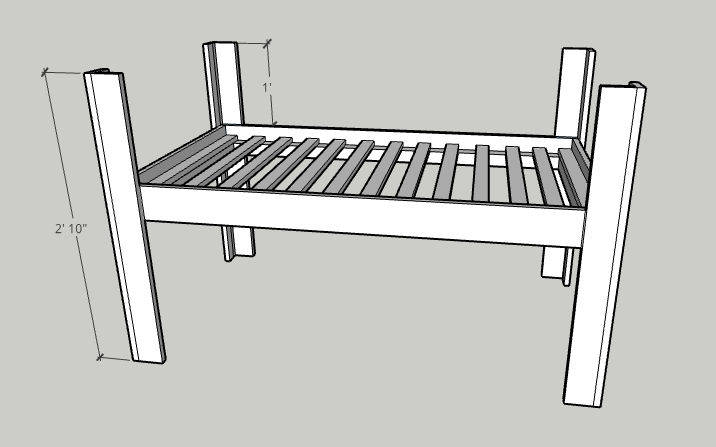 After all four posts were in place, I added the top and mid rails. These are cut from the 1×3’s. See the image below for placement and lengths. I used glue and the #8 1-1/4" screws to secure the position (2 screws on each end). 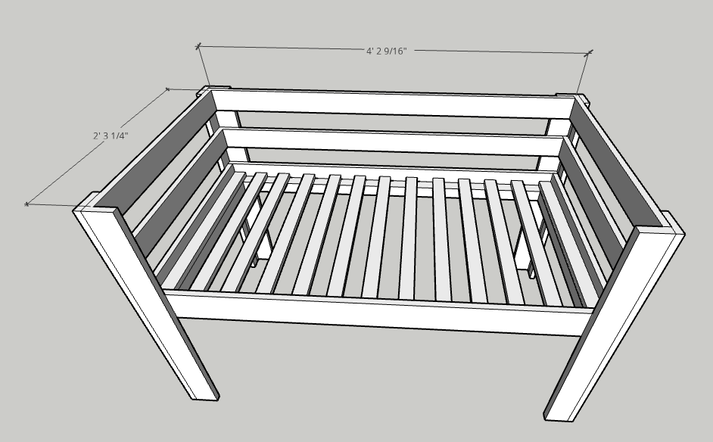 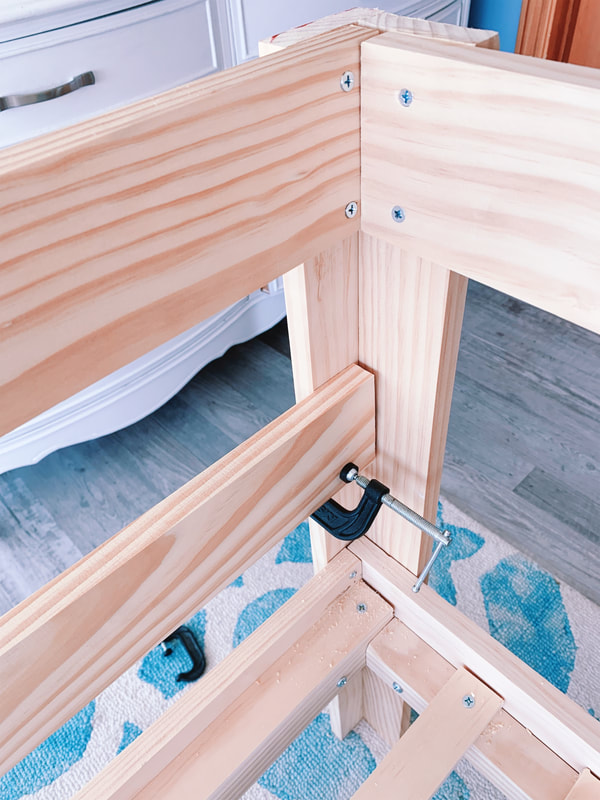 I then cut all three pieces for the top caps of the sides and back of the swing. For this I used 1×3’s. I cut the ends where they meet at a 45 degree angle. See measurements and placement below. I had a few finish nails around the house so I used these to secure the caps to the rails, but you could also use the #6 1-1/4" screws. 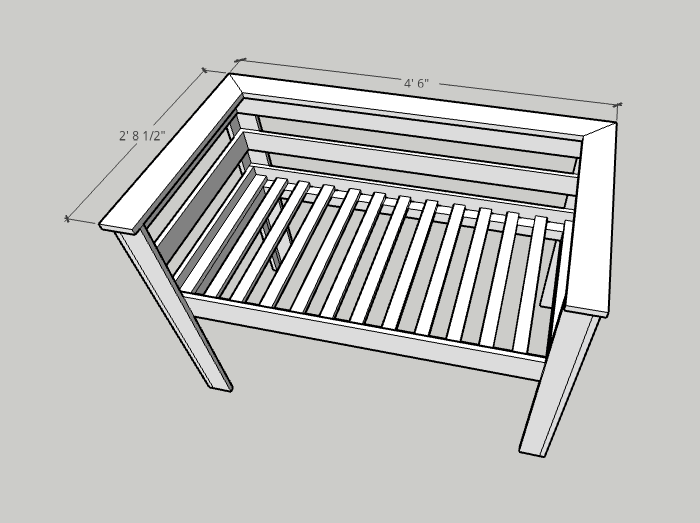 The last part of the upper bench is the lower rail. This will be used to attach to the glider base. I used glue and the #8 1-1/4" screws, 2 on each end to secure it. 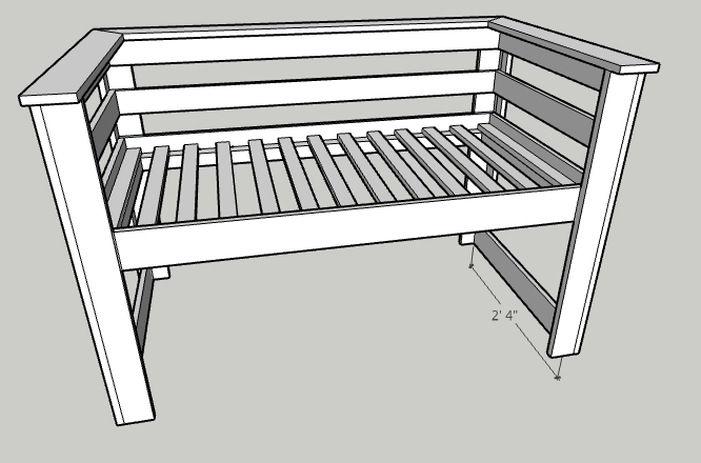 Next up, I started on the frame for the seat base. You can do this outside of the bench frame and attach them later, I just showed placement for reference in the images below. Just as we did or the upper seat frame, I used the pocket joineries to make the base with slightly shorter pieces. See dimensions below. 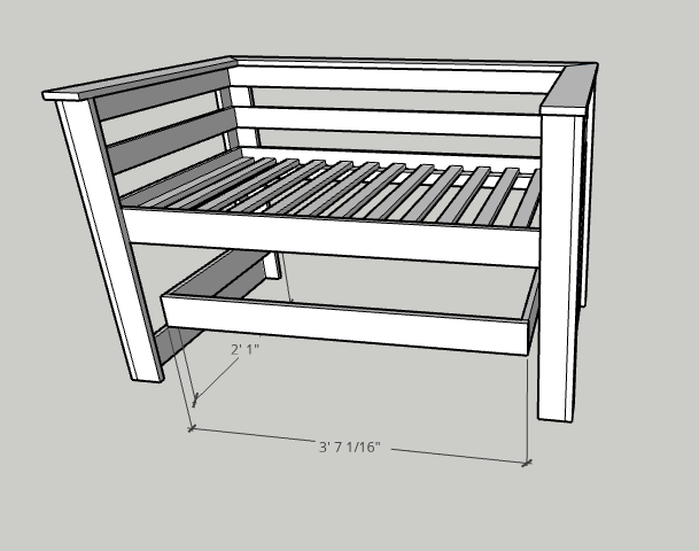 In order to allow the upper bench to have enough clearance to swing from the lower base, I placed the post legs on the inside of the frame. I cut these to 16" and used the same L-shape formation with glue and screws to secure it. 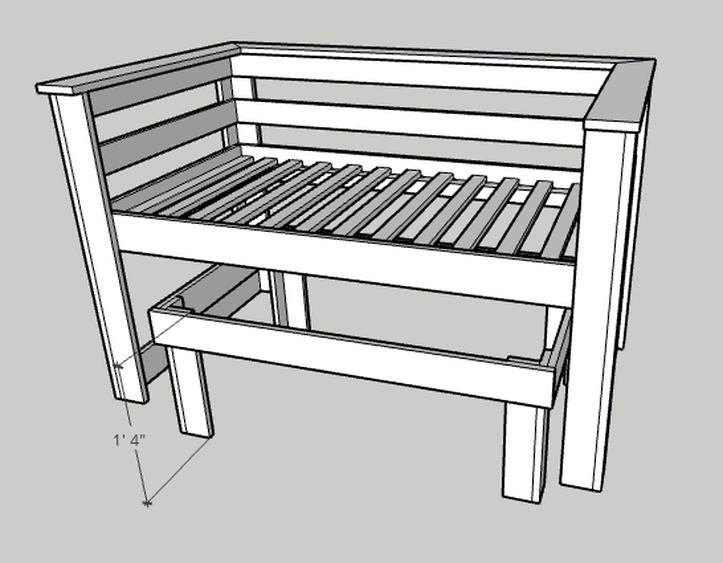 The last piece requires a 1/4" drill. This part is prepping the connection point for the glider hardware to be installed. Use the dimensions below to place your holes. Again, I wanted my bench to be fairly high in order to see over the balcony rails. You can adjust the legs of your upper seating and lower base in order to find your ideal height. As long as you ensure the bottom of your base piece and the top of our outside edge seating is 3" apart, you should be able to connect your 7" gliders. 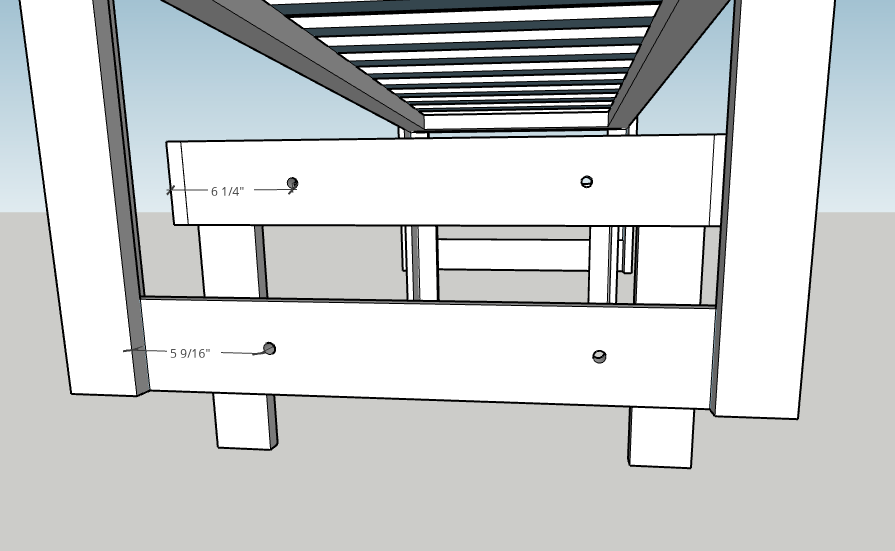 Last, install the nut and bolts to lock in the hardware and get ready to enjoy! I didn't put the bolts in all the way to leave the offset between the base and bench a little bigger.  There you have it! In the picture below, not all the final decor pieces are put together but at least gives you a sense of how it looks complete. After I get all the final pieces in, I'll add a full tutorial for styling your crib day bed. Hope you enjoy and be sure to tag @beyondtheclock on instagram when you complete yours. I can't wait to see it! xoxo, |
 |  |  |  |  |
8 Comments
Stephanie
6/9/2020 01:52:42 pm
Hey! I totally loved this project, but I have one suggestion! A cut list for the pieces you used at the top of this article would have been super helpful! I definitely learned my lesson to write down my own cut list before I begin, but most blogs I see include the cut list!
AWESOME design though I totally love it!
Raquel
7/23/2020 03:21:23 pm
Did you do make a video? I’m a little confuse with your direction.
7/23/2020 11:11:12 pm
Hi Raquel,
Thanks for reaching out. Unfortunately, I wasn't able to make a video. What parts are you getting stuck on, I'm happy to help!
Jessica
Janet Wheeler
5/13/2023 01:46:28 pm
Hi thank you so much for this. My husband made it and he didn’t follow instructions completely and now it tilts dangerously back on the glider base. Any suggestions on how to fix?
Nancy Silver
9/5/2023 07:30:38 pm
Hi. Do you think your plan would work for a twin sized daybed swing. We purchased a swing and it is too heavy to hang, so we would like to modify and make it a glider. Do you think your plan would work?
Leave a Reply.
Archives
October 2019
September 2019
August 2019
July 2019
June 2019
May 2019
April 2019
March 2019
January 2019
December 2018
October 2018
September 2018
July 2018
June 2018
May 2018
April 2018
March 2018
February 2018
January 2018
December 2017
Categories
All Accent Pieces Action Planner Basket Baskets Bathroom Bedroom Branch Floral Arrangements Bud Vase Candles Cherry Blossoms Curtains Cylinder Vase Decor Accents DIY Door Mat Family Flare Vase Floral Notebook Floral Water Bottle Flowers Flower Wreath Flower Wreaths Furniture Gifts Greenery Guest Room Home Home Decor Indoor Plants Jeans Living Room Mirrors Narrow Neck Vase Nightstand Outdoor Living Pastels Personal Development Productiity Rugs Seat Cushions Shelf Decor Shower Sneakers Spring Spring Decor Spring Ideas Storage Ideas Style With Time Styling Tips Sunglasses Table Lamp Throw Blanket Vase Vases
 RSS Feed
